


Introduction: The Must-Pull Support
In the current meta, ![]() Sakiri has solidified her position as the solitary "must-pull" support. Her strategic importance is not merely additive — it is transformative. By providing elite crowd control (CC), high-density grouping, and massive offensive scaling through her Scorch-based DoT amplification, she dramatically lowers the execution floor for casual players while raising the ceiling for endgame PvE clear speeds. Investing in Sakiri is a direct investment in the overall quality of life of an account.
Sakiri has solidified her position as the solitary "must-pull" support. Her strategic importance is not merely additive — it is transformative. By providing elite crowd control (CC), high-density grouping, and massive offensive scaling through her Scorch-based DoT amplification, she dramatically lowers the execution floor for casual players while raising the ceiling for endgame PvE clear speeds. Investing in Sakiri is a direct investment in the overall quality of life of an account.
Core Identity
- Element: Incantation
- Primary Familiar: Kiramaru
- Core Utility Roles: High-Efficiency Grouping, Suppression CC, Attack Buffing, DoT Amplification
While her narrative personality is famously abrasive, her combat style follows suit: a domineering control of the battlefield where her anomaly familiar, Kiramaru, dictates enemy positioning through force.
Skill Mechanics and Investment Hierarchy
Sakiri's kit is an extension of Kiramaru, her anomaly familiar. Her primary strategic function in mob-clearing scenarios is Grouping — consolidating disparate targets into a single point of impact. This allows your Main DPS to maximise Area of Effect (AoE) efficiency, effectively multiplying your team's total damage output per rotation.
Skill Priority
- Passives (Mandatory Priority): Highest ROI for resource-limited players. They house her level-independent debuffs — 10% defence reduction and up to 100% DoT amplification.
- Ultimate: The engine of her team-wide offensive buff and the "Suppressed" CC state.
- Skill: The primary grouping tool.
- Basic Attack: Filler for building the Esper Cycle meter.
- Support Skill: Supplemental Incantation damage during swap-ins.
Resource Tip: Stop skill levels at Level 6 during the early-to-mid game. Her utility is level-independent — those high-tier materials are better allocated to your Main DPS.
Tactical Skill Execution: Tap vs. Hold
Energy efficiency is the heartbeat of rotation fluidity.

| Action | Energy Gain | Tactical Use-Case |
|---|---|---|
| Tap Skill | 16 Energy | Sub-optimal. Use only for emergency grouping. |
| Hold Skill | 23 Energy | Mandatory Default. Essential for reaching the 100-point Esper Cycle threshold. |
Critical Constraints and Debuffs
- Suppressed State: Her Ultimate triggers a gravity attack that pins enemies.
- Eating Mode: Her basic attack allows Kiramaru to devour weakened enemies.
- CC Limitation: All forms of Sakiri's CC (Airborne, Grouping, and Suppression) do not apply to boss-tier enemies. Against bosses, her value is strictly as a buffer and DoT amplifier.
- Defensive Shred: Her second passive reduces enemy defence by 10% for 20 seconds after inflicting Airborne or Suppressed effects.
- Offensive Scaling: Her Scorch enhancement increases DoT damage taken by the target by 25% per type, stacking up to 100%.
Understanding the Ultimate Buff: Base Attack vs. Total Attack
There is significant community confusion regarding Sakiri's team-wide attack buff. To optimise her, you must distinguish between "Base Attack" and "Total Attack."
The Daffodill Test (Data Verification)
Analytical testing was conducted to verify whether module-based "Total Attack" influences her buff:
| Scenario | Sakiri ATK | Teammate (Daffodill) DMG |
|---|---|---|
| A — Full Build | 2,422 | 26,951 |
| B — Modules Removed | 1,825 | 26,951 |
Definitive Conclusion: The buff scales exclusively from character level and Arc level. You can safely ignore ATK% or flat ATK modules when optimising the team buff. Focus on maximising her character and Arc levels first. While ATK modules improve her personal damage, they are irrelevant to her support utility.
Arc Selection: The Morphix Weekly Standard
Arc selection is a binary choice: you have her Best-in-Slot (BiS) or you are using a placeholder.
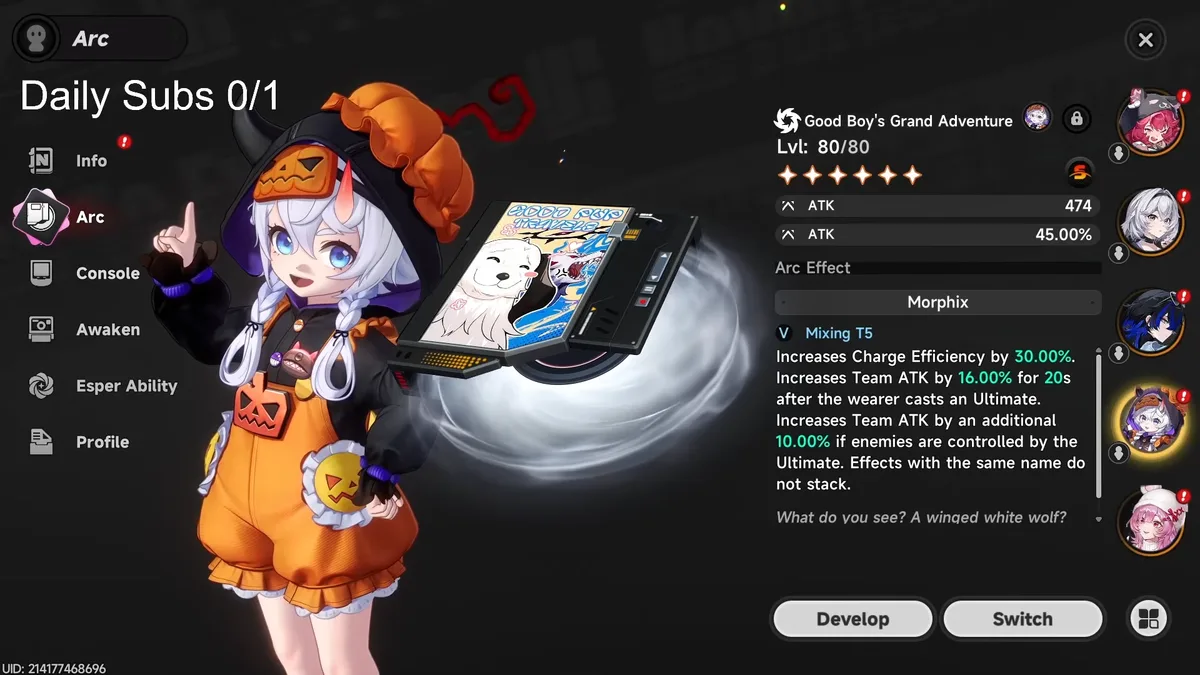
Best-in-Slot: Good Boy's Grand Adventure (S-Rank)
Dropped from the weekly boss Morphix. This is the gold standard for three reasons:
- ATK% Main Stat: Directly increases the "Base" value for her Ultimate buff.
- Charge Efficiency: Vital for Ultimate uptime.
- Secondary Buffs: Provides additional team-wide offensive layers.
Pre-Weekly Alternative
Use any generic Arc with an ATK% main stat to maintain her buffing floor until Morphix is unlocked.
Console Architecture and Module Optimisation
The Speedy Hedgehog set is the only viable architecture for a high-level Sakiri, perfectly complementing her Ultimate-reliant gameplay.
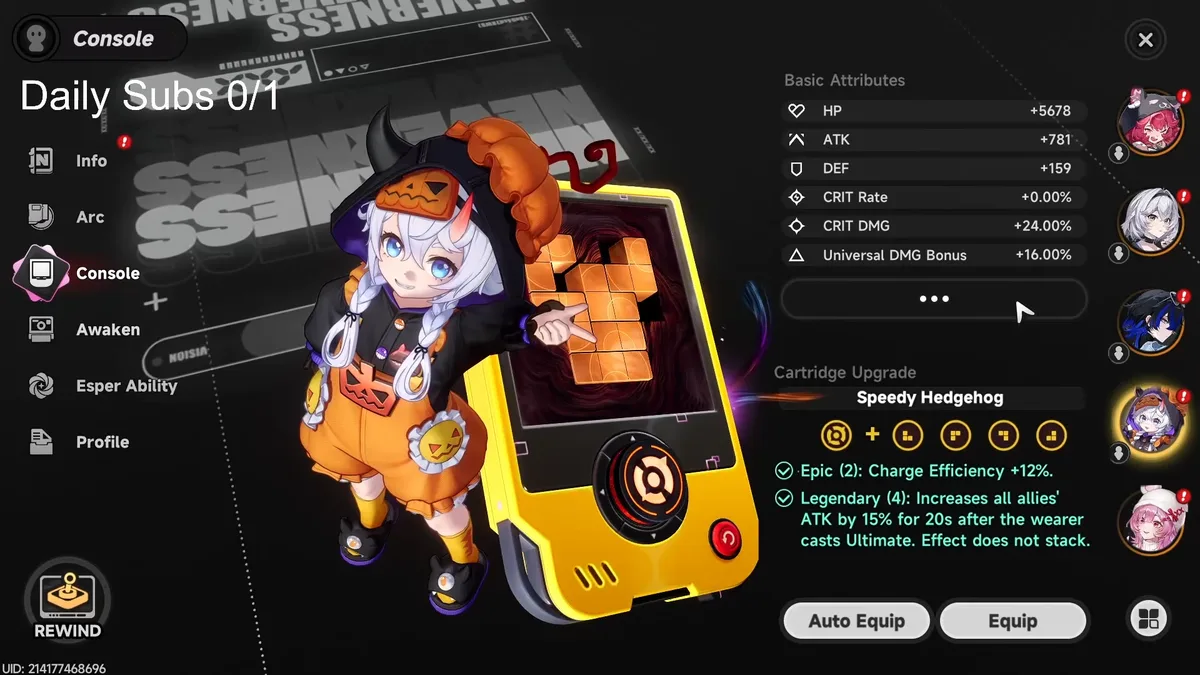
Build Specification
- Set: Speedy Hedgehog — 12% Charge Efficiency and 15% team-wide ATK buff for 20s after Ultimate activation.
- Cartridge: Incantation DMG Bonus.
- Substat Priority:
- Economic Build: Flat ATK → Universal Damage → ATK% (high value at low cost)
- Luxury Build (Personal Damage): Crit Rate → Crit DMG
The Differentiator: Crit Rate is a secondary luxury. In a meta-optimised account, high-tier Crit modules should be reserved for your Main DPS. Sakiri provides 90% of her value through static buffs and CC, which do not require Crit.
Awakening Progression
Sakiri's awakenings shift her from a functional support to a fluid, pure swap engine.

Optimal Awakening Path
- A5 (Priority 1 — Most Transformative): Allows immediate Ultimate replenishment after using her Skill. This solves the "Momentum Killer" problem — without A5, Sakiri requires field time for basic attacks; with it, she becomes a seamless swap support.
- A4 (Priority 2): The energy restoration appears partially active in her base kit. Regardless, A4 is a priority for the massive 30% Base Attack team-wide buff it provides.
- A1 through A3/A6 (Priority 3): These tiers extend "Immovable" durations to 6 seconds and provide scaling damage based on enemy mass, up to 600% ATK.
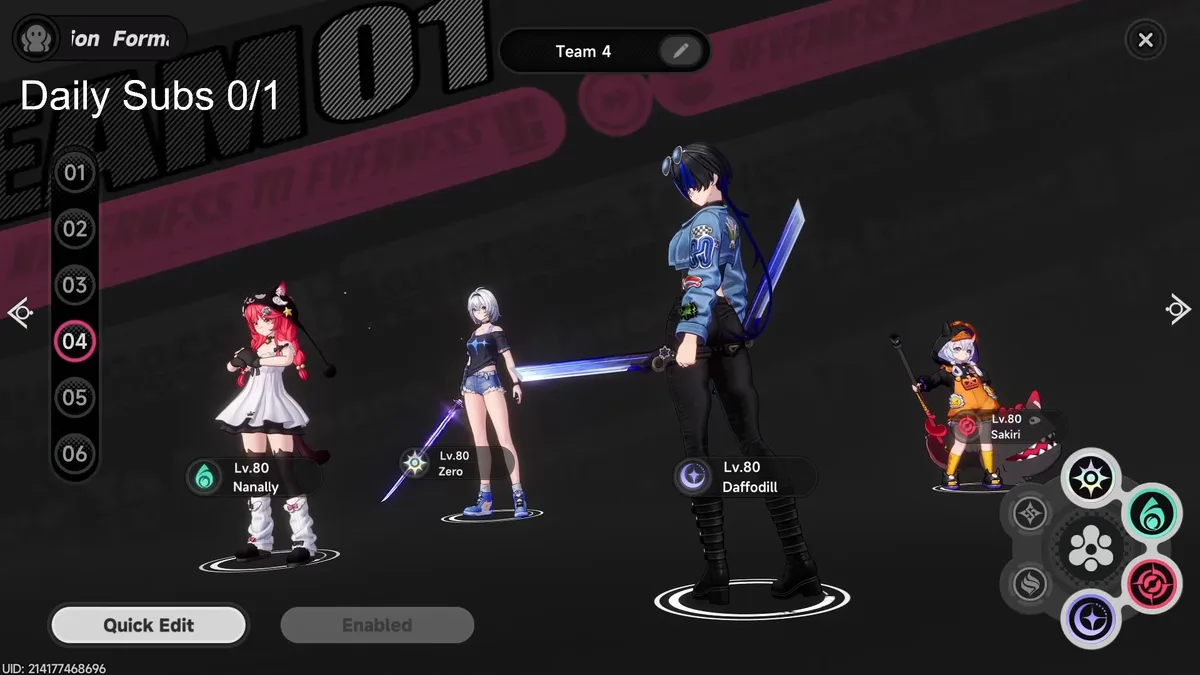
Team Architecture and Advanced Rotations
Sakiri is the ultimate Slot 3/4 flex. Because every team benefits from grouping and raw ATK buffs, she is compatible with every composition regardless of element.
Standard Opening
Hold Skill → Ultimate → Swap. This sequence provides immediate grouping and sets the buff window for your DPS.
Team 1: The Phantom Burst (Complexity: High)
This composition focuses on ![]() Daffodill 's Phantom Step loop, empowered by Sakiri's grouping and ATK buff.
Daffodill 's Phantom Step loop, empowered by Sakiri's grouping and ATK buff.


Rotation:
- Sakiri Hold Skill → Ultimate (Group and Buff)
- Daffodill Ultimate → Skill (Build Phantom Step stacks)
-
 Zero Ultimate
 - Daffodill: Swap in (Consume 1st Phantom Step stack)
- Zero Skill (critical — replenishes the Esper Cycle meter mid-rotation)
- Daffodill: Swap in (Consume 2nd Phantom Step stack)
-
 Nanally : Swap in → Apply Blossom → Skill (+30% Crit DMG) → Ultimate
Team 2: The Remora Reaction (Complexity: Moderate)
This composition pairs Zero's Cosmos element with ![]() Hathor 's Lakshana to trigger the Remora reaction, applying a slow and mark to enemies.
Hathor 's Lakshana to trigger the Remora reaction, applying a slow and mark to enemies.
Rotation:
- Sakiri Hold Skill → Ultimate
- Zero Ultimate → Skill (Instant Remora reaction)
- Hathor (Esper Cycle Swap): Hold Skill (Hathor must take hits during this hold to generate Feather Stacks and recover the Cycle meter)
- Hathor Ultimate → Spam Skills (Expend all Feather Stacks)
- Swap to Zero for Skill usage, then back to Hathor for a second burst window
Final Summary
Sakiri is the definition of a low-effort, high-reward investment.
- For Casuals: Level-independent CC and grouping that trivialises mobs.
- For High-Investment Accounts: A 30% Base ATK buff and 100% DoT amplification that is essential for meta-tier clear speeds.
Maximise her character level and Arc, cap skills at Level 6, and she will carry your account through the current meta.
Video Guide
Related Neverness to Everness Resources
Guide
Daffodill Sub-DPS Guide
Master Daffodill's Phantom Step loop, Resonance system, and quick-swap rotations in this comprehensive sub-DPS guide.
Guide
Beginner's Progression Guide
Optimize your early account growth in NTE — from motorcycle traversal and City Tycoon economics to gear architecture and Esper Cycle mastery.
Guide
Earning Fons & Spending City Stamina
A complete guide to NTE's economic engine — how to level City Tycoon, exploit free Fon sources, and allocate City Stamina for maximum account efficiency.

News
NTE Team Responds to AI-Assisted Background Asset Feedback
The NTE team says AI-assisted tools were used only on a small number of background and environmental assets, with flagged assets being reworked.
News
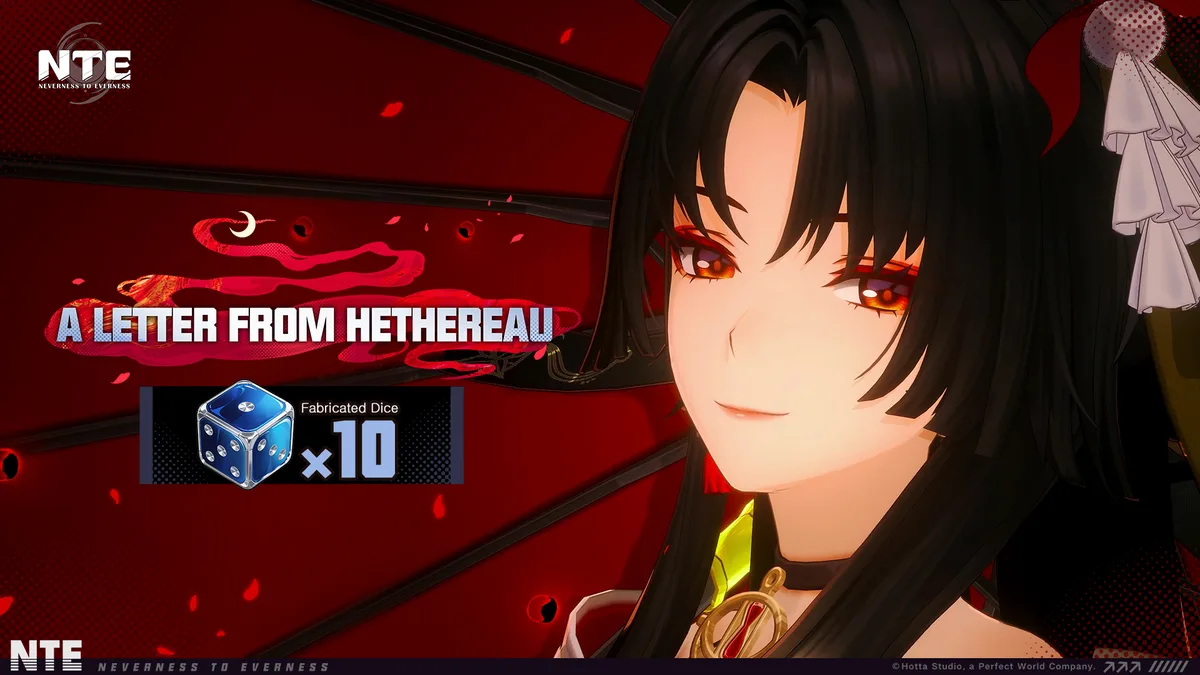
NTE Letter from Hethereau Reward: 10 Fabricated Dice After May 13 Maintenance
NTE players can receive 10 Fabricated Dice after the May 13 maintenance if they create a character and unlock Mail before Version 1.0 ends.