
















Introduction
NTE’s 999 Nights game mode is a substantial, permanent side campaign that rewards dedicated progression with unique gear and event milestones. The mode is intentionally grindy, so reaching level 100 efficiently comes down to using the right setup and farming routes. This guide covers the fastest path from the end of the story campaign to the level cap, including the early climb, the level 60 power-leveling build, and the best farming spots for each bracket.
Unlocking Challenge Mode
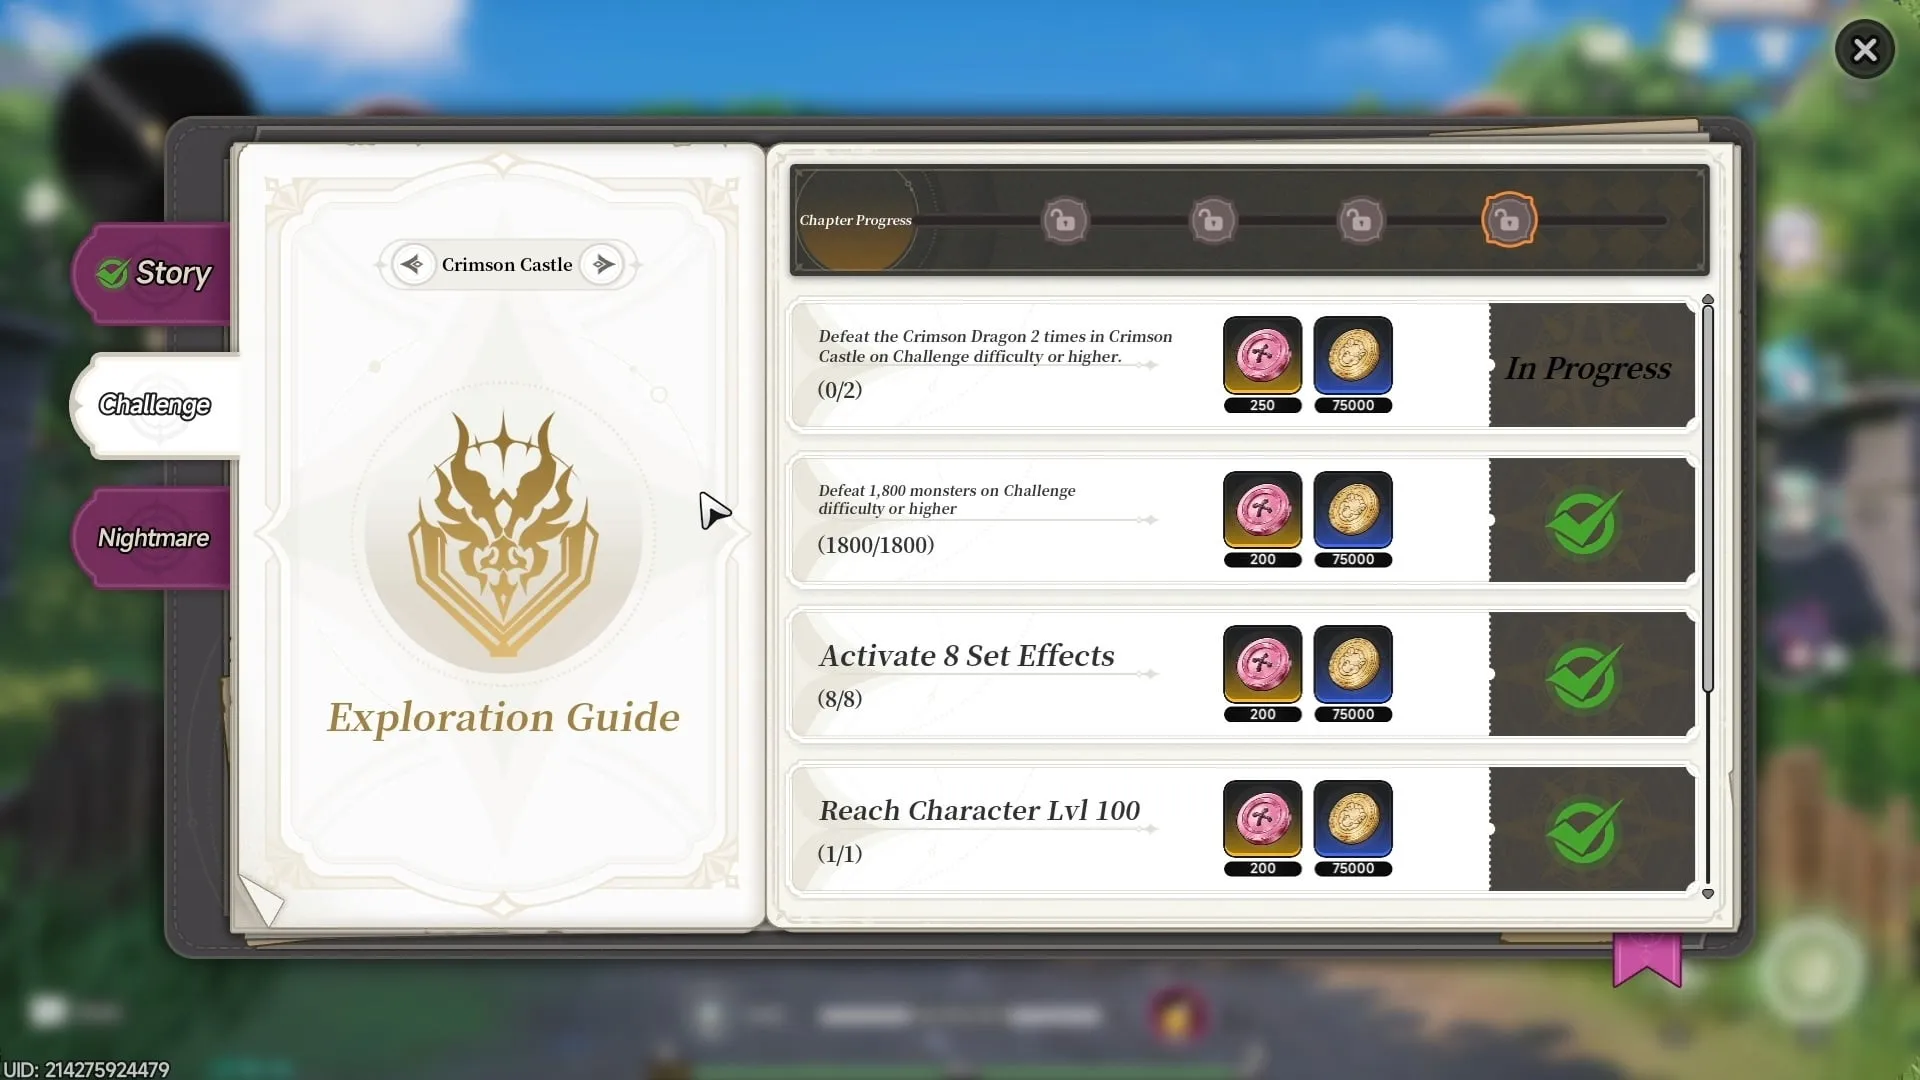
Your first objective is clearing the 999 Nights story campaign. Expect this to take roughly five to six hours depending on whether you watch cutscenes and read dialogue. Once the story is complete, Challenge Mode unlocks as a new-game-plus version of the same maps. Your character levels, resources, and gear from the story carry over, so you will enter Challenge Mode at around level 40. Only the dungeon teleport points reset, although Challenge Mode also opens a few shortcuts that were unavailable during the story.
Early Levels: Chocolate Volcano & Milk Ice Mountain
Start Challenge Mode by heading to the Chocolate Volcano and manually farming enemies until your party reaches at least level 50. At that point you can equip the level 50 gear drops from the dungeon. Full-clearing the dungeon is optional, but the extra chests are worth grabbing if you have the time.
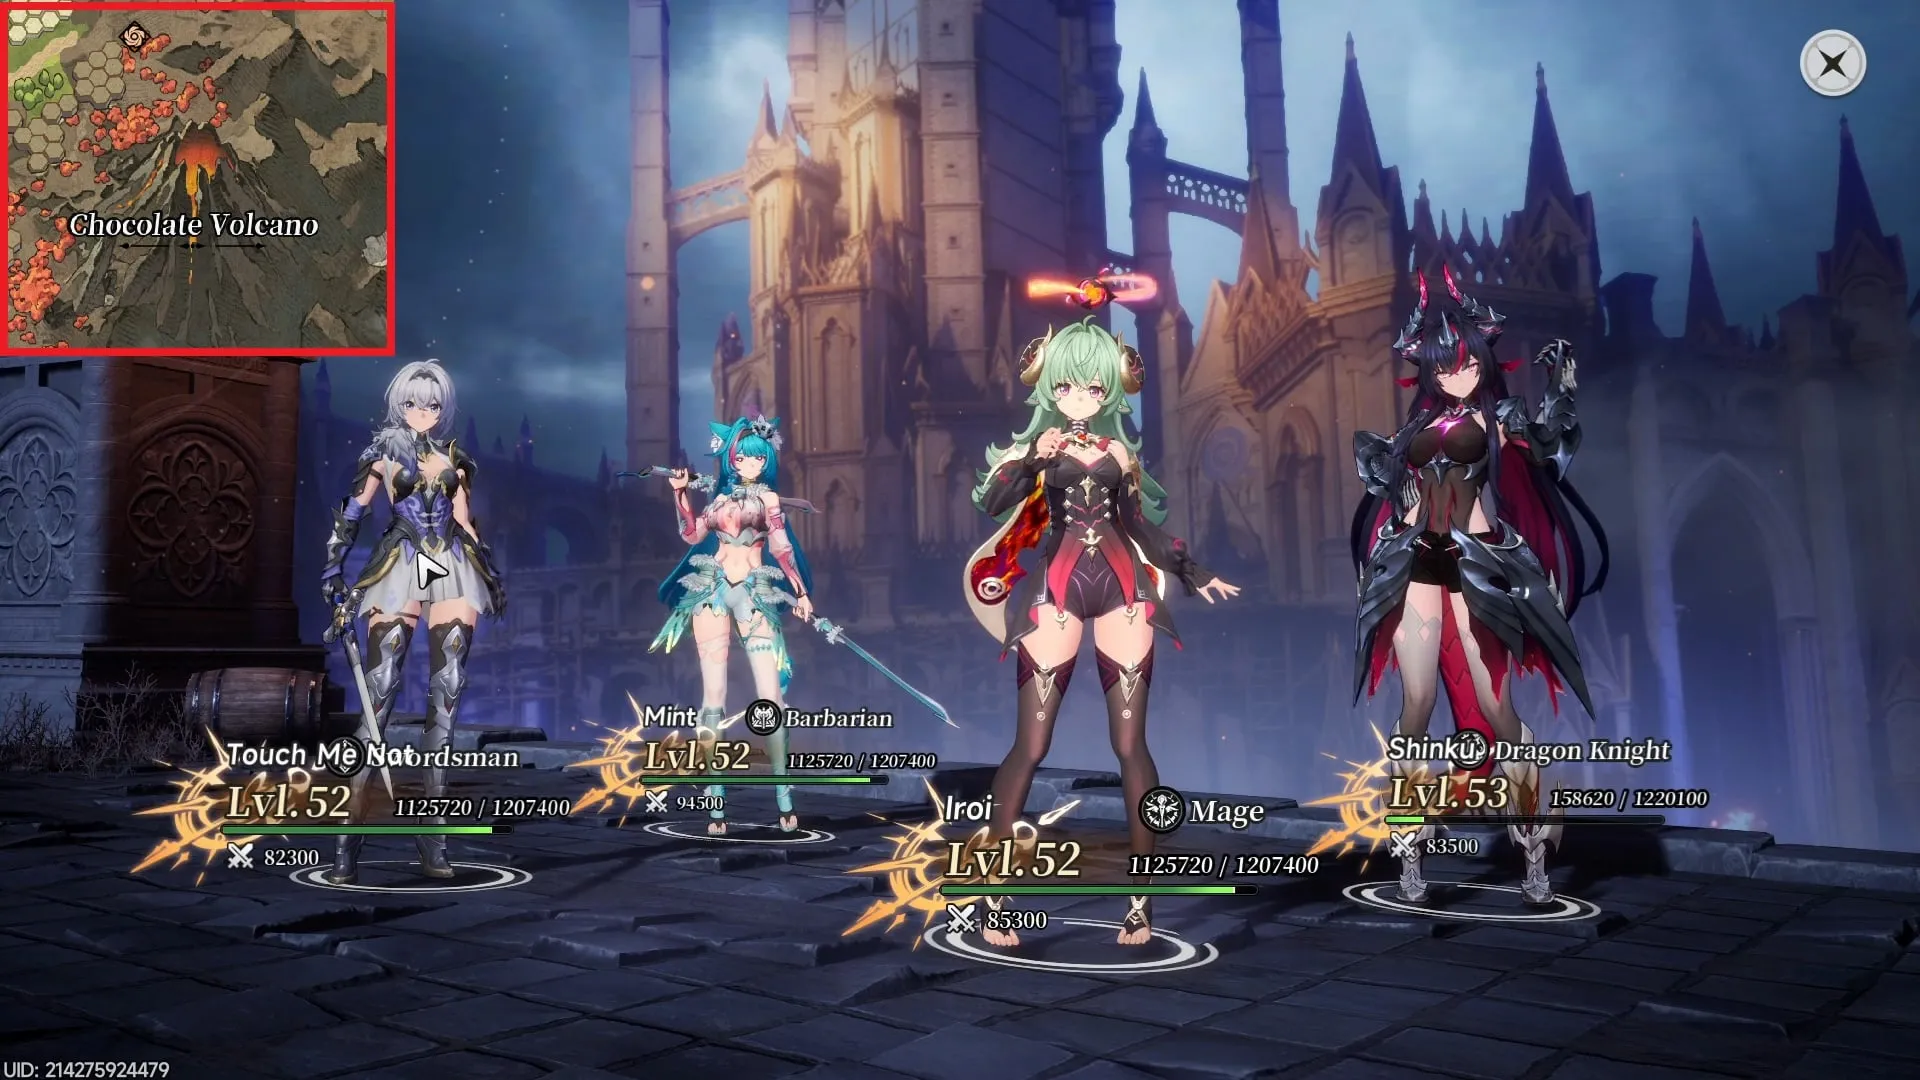
Once you hit level 55, move to Milk Ice Mountain. Farm enemies there until you reach level 60, because legendary drops become more common in this dungeon. I recommend pushing through the newly unlocked areas for extra chests and event-shop currency alongside the experience.
Level 60 Power-Leveling Build
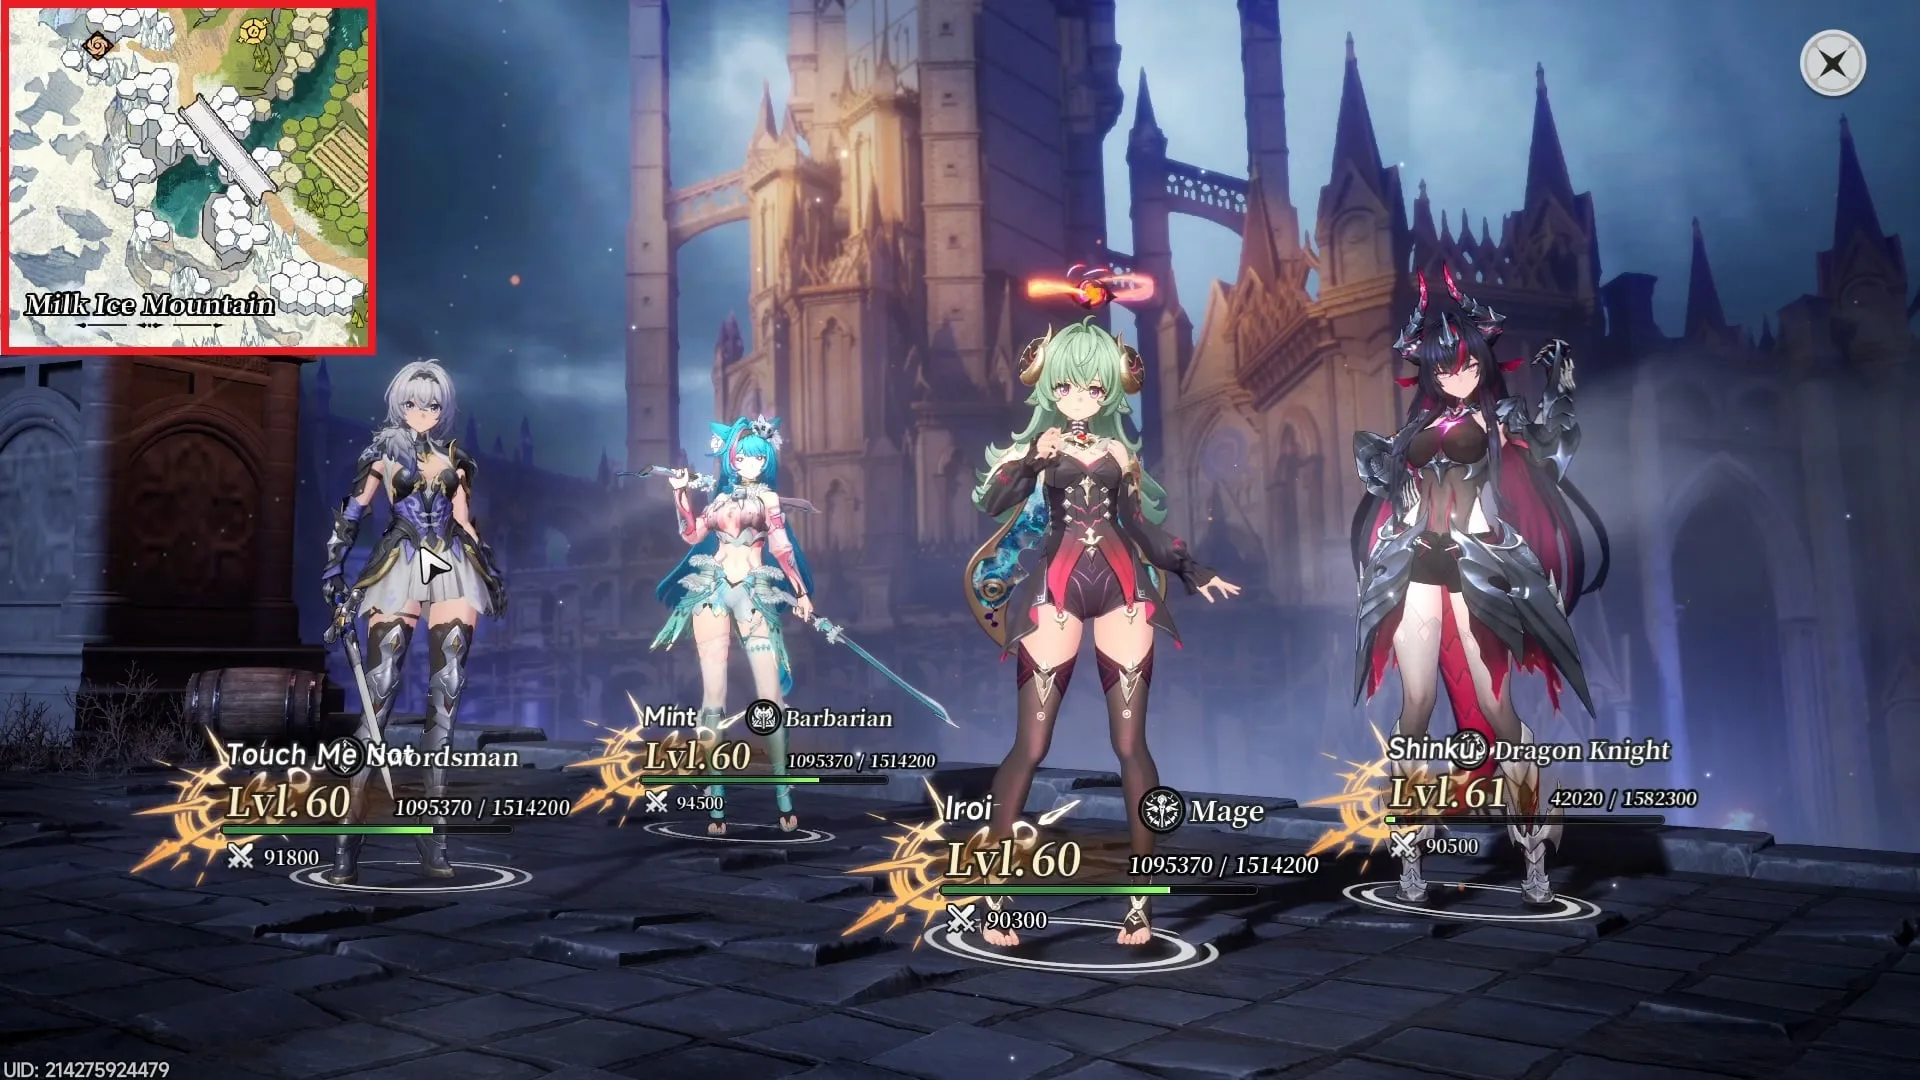
Level 60 is where the real power-leveling begins. The strategy revolves around the White Lightflame status, which functions as an area-of-effect burn that clears groups of enemies quickly when stacked and supported correctly. The recommended team is:






Zero
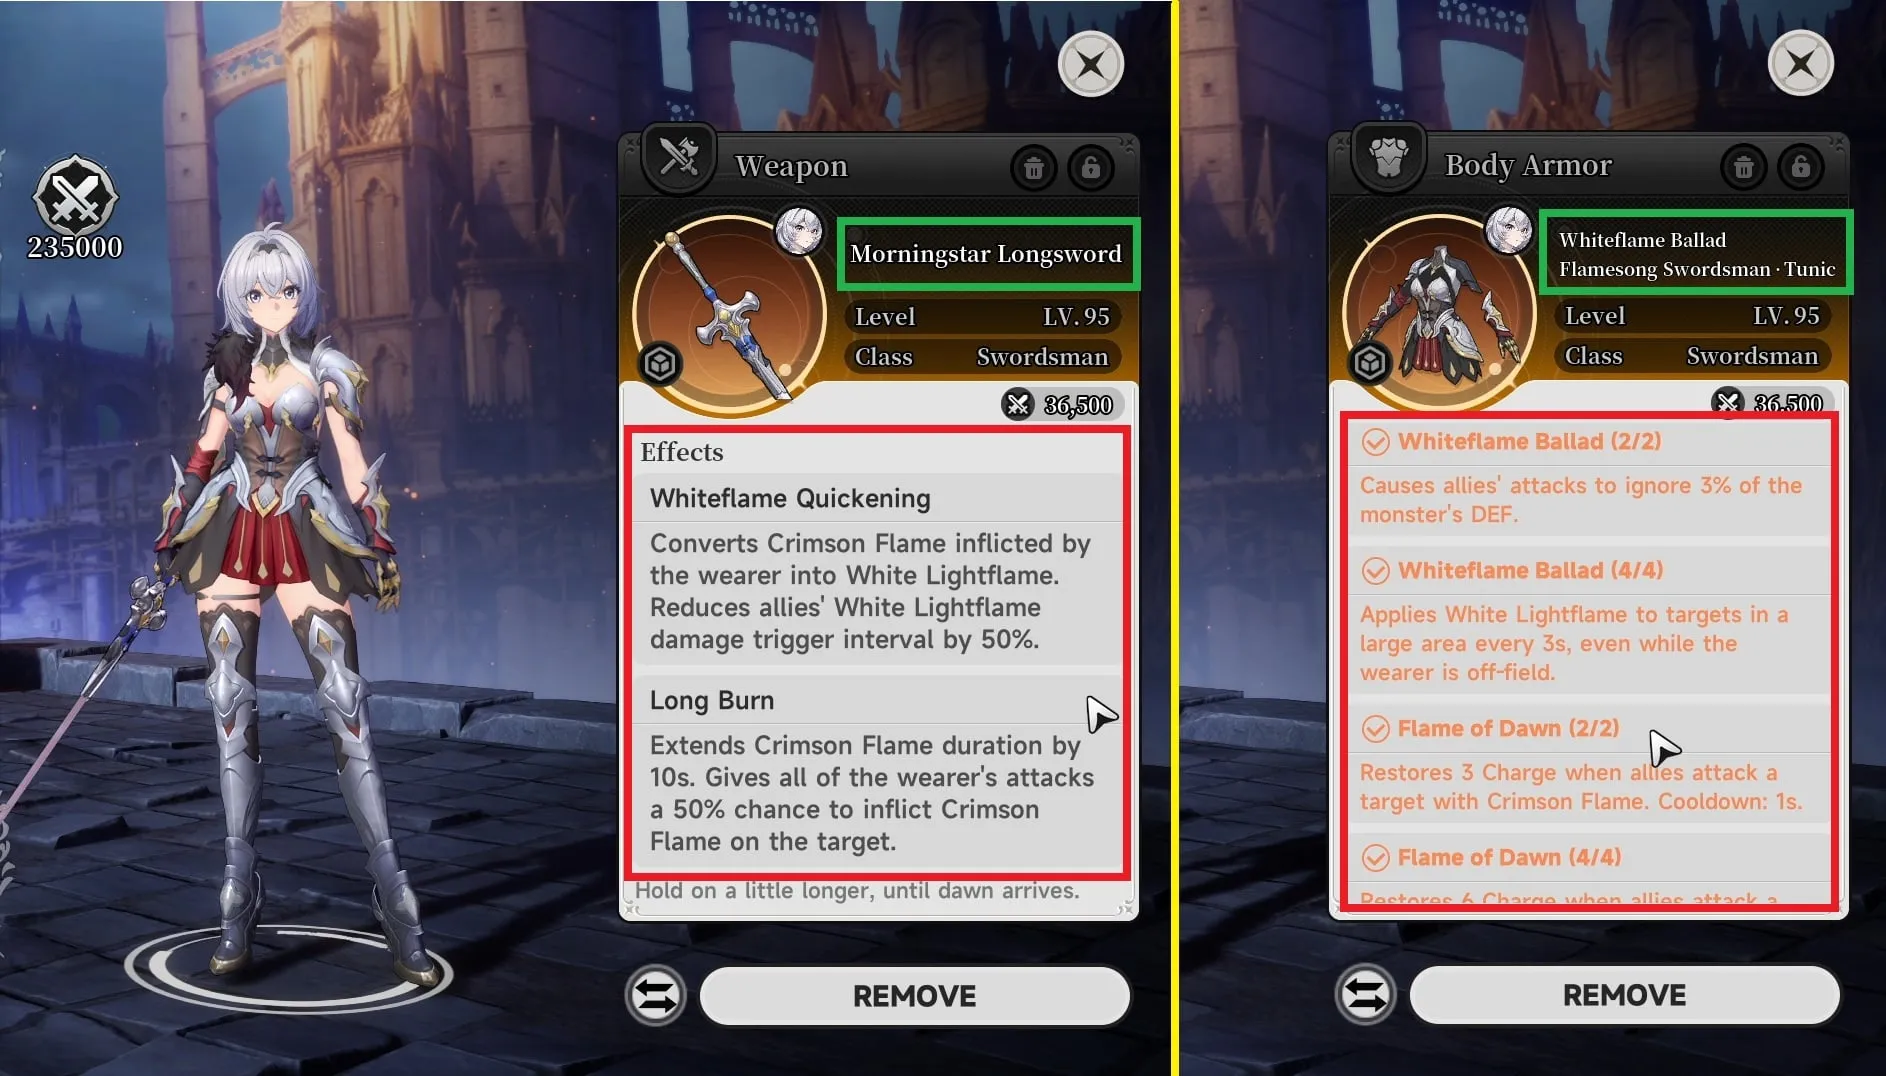
Zero’s weapon for this setup is the Morningstar Longsword, which converts Crimson Flame into White Lightflame and reduces the burn’s trigger interval by 50%. It also extends burn duration by 10 seconds and gives Zero’s attacks a 50% chance to inflict White Lightflame.
For armor, equip the Whiteflame Ballad: Flamesong Swordsman Set. With four matching pieces it ignores 3% of enemy DEF and applies White Lightflame to targets in a large area every 3 seconds, even while Zero is off-field. The Flame of Dawn effect restores 6 Charge whenever an ally attacks a burning target.
Mint
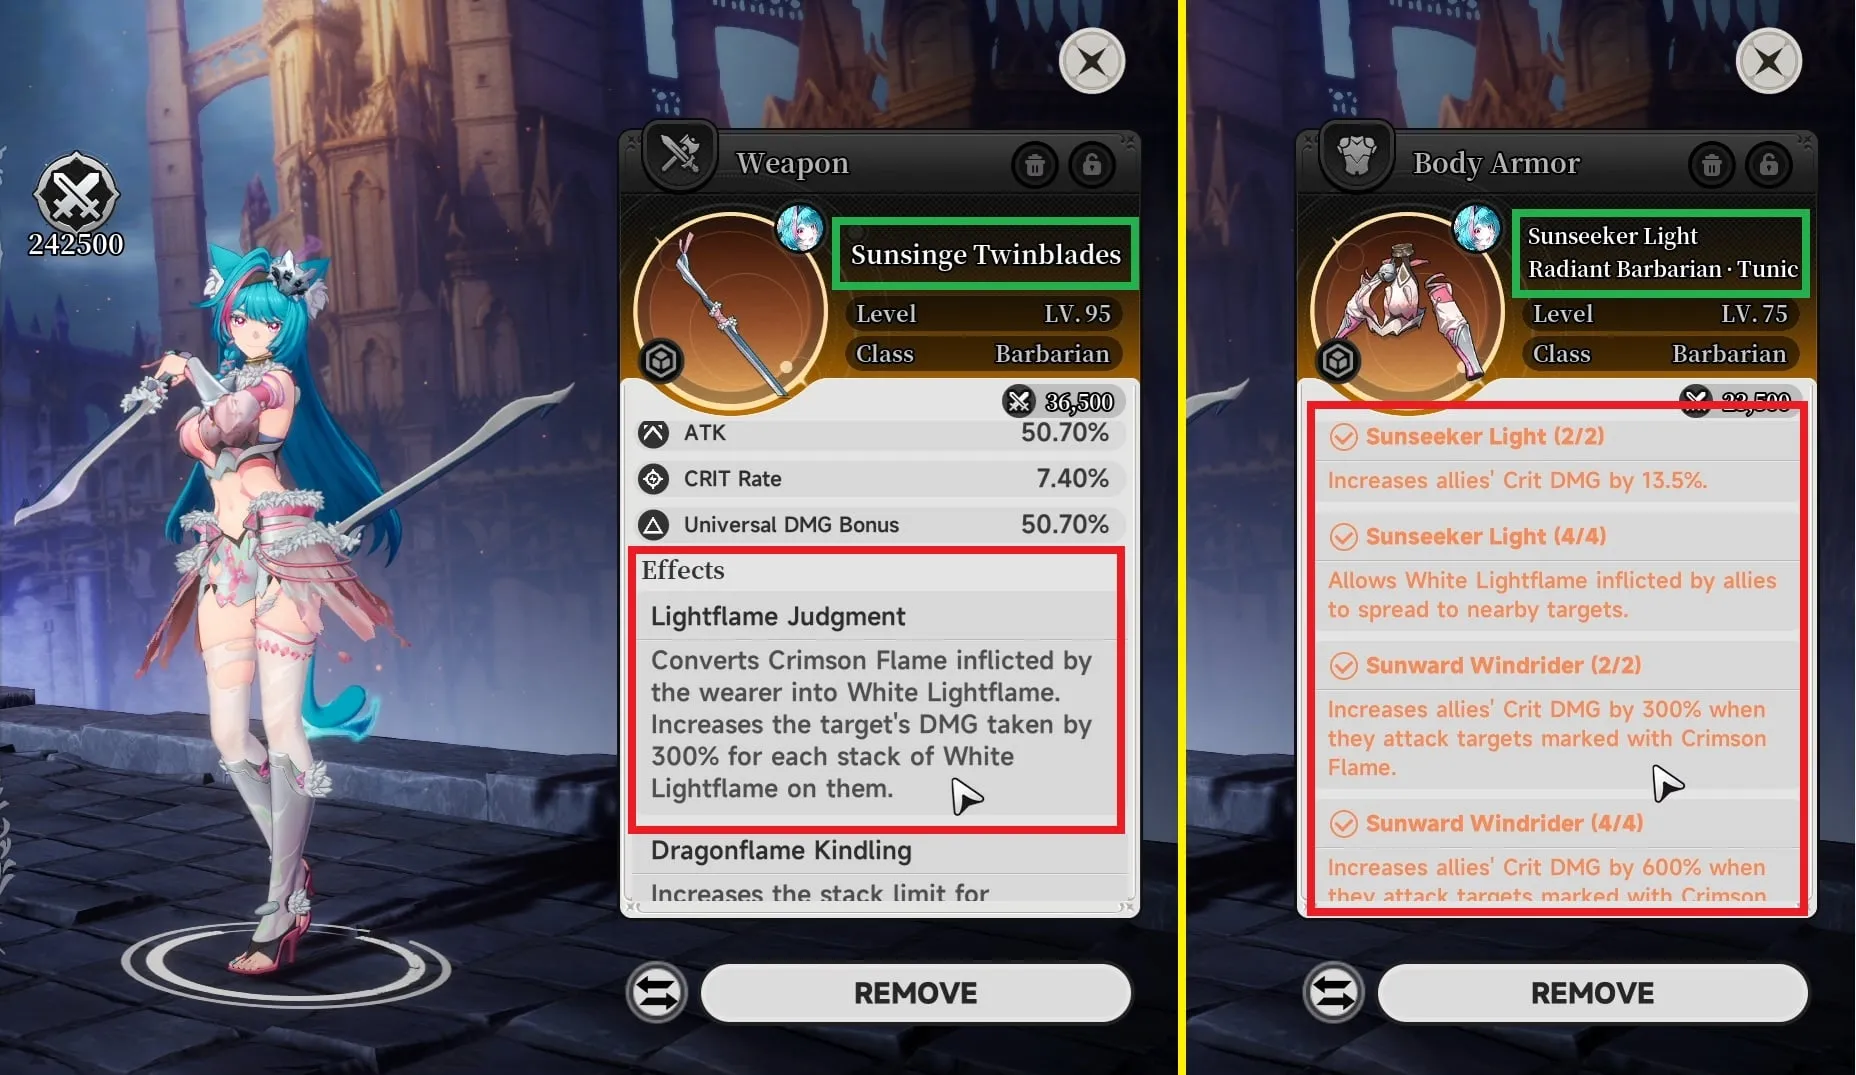
Mint uses the Sunsinge Twinblades, which trigger White Lightflame and increase damage taken by the target by 300% for each stack of White Lightflame applied. Her armor should be the Sunseeker Light: Radiant Barbarian Set, which raises allies’ Crit DMG and lets White Lightflame spread to nearby targets.
Iroi
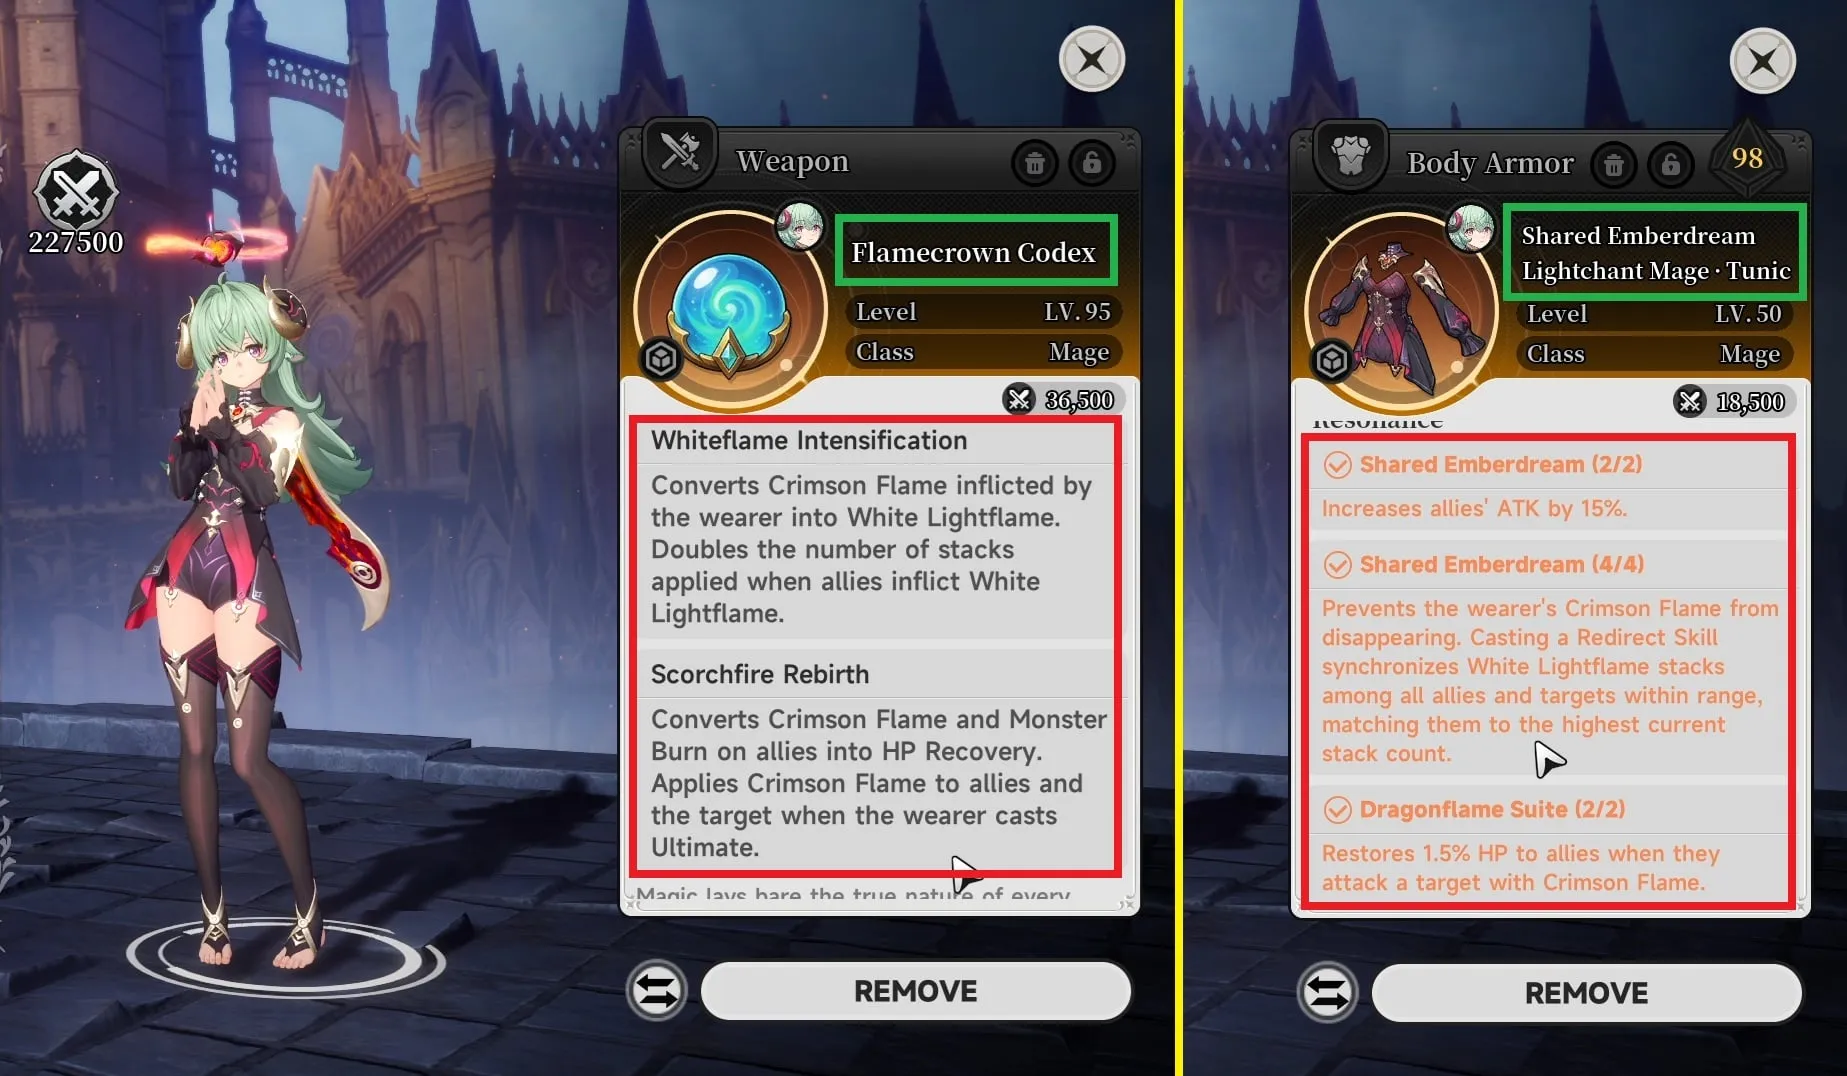
Iroi’s weapon is the Flamecrown Codex, which triggers White Lightflame and doubles the number of stacks applied when allies inflict White Lightflame. It also heals Iroi when she casts her Ultimate.
For armor, use the Shared Emberdream Lightchant Mage Set. This set buffs the party’s ATK, prevents Iroi’s burn effect from disappearing, and synchronizes White Lightflame stacks across all allies and targets to the highest stack count whenever she casts her skill. Attacking a burning target also heals the attacker.
Shinku
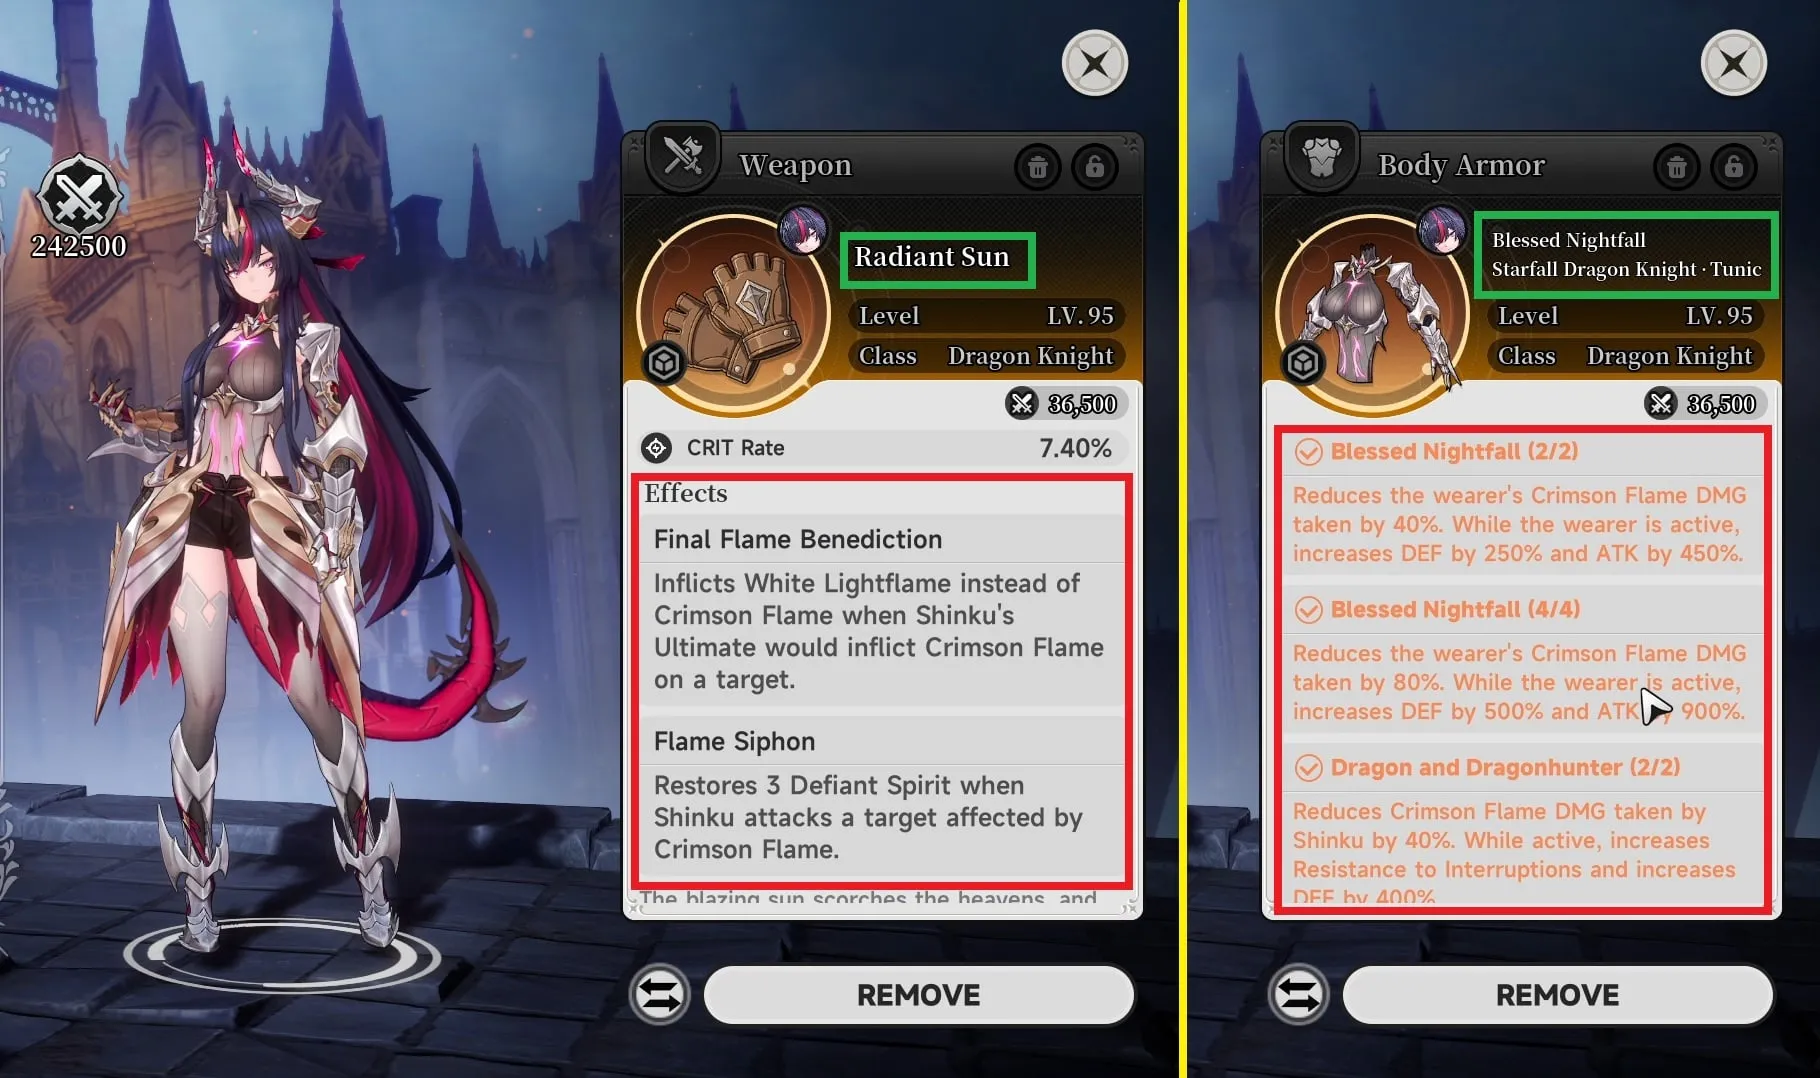
Shinku’s weapon is Radiant Sun, which triggers White Lightflame instead of Crimson Flame during her Ultimate and restores 3 Defiant Spirit whenever she attacks a burning target.
For armor, any White Armor set works. Two different sets share the same effect of boosting Shinku’s DEF, ATK, and resistance to interruption, making her the ideal Vanguard for this setup.
Accessories
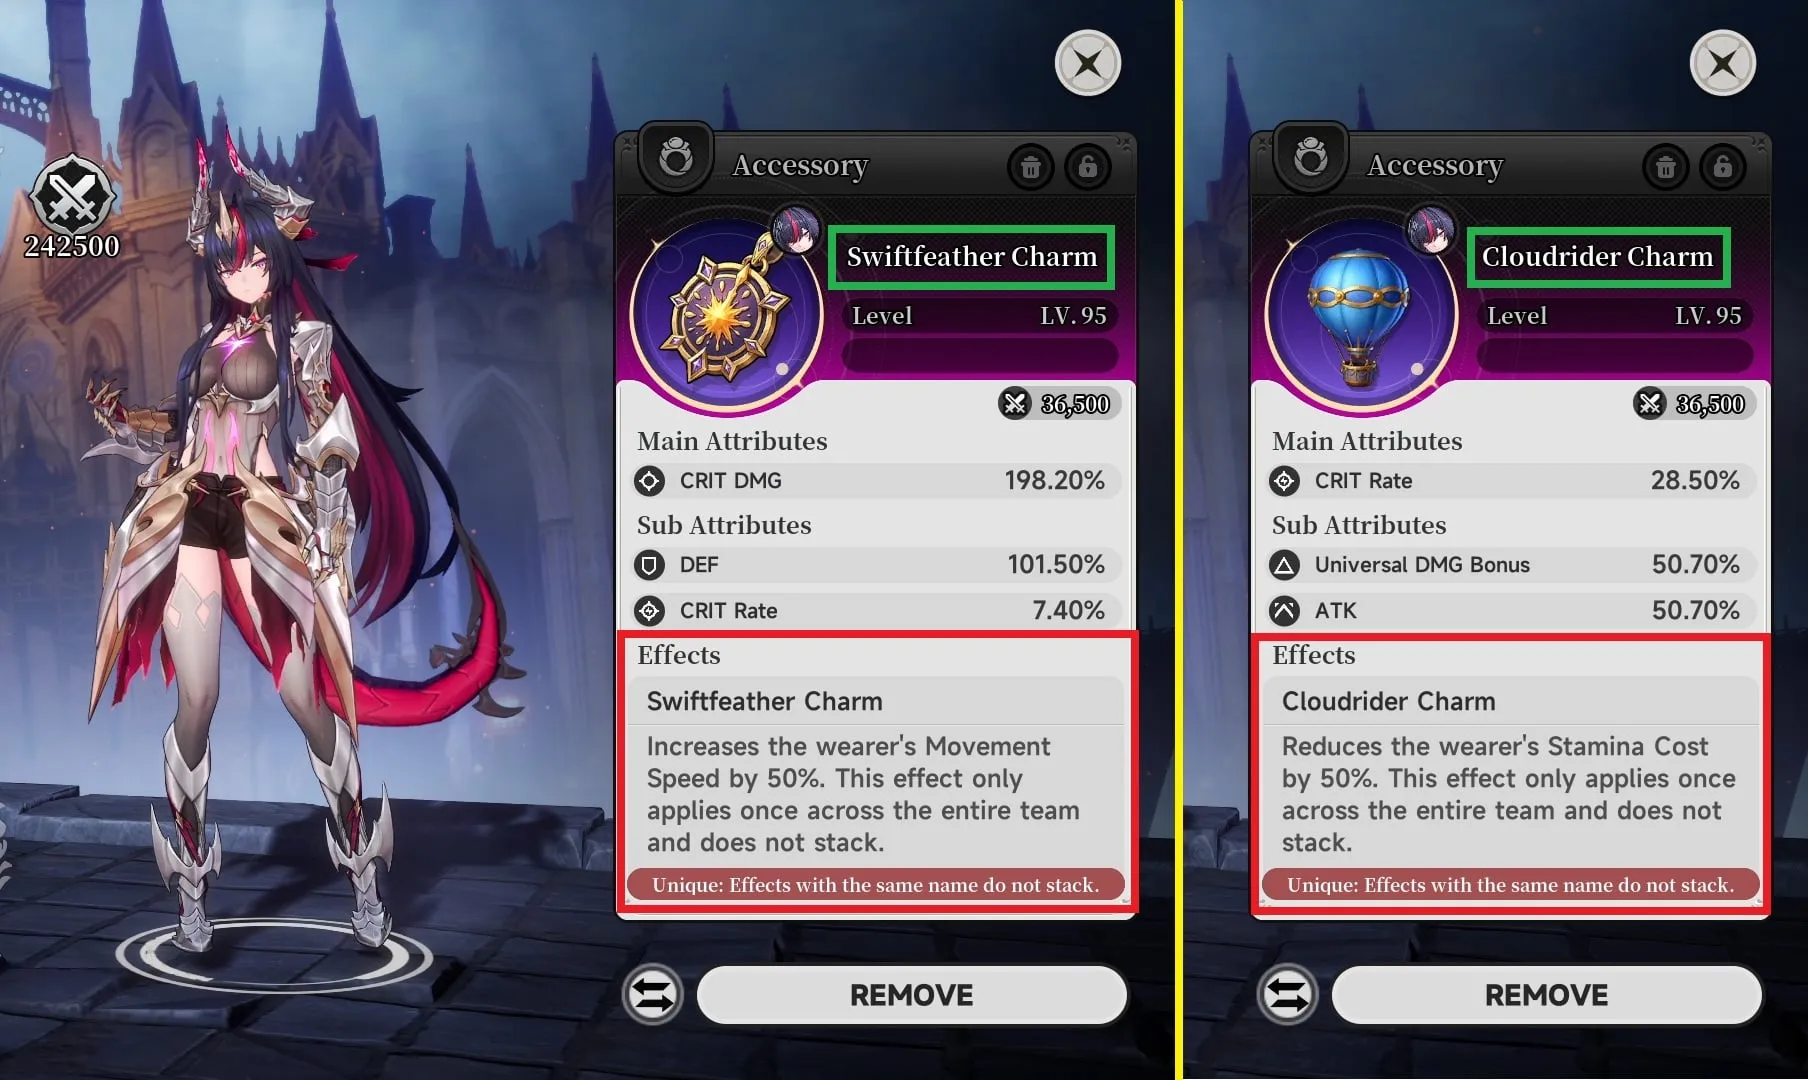
For Shinku, prioritize Swiftfeather and Cloudrider Charm. Swiftfeather increases movement speed by 50% and Cloudrider Charm reduces stamina cost by 50%, both of which make Shinku’s Rampage Form far more effective for gathering mob aggro.
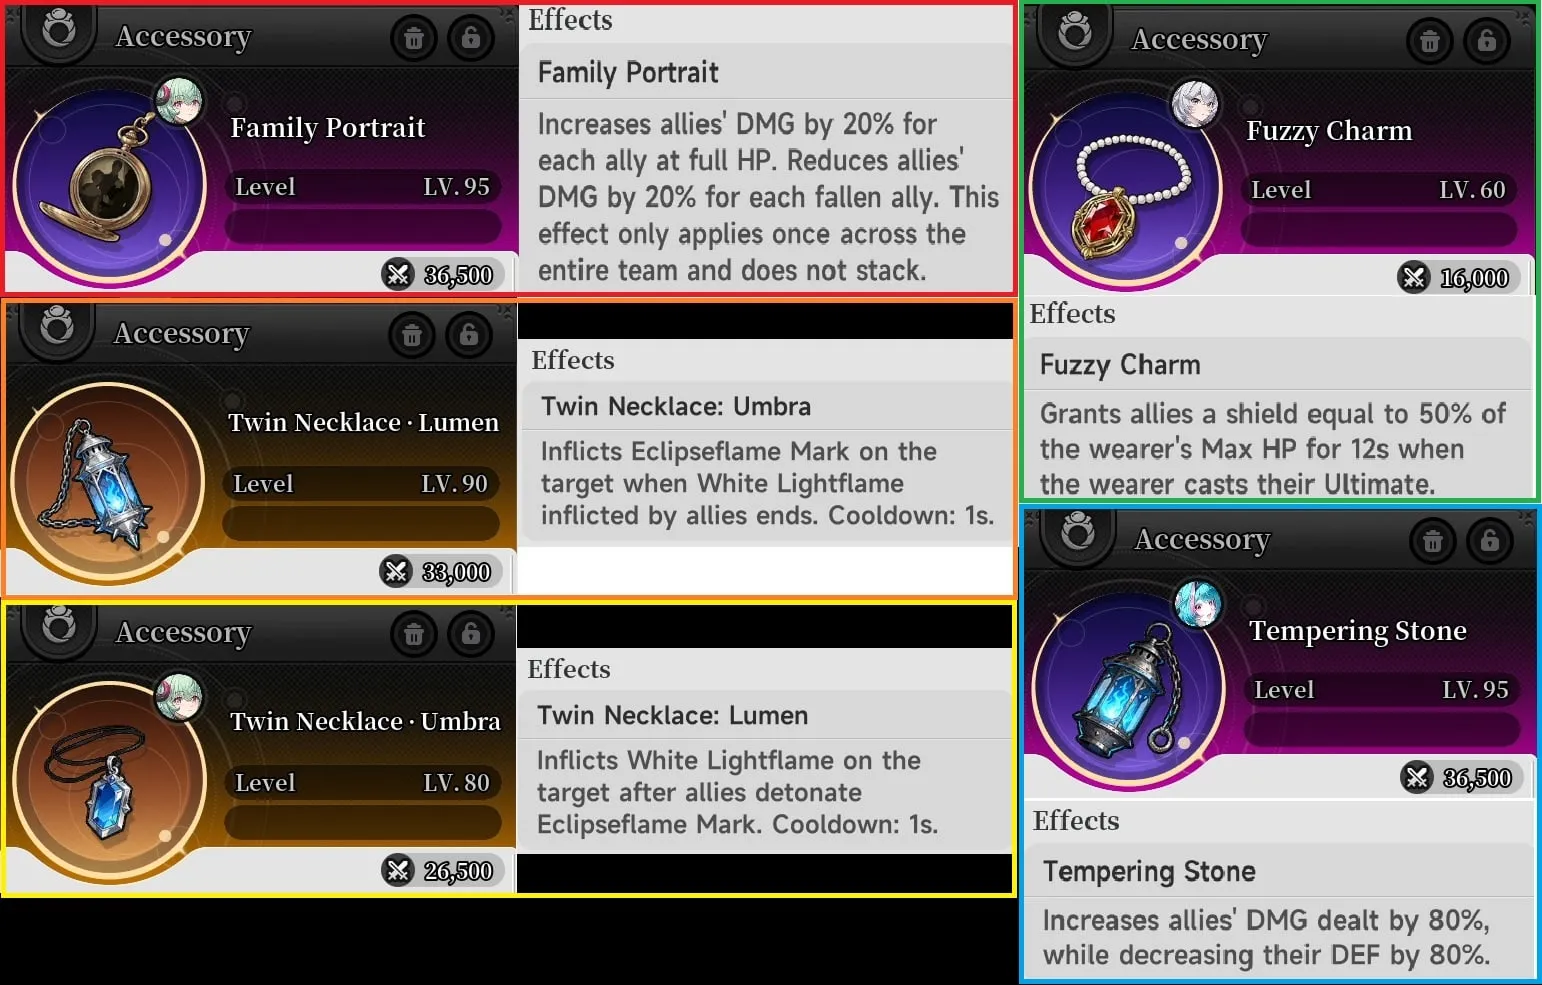
The remaining accessories work off-field, so you can place them on any character. The Family Portrait raises allies’ damage by 20% for each ally at full HP, meaning a full-health party gains an 80% damage increase. The Twin Necklace: Umbra and Lumen further amplifies White Lightflame. The Fuzzy Charm grants a shield equal to 50% of the wearer’s max HP, and I usually put it on Zero; Mint or Iroi are equally valid choices. Finally, the Tempering Stone raises allies’ damage dealt by another 80% at the cost of 80% DEF. At higher levels, shields and healing completely offset the DEF penalty, so the stone functions as a large damage buff.
Farming Routes from 60 to 100
With the gear setup complete, these are the best spots to grind from level 60 to the cap.
Levels 60 to 65: Milk Ice Mountain
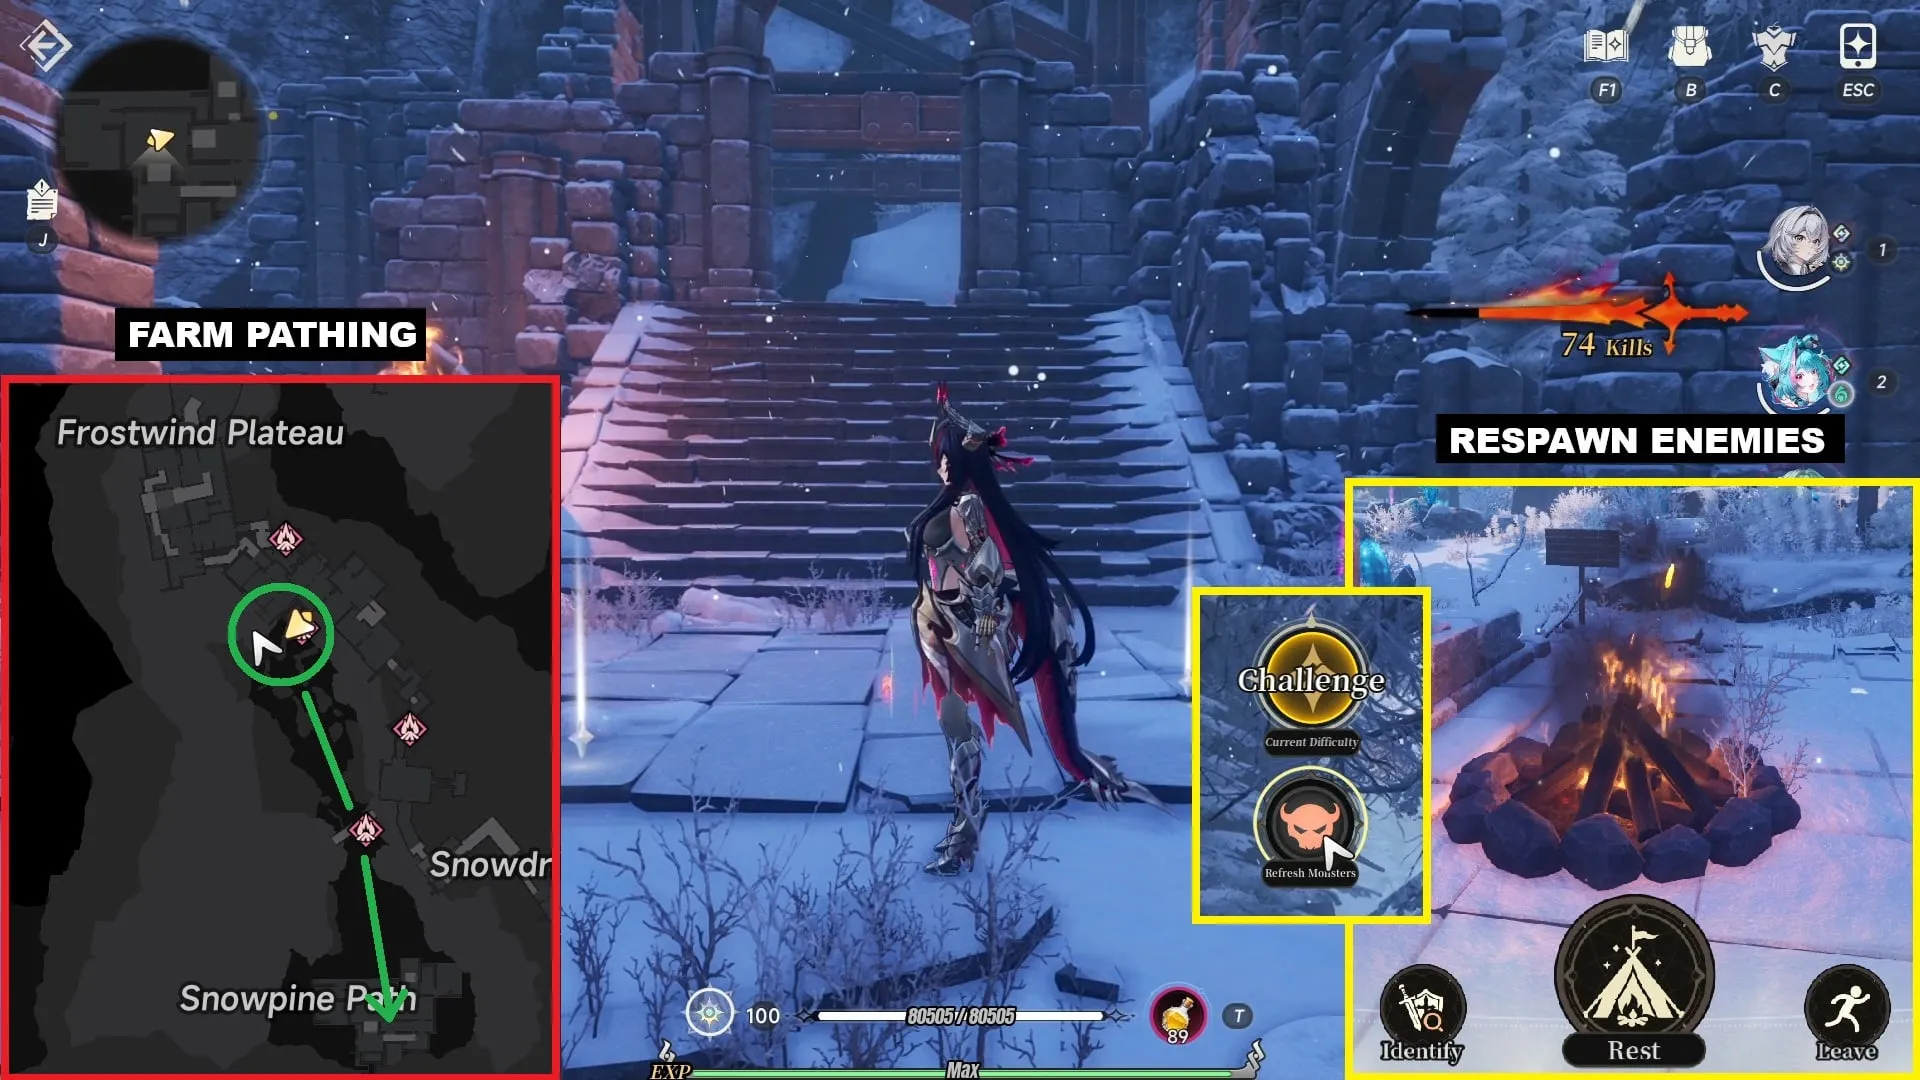
Return to Milk Ice Mountain and farm at the bonfire shown below. Pull groups of enemies along the path, wipe them out, then teleport back to the bonfire to respawn the mobs. Gear drops here are level 60.
Levels 66 to 80: Amber Sugar Lake
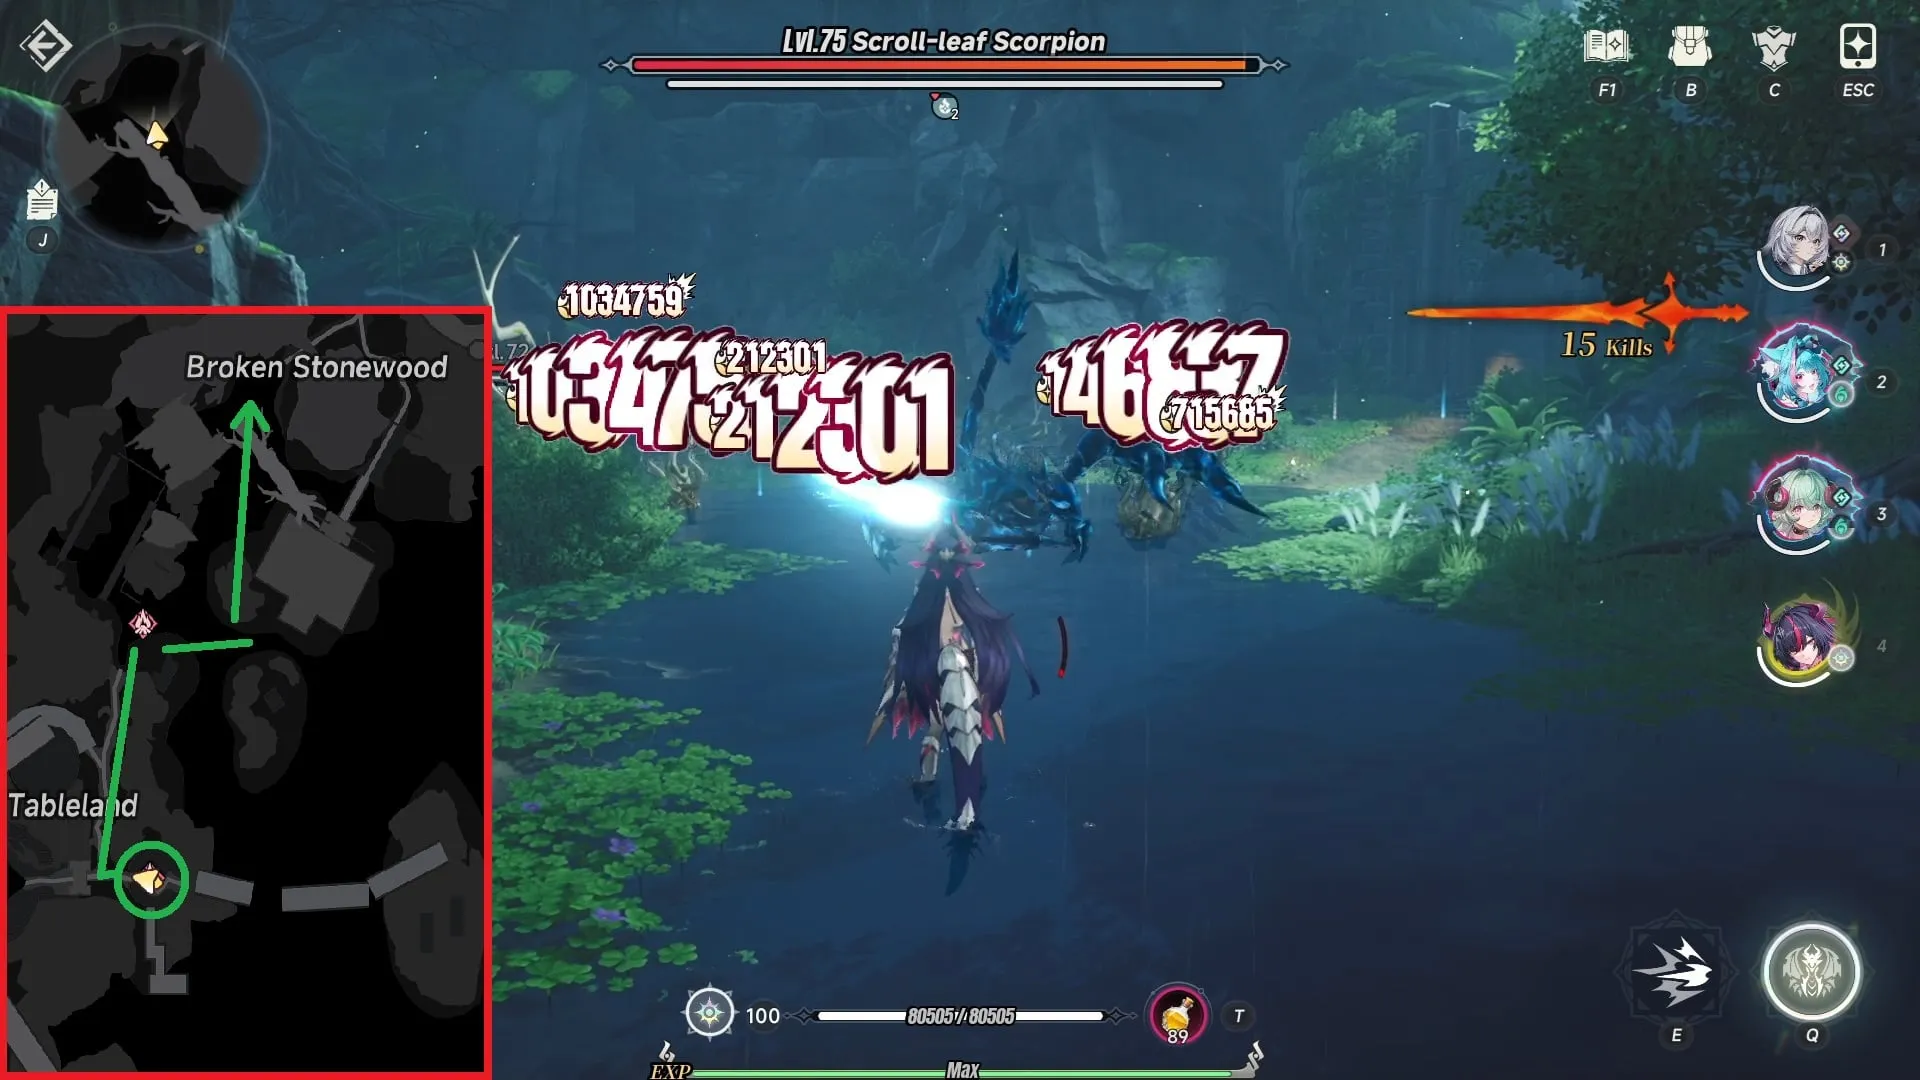
At level 65, move to Amber Sugar Lake. Start at the first bonfire and run toward the giant tree marked on the map. The path is packed with enemies and ends with a mini-boss, making this an excellent spot for both experience and gear upgrades. Drops here are level 75, so replace older pieces as soon as you assemble the correct set. After clearing the route, teleport back to the bonfire and repeat.
Levels 81 to 100: Crimson Castle
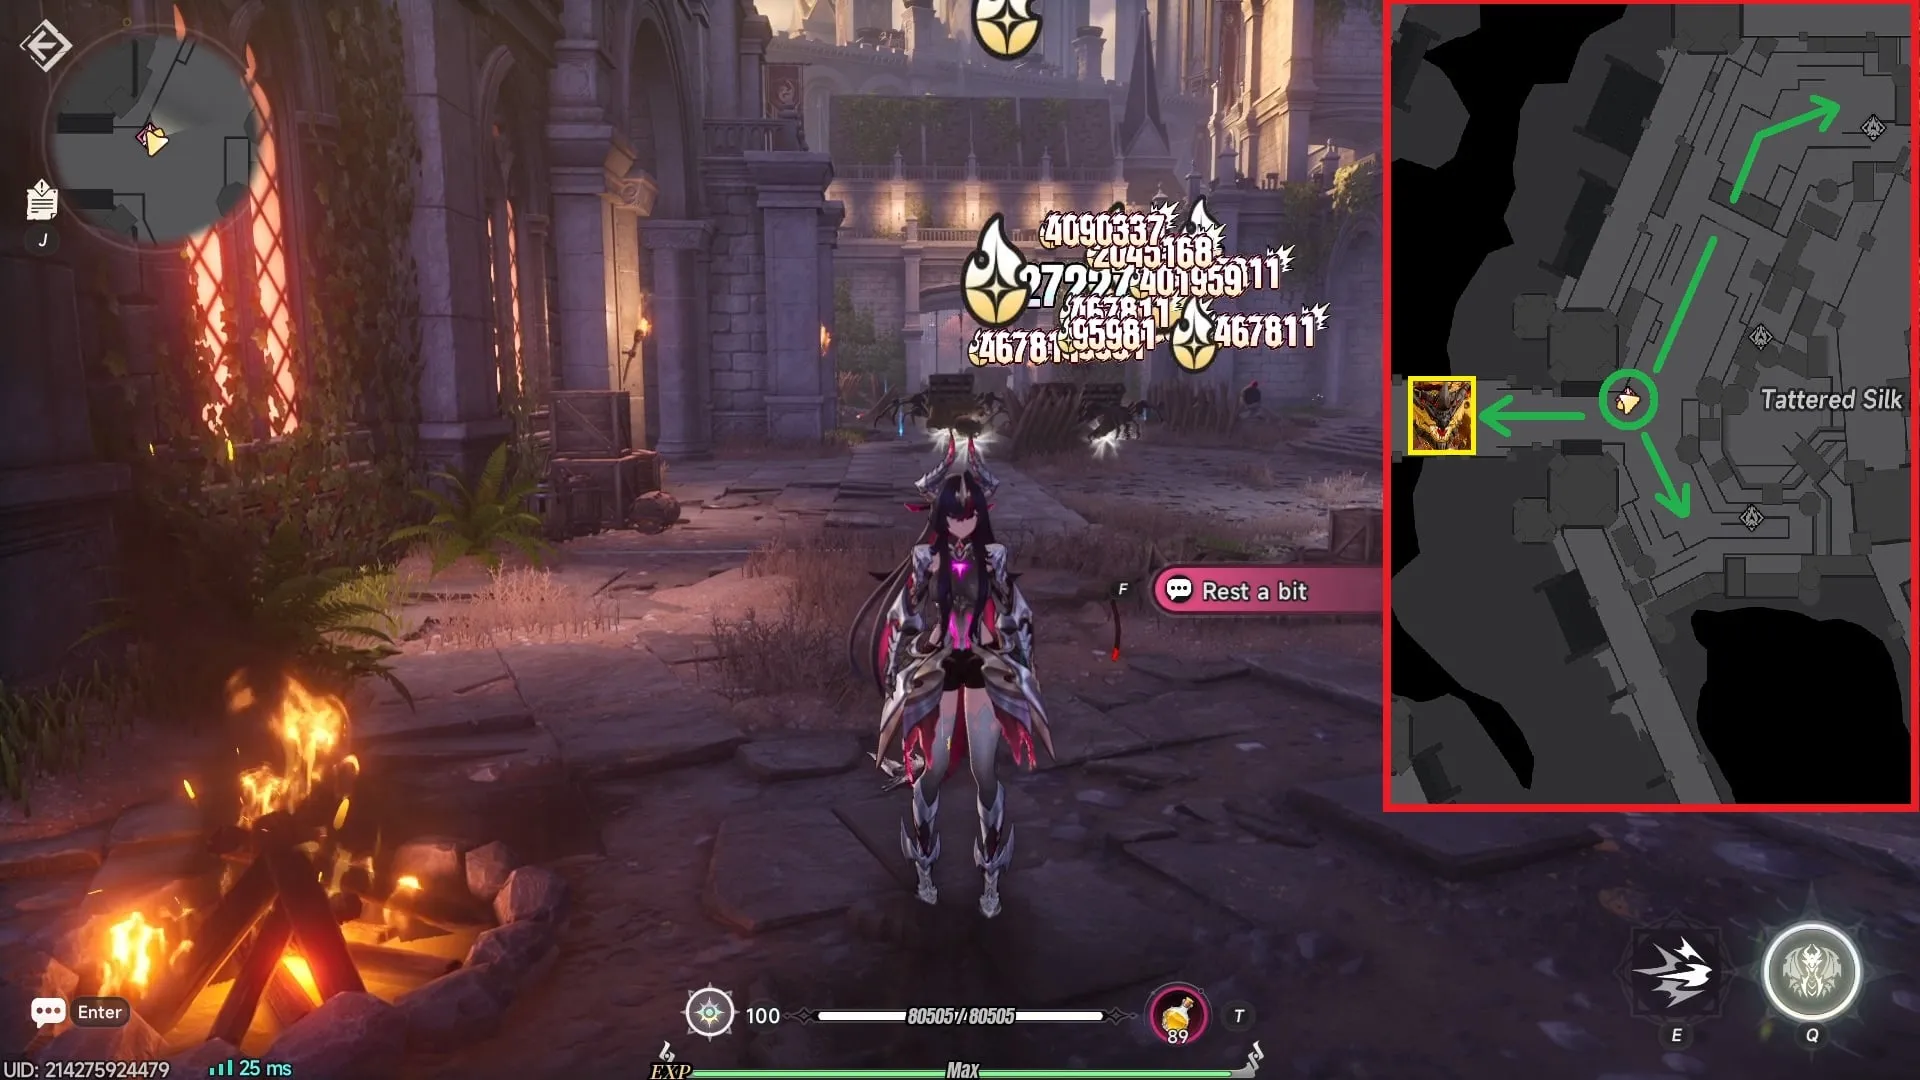
The final stretch takes place in Crimson Castle. Head to the bonfire on the map, clear the group to the right, then move to the left side. The enemies here are level 90 and above, but they group up cleanly and fall quickly to the White Lightflame build. Once the area is clear, return to the bonfire. You can also hunt the boss on the bridge for a large experience payout. In my experience it is straightforward to kill by spamming Shinku’s Ultimate.
Final Notes
That covers the fastest path to level 100 in 999 Nights. The mode has plenty of side systems and rewards beyond leveling, but getting your party to the cap first makes everything else far more comfortable. Good luck with the grind.
Video Guide
Related Neverness to Everness Resources
Guide
999 Nights: Mystery Button Farming Guide
Farm Mystery Buttons efficiently in NTE's 999 Nights Nightmare mode with this Eclipseflame team setup, Mythic accessory priorities, and semi-AFK plus manual farming routes.

Guide
Iroi: Deleting Bosses in 999 Nights Nightmare Mode
Build Iroi into a boss-melting machine for NTE's 999 Nights Nightmare mode by stacking White Lightflame with Zero, Mint, and Shinku support.

Guide
Pixel Search Double Drops: Best Dungeon to Farm
Which anomaly zone is actually worth spending your Character Pixels on during the Pixel Search double drop event? A quick breakdown of all four dungeons.
News
NTE July 16, 2026 Hotfix Patch Notes
NTE deploys a hotfix on July 16, 2026 at 14:00 UTC+8. The patch fixes Shinku bugs, 999 Nights issues, auction house behavior, and more.
News
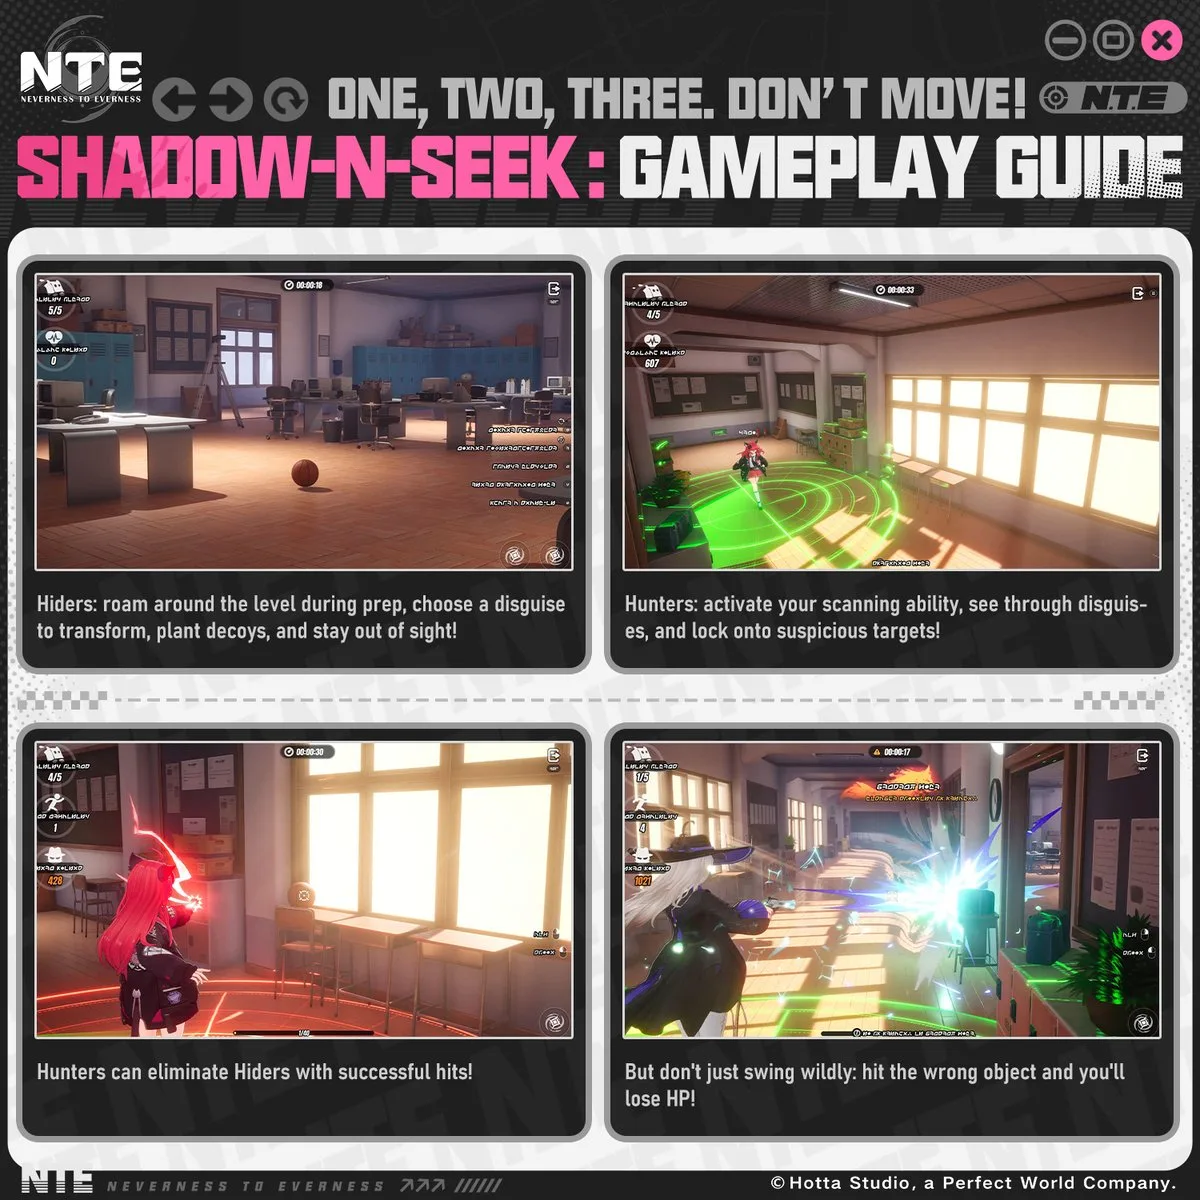
NTE Shadow-n-Seek Event Guide: Dates, Roles, and Rewards
NTE's Shadow-n-Seek asymmetric PvP event runs July 17 to August 19, 2026. Learn the Hider and Hunter rules, win conditions, and Shadebound Shop rewards.