Hybrid Build
A general team with Tsuruko as the healing source; having a high-break unit is highly recommended.

Tribe Nine
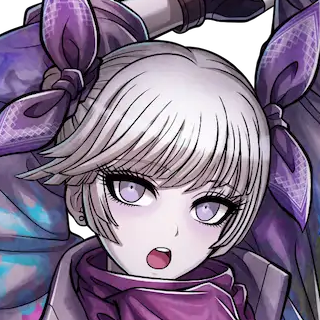
Tsuruko Semba build, teams, tier and character info
Tsuruko Semba build, teams and tier collects build notes, tier position, skills, stats, teams, and related Tribe Nine guides.
Review Snapshot
DPS
B
Strengths & Weaknesses
For Tsuruko, the whole gimmick is to build Twilight's Embrace to 100 stacks, which will create a huge circle on the map (Unending Twilight). Once the circle is made, you want to stand in it and do damage with primary/secondary attacks or counterattacks to build your meter until you hit 3/4 (75 Twilight's Embrace), then use your strategy skill to deliver a huge AoE attack. If that attack hits someone in the circle, it gets enhanced to deal more damage (you can activate the strategy skill at 55 Twilight's Embrace, but it's better to have a bit more). Additionally, every hit in the circle heals your team (if Passive 2 is not unlocked). If you run out of Twilight’s Embrace, the circle will disappear, and you'll have to recharge it.
Series of 3 attacks, each hit granting Twilight's Embrace. Note that the 3rd stage can be animation canceled. Wait until the dark orbs are right above, then Dash to cancel the animation or Counterattack for damage and reset the cycle.
After charging up, releases a huge AoE orb that grants Twilight’s Embrace. If the circle is active and an enemy is hit, it repositions the circle under that enemy. YOU ARE ABLE TO MOVE DURING THIS ATTACK. Hold Dash, then trigger the secondary attack; the Dash momentum moves you during the attack.
When an enemy executes a powerful attack, a red circle (or glare) appears. Use your Counterattack button to respond. It works on both physical and non physical attacks but isn't ideal for small moves (e.g., shark bites). Counterattacks force enemies into break status and increase Twilight's Embrace.
Activatable at 55+ Twilight's Embrace. It delivers an AoE attack on the target; if the target is inside Unending Twilight, it gets enhanced for extra damage, consuming some Twilight’s Embrace.
Usable with 3 Tension Bars. It launches an AoE attack and grants all allies Turning Tides, which recovers 50% of an ally's max HP if they drop below 50% HP. Not a great ult—better to use a DPS ult or one costing 2 Tension Bars.
Can be activated when the enemy is in break, dealing AoE damage.
Start by building Twilight's Embrace to 100 to get the circle (Unending Twilight). Then use your strategy skill for a big AoE. Next, rebuild your meter to around ¾ (75 Twilight’s Embrace) to use the strategy skill again. Use chain skills that provide buffs afterward.
Recommended when the target is not attacking you.
Recommended when the target is focusing you and about to launch a strong attack that can be countered. This has a quicker startup time.
Once Unending Twilight is up, immediately use Strategy Skill. Then balance your meter:
Best for pure healing needs.
For when you want Tsuruko to melt life bars. Best for pure damage if you can pair her with a dedicated healer (e.g., Yo with Passive 2 unlocked).
Dupe 1 offers the best bang for your buck—unlocking extra damage when units are in the circle (Twilight’s Embrace), and proccing extra healing and damage for versatility. Dupe 5 increases damage further, but is only worthwhile if you're a whale.
You can let AI handle her.
Manual control is recommended, as Counterattacks and Hold Dash > Secondary increase her uptime on Twilight's Embrace, allowing her to deal more damage. When left to AI, her secondary attack can cause frustration—so manual play is advised.
Tsuruko is a very good and versatile unit. Her ability to deal damage and/or heal opens up many team comp options. Highly recommend pulling her and you should try to get Dupe 1 to maximize her versatility.
Synergy & Teams
 Miu Jujo
 Enoki Yukigaya
 Kazuki Aoyama
 Yo Kuronaka
Hybrid Build
Main DPS Build
F2P Friendly Team
Build & Tension Cards
Focus on enhancements for strategy skill for more damage.
Disclaimer: Even though Semba’s healer scales off support, boosting her attack increases her damage and healing.
Patimon Sets
Priority Stats
Enhancements for strategy skill are useful for more damage. Run Trickster if using Passive 2, Berserker otherwise. The Main DPS option is good for mob farming or character walking.
IF YOU CAN, MUST Have HER DUPE 1—IT HELPS TREMENDOUSLY.
Disclaimer: If using her as a main DPS, ensure you have other high-damage units.
Patimon Sets
Priority Stats
Other than the usual crit rate setup cards, Tsuruko benefits most from additional attack cards. Her chibi card, Diligent Perusal, is currently the only card that specifically buffs the damage of additional attacks. Adding Battle Tactics to activate its bonus condition is also a simple matter, since Curse will only apply to the operating character (in most cases, Tsuruko) and its downside on her is practically irrelevant due to her damage/healing primarily coming from her field/strategy skill.
If you’re not running Kazuki and his sig card, you can slot in typical good cards like Maximization or Excuse for the crit rate, All Out to buff damage across the team, or even Detonator if you want a meme option at the cost of some tension gauge (which Tsuruko doesn’t really need anyway). Her signature card is worth noting as it provides a massive boost of support points, but its EX requirement means you’ll likely need Iroha passive 1 to reliably reach EX phase.
For passive 1 builds, you could run Pulsating Life and Stimulation to support a main DPS ultimate, since Tsuruko easily applies the Clinical effect.
 Characters: Conditions Met
 Curse
Characters: Conditions Met
Curse
Characters: Conditions Met
Curse
Characters: Conditions Met
Curse
Characters: Conditions Met
 Control
 Special Condition
Control
Special Condition
Control
 All Party Members
Characters: Conditions Met
All Party Members
Characters: Conditions Met
Based on the number of times continuous damage is dealt or Recovery Effect is granted to a same target by the operating character, grant them a same number of stacks of [Whispering Spirits] for 5s.
When reaching the maximum stack of [Whispering Spirits], further increase Support point by 75.
Whispering Spirits
Maximum 5 stacks.
Based on the number of stacks, increase Support point by 15.
After the effect is granted, cannot grant the same effect within 5s.
Special Condition
Control
All Party Members
 Clinical
Characters: Conditions Met
Clinical
Clinical
Characters: Conditions Met
Clinical