


Basic Combat Mechanics
Mastering movement and energy management is the non-negotiable prerequisite for high-level play. In the high-velocity urban combat of Hethereau, survival is tied to the momentum of your Esper Cycle. Movement is not merely defensive — it is the engine that generates the resources required for your team's most devastating maneuvers. A static player is an inefficient player.
The standard move set provides the building blocks for every engagement:
| Move | Description |
|---|---|
| Basic Attack | Primary damage dealer and the foundational method for generating energy. |
| Plunge Attack | Aerial AoE strikes; damage scales up to 200% based on fall height. |
| Skill (Redirect Skill) | Character-specific tools defining individual roles — often featuring resource generation or crowd control. |
| Ultimate | High-impact abilities requiring a full energy meter. |
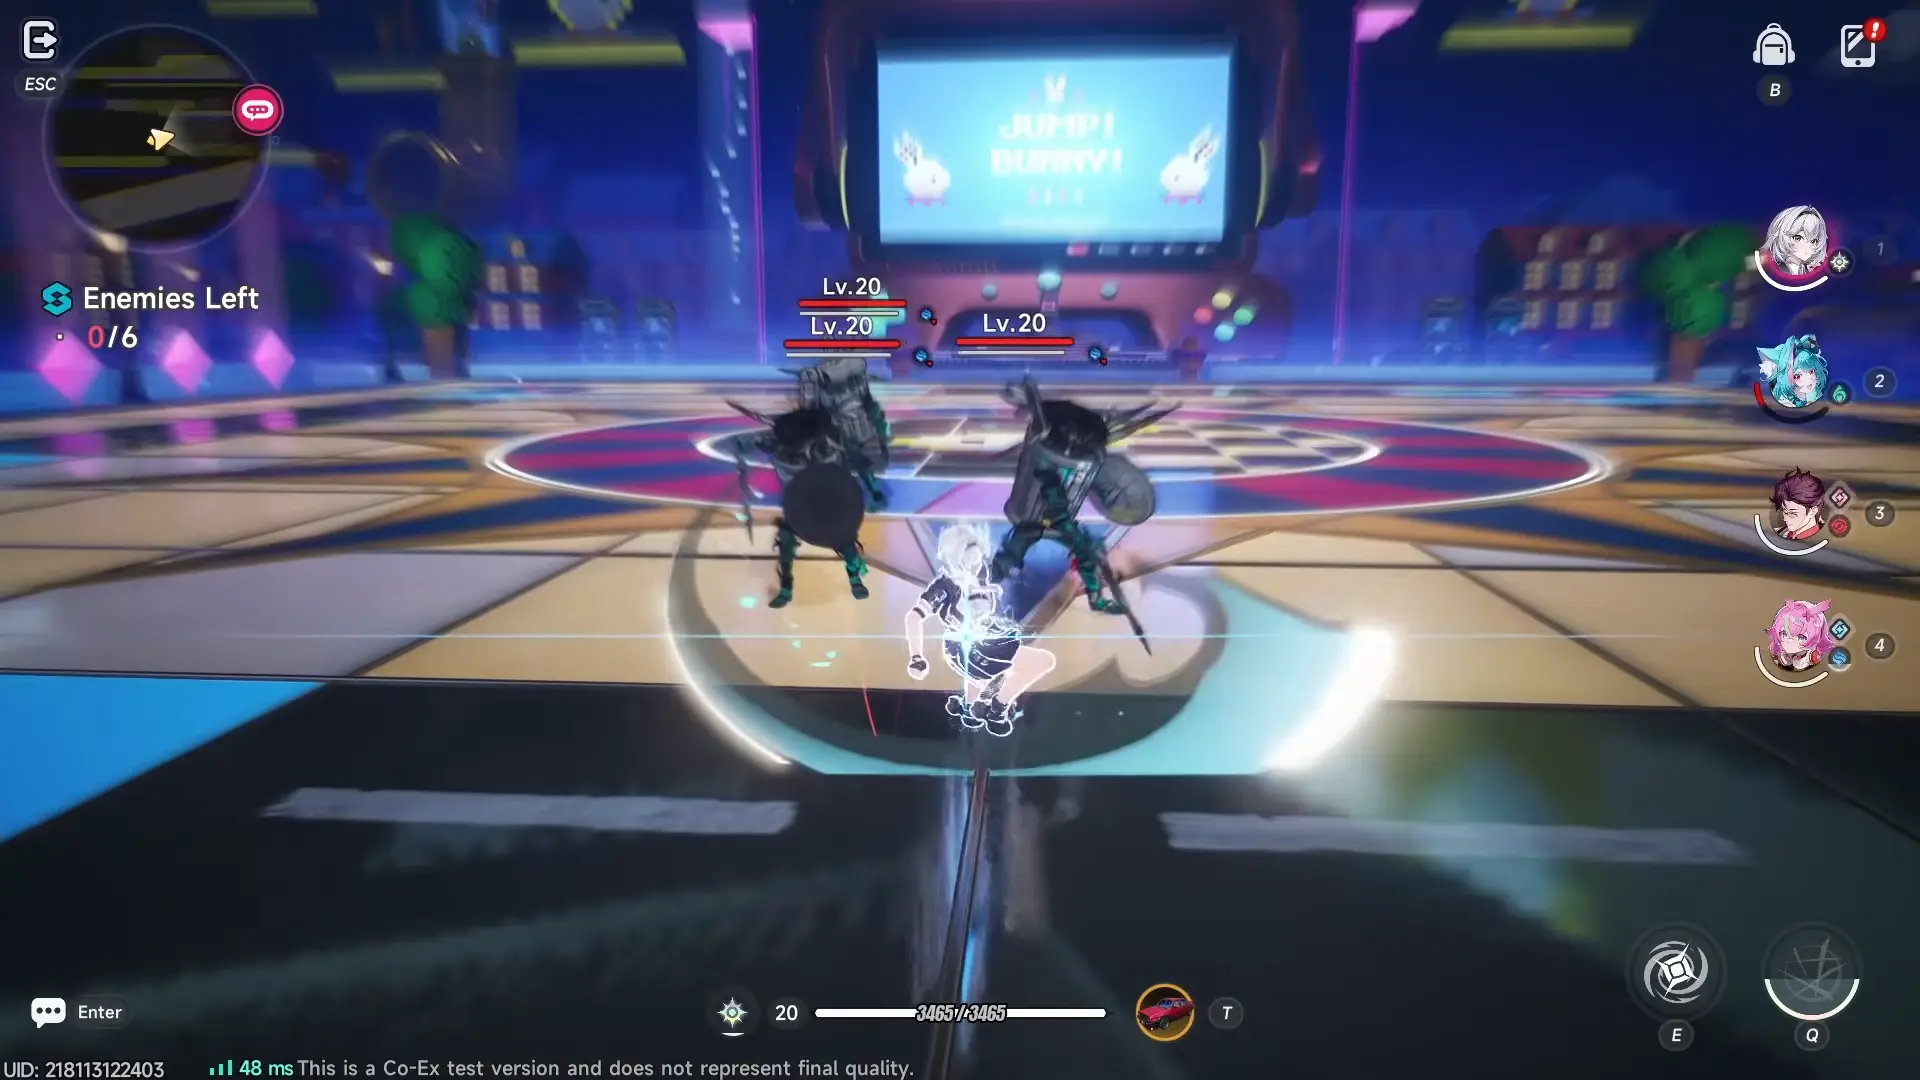
Tactical efficiency hinges on using Basic Attacks and Skills to fuel the Ultimate meter. Monitor your party's status via the UI on the right: White bars indicate healthy status, while Red bars signal low health — a critical visual cue for units like ![]() Baicang who thrive on low-HP thresholds. The top icon shows Ultimate readiness; the bottom tracks individual Esper Cycle levels.
Baicang who thrive on low-HP thresholds. The top icon shows Ultimate readiness; the bottom tracks individual Esper Cycle levels.
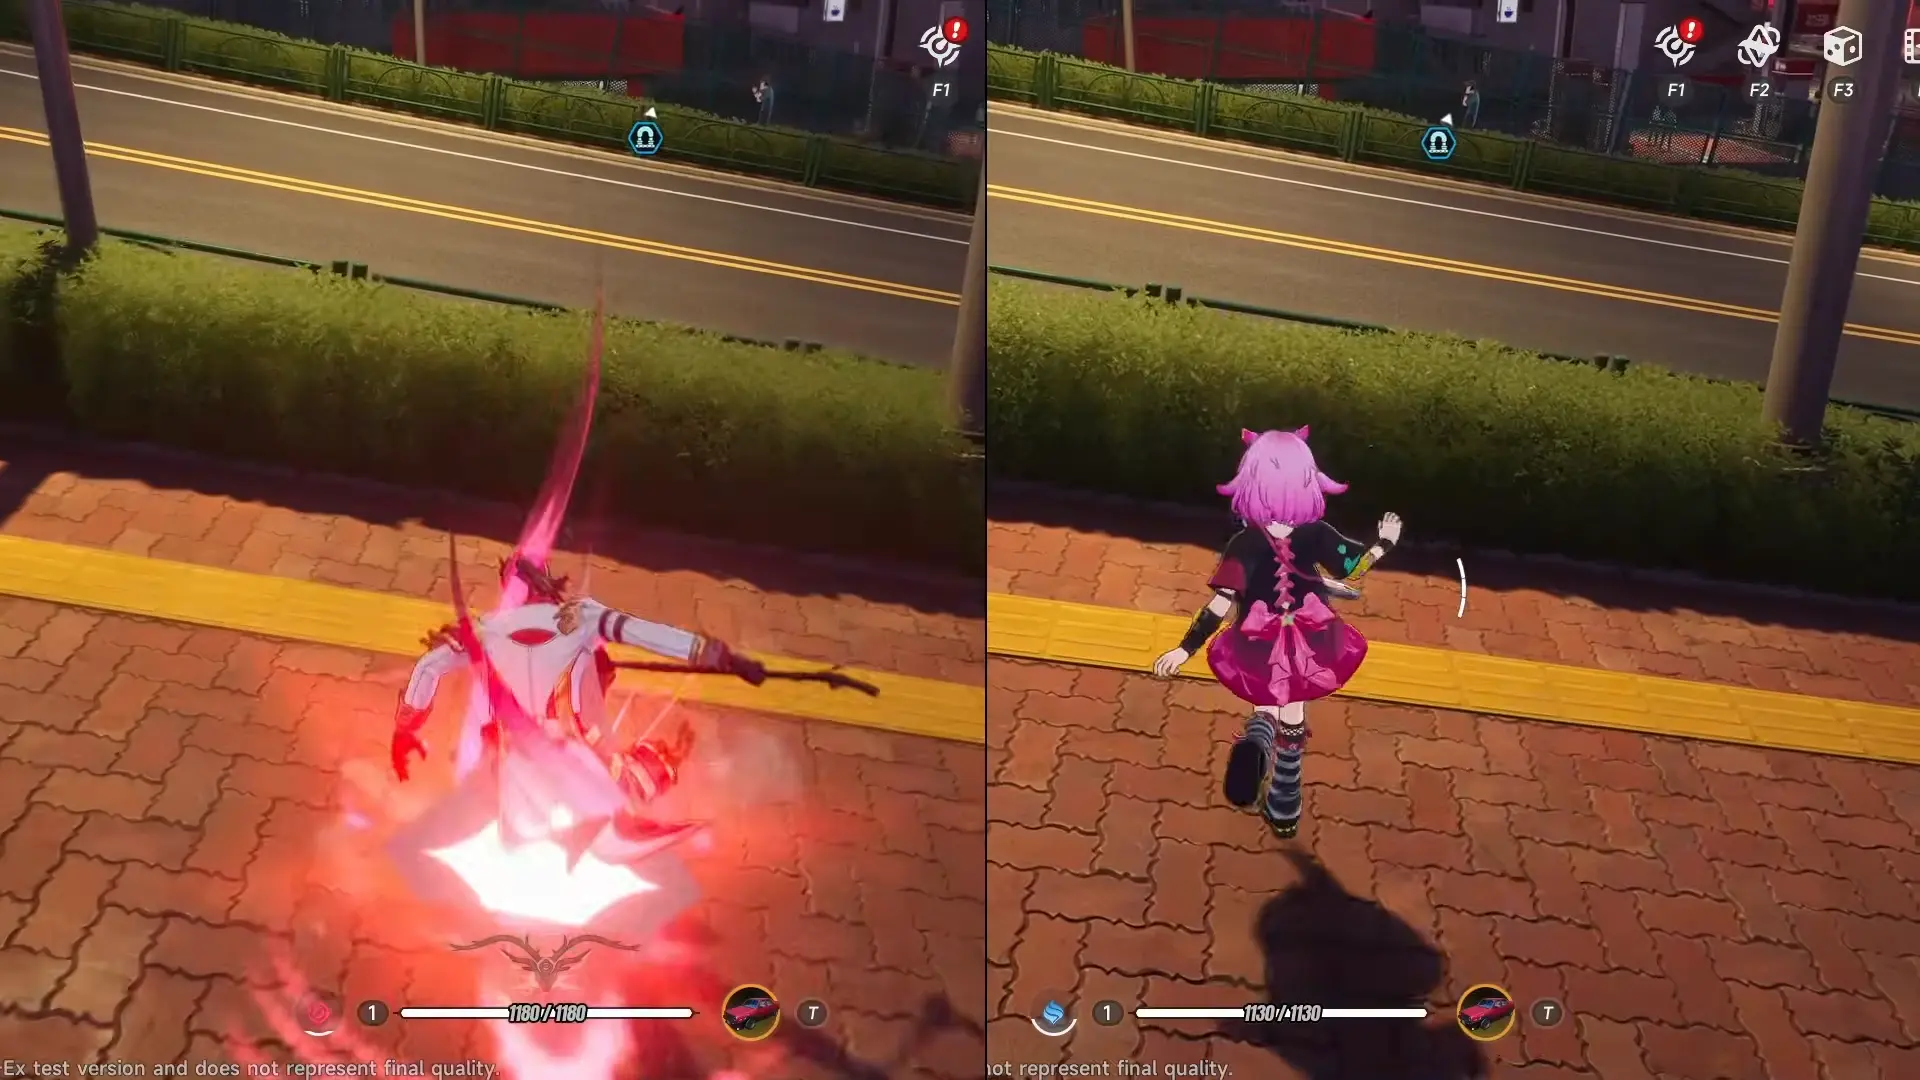
The Critical Dodge & Riposte
Defensive play revolves around a stamina-based dodge system. Observe the "Red Flash" indicator — dodging at the exact moment of the flash triggers a Critical Dodge, granting brief invincibility. Following this immediately with a Basic Attack executes a Critical Riposte: a counter-attack that deals significant damage and serves as a primary tool for shredding enemy stability, transitioning the fight into the Break phase.
The Break Meter & Parrying System
The Break system provides the primary strategic window for maximizing damage. Every elite enemy is protected by a stability layer that must be dismantled to reach their true vulnerability.
Underneath an enemy's HP bar is the Break Meter (the white bar). Once depleted, the enemy enters a Staggered state — rendered immobile and susceptible to a massive damage multiplier. This is the optimal moment to unleash stored Ultimates.
The Five Pillars of Parrying
Parrying is the most efficient way to accelerate a Break. Look for the "Double Red Circle" visual indicator; when the circles overlap, execute your counter.
| Method | Mechanical Advantage |
|---|---|
| Basic Attack | High-risk, standard timing during ground combos. |
| Plunge Attack | Effective for countering ground-based ripples or low-altitude strikes. |
| Skill | Uses ability frames; effectiveness varies by character animation. |
| Swap Normal | A QTE-style Entry Skill triggered by timing a character swap precisely. |
| Esper Cycle | Guaranteed Parry. The premier defensive tool — success regardless of timing precision. |
Successful parrying does more than stop aggression: it provides an Instant Fill to your Esper Cycle meter, bridging the gap between defense and offensive synergy.
The Esper Cycle
The Esper Cycle is the core engine of NTE's depth, facilitating team-based pressure and elemental reactions. The Esper Cycle Meter (100 units) is charged through basics, skills, and the instant-fill reward of a successful parry.
A character's Cycle Rate dictates their role in the rotation:
-
 Mint (Sustainer): 21-point basic + 5-point skill — requires extended field time before a swap is available.
 -
 Zero (Rotation Accelerator): Skill provides a 100-point charge, enabling an immediate 1:1 swap trigger. Use him to force rotations when momentum stalls.
The UI's "Pulsing Circle" signifies a character is swap-eligible. If the meter is full but the circle is not pulsing, you are likely violating the Adjacency Rule of the Elemental Wheel.
Elemental Architecture & Reactions
The Elemental Wheel — comprising Cosmos, Anima, Incantation, Chaos, Psyche, and Lakshana — dictates team synergy. The Adjacency Rule requires characters to be next to each other on the wheel to trigger Esper Cycle reactions.
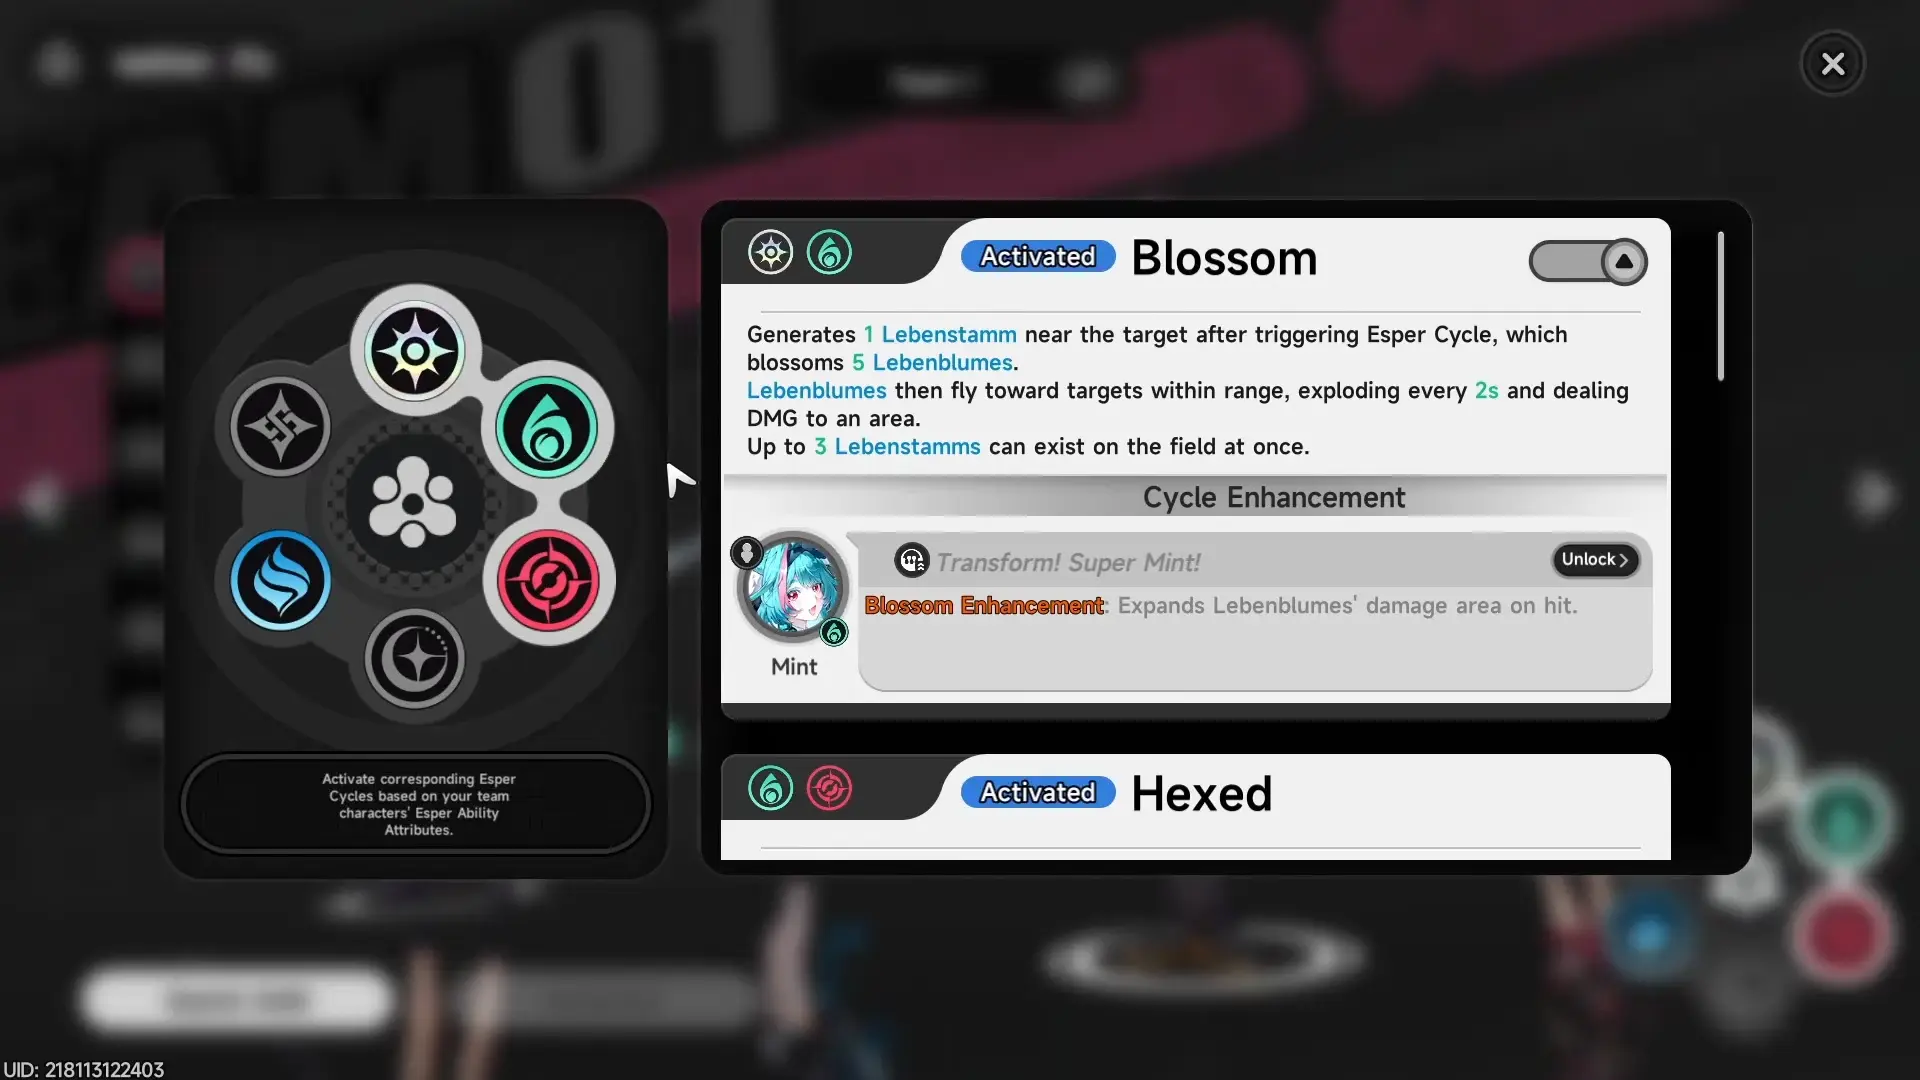
Duo Reactions
| Reaction | Elements | Effect |
|---|---|---|
| Blossom | Cosmos + Anima | Generates Lebanon Blooms for damage over time (DoT). |
| Hexed | Anima + Incantation | High-impact burst damage. |
| Remora / Stain / Nova / Scorch | Various | Foundational triggers for advanced Trio Buffs. |
Trio Elemental Buffs
| Buff | Trigger | Effect |
|---|---|---|
| Charge | Top 3 elements active | +10 Ultimate energy when Lebanon Blooms strike targets affected by Remora. |
| Discord | Bottom 3 elements active | Deducts a % of the target's Break meter when simultaneously affected by Nova and Scorch. |
Analyst's Tip: Leveling character-specific Cycle Enhancements is mandatory for optimization.
Adler 's enhancement applies one of three high-impact debuffs upon Scorch infliction: −20% ATK, −10% ESPER, or +10% Break Efficiency.
Prioritize investments based on bossing utility and elemental coverage.
T0 — Meta-Defining
| Character | Role | Why |
|---|---|---|
| |
Main DPS (Hyper-Carry) | Premier throughput unit. Off-field follow-up attacks maintain DPS uptime during rotations. |
| |
Main DPS (F2P Carry) | Fully free to max via City Tycoon. Independent kit slots into any rotation structure. |
| |
Sub DPS (Insta-Cycler) | The game's only insta-cycler — irreplaceable for bridging Anima and Cosmos team cycles. |
T0.5 — Elite
| Character | Role | Why |
|---|---|---|
| |
Break Specialist | Her passives shred enemy shields — essential for endgame bossing and enabling the rest of the roster to deal unmitigated damage. |
| |
Main DPS (Executioner) | Exceptional bossing ceiling. Power Word rotation mastery yields top-tier single-target results. |
T1 — High Priority
| Character | Role | Why |
|---|---|---|
| |
Support / Tank | Highest utility A-rank. Massive shields + Scorch debuffs fit almost any elemental archetype. |
| |
Energy Battery | Premier energy battery. Enables Esper Cycle efficiency while providing AoE damage. |
| |
Buffer / Support | Accessible low-barrier buffer. Simple switch-in, buff, switch-out loop. |
Recommended Team Builds
Team 1 — Anima (Blossom / DoT)


Use Zero's Skill for an Insta-Cycle to instantly proc Blossom, then swap to Nanally to catch the reaction window with her Ultimate.
Team 2 — Incantation (Discord / Break)


Sync Sakiri's CC before unleashing Baicang's Skill. Daffodill procs Discord for amplified stagger.
Team 3 — Cosmos (Remora / Fons Economy)

Hathor batteries Chiz's Ultimate. Initiate Grain Settlement only at peak market price.
Team 4 — Lakshana (Stain / Consistent DPS)
Maintain Skia's on-field uptime until the Stain reaction procs; use Zero's Skill only when the Esper Cycle requires a reset.
Video Guide
Related Neverness to Everness Resources
Guide
Lacrimosa: Rotation & Team Composition Guide
Master Lacrimosa's dual-stance system, Nightmare stacking, and Discord team rotations in this complete build guide for the definitive Chaos Main DPS.
Guide
NTE x Porsche 918 Spyder Collab: Cost Breakdown and Spending Guide
Full cost breakdown of the NTE x Porsche 918 Spyder collaboration — Fons vs. Annuliths, pity math, mixed pool strategy, and who should actually pull.
Guide
Pre-Patch 1.1 Preparation Guide: Resources, Milestones, and Double-Drop Windows
How to prepare your NTE account for Version 1.1 — clearing endgame modes, prioritizing shops, timing resource hoards, and reaching Hunter Level 45 before the June 26 double-drop event.
News
NTE Version 1.1 "Dreamwalk Corridor" — Maintenance & Update Notes
V1.1 goes live June 3 after maintenance. Claim Annulith ×600 compensation and prepare for Lacrimosa, the Porsche collab, and a full event slate.
News
NTE Nocturne Special Arc Research Program — The Last Rose Details and Pity
The Nocturne Special Arc Research Program launches June 3 with V1.1 Dreamwalk Corridor, featuring S-class Arc "The Last Rose" with a guaranteed 8-pull pity and permanent carry-over.