


































Event Overview
Going, Going, Gone! is a limited-time auction mode where you compete against other players to win lots of collectible items using Gold Shells, the event’s own currency. It is easy to treat this like a straight gambling minigame, but going all-in and busting out on your very first match is the fastest way to waste the event. The mode rewards reading intel and bidding within your means, not reckless all-in bids.
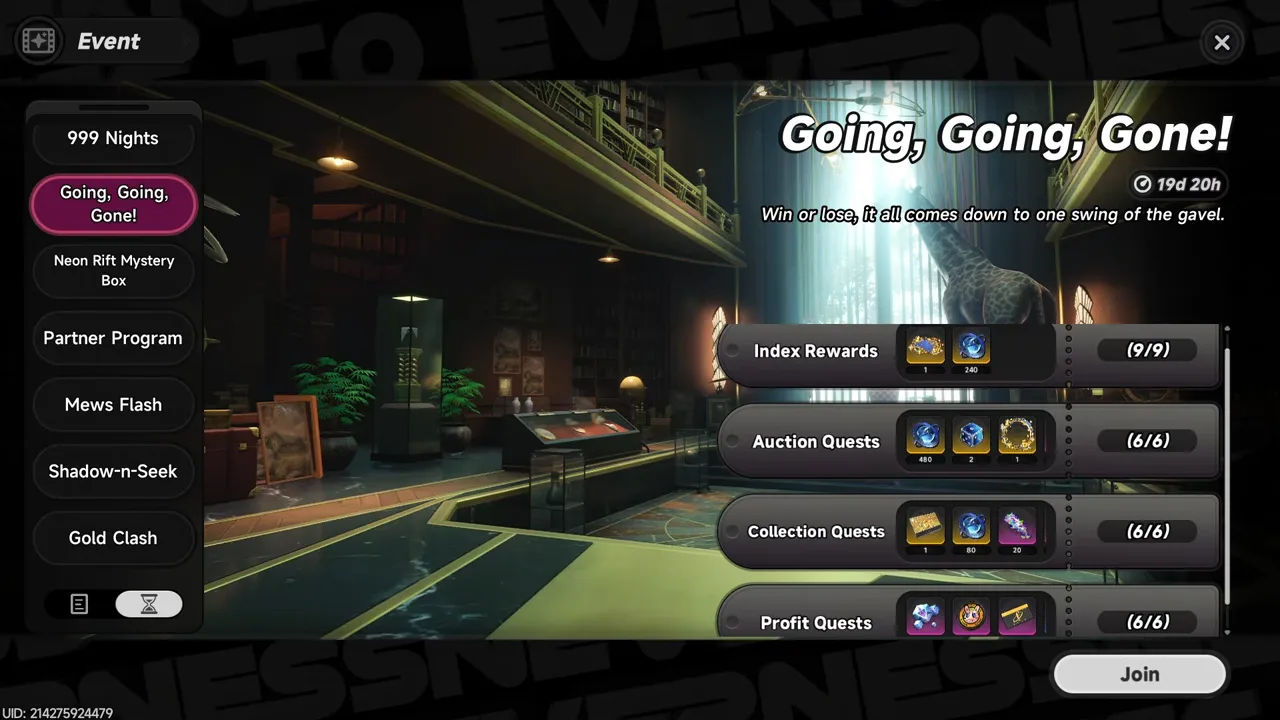
Earning Gold Shells
You can build up your Gold Shell total in three ways:
- Win auctions under true value. When you win a lot, you earn Gold Shells equal to the gap between your winning bid and the true value of the items you picked up. Bid more than the lot is actually worth and you lose Gold Shells instead of earning them, so knowing item values matters more than winning at any cost.
- Collect a cut from other players’ losses. Whenever another player’s winning bid goes negative, you get a passive 10% cut of what they lost. The more other players overpay, the more you earn just by being in the match.
- Display your best items in the warehouse. Your highest-rarity won items can be displayed in the warehouse for passive Gold Shell income per hour, scaled to each item’s rarity.
If your total assets drop below 100,000, you can also claim a small daily stipend of Gold Shells as a safety net. Treat this as a last resort. Getting low enough to need it means your bidding strategy needs work.
Choosing a Venue
Three auction venues are available. The first is free and the best place to learn the mode’s pacing before risking bigger bids. The second and third venues require a minimum asset threshold plus an entry fee, but they open up better quest progress: auction and collection quests are easiest to clear on the first venue, while profit quests come together faster on the second. Index rewards are separate from venue choice entirely, since they come from collecting a set number of item types across your auctions overall.
Picking an Assistant
Before each match, you choose an assistant to help you during bidding. Each assistant has a unique passive skill, and some, like
 Daffodill
and
Daffodill
and
 Hotori
, only unlock after meeting specific requirements.
Hotori
, only unlock after meeting specific requirements.
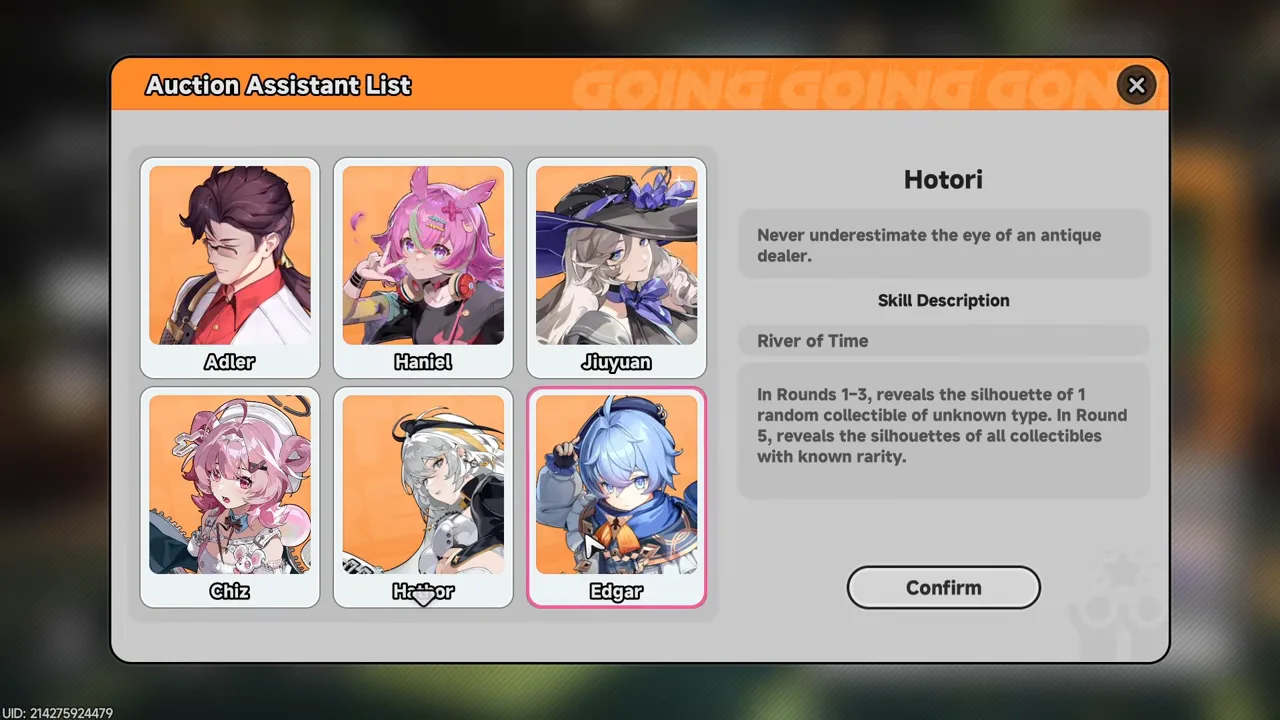
 Edgar
Edgar
’s skill, River of Time, reveals the silhouette of one random collectible of unknown type in Rounds 1 through 3, then reveals the silhouettes of every collectible with known rarity in Round 5. That steady stream of intel makes Edgar a strong default pick for valuing a lot before you commit to a bid.
Devices
Devices are one-time-use consumables that reveal extra intel about the current lot, such as the total value of items in a specific rarity. You cannot stockpile them, so use everything from a purchased set before buying another. The premium general-purpose device set is the most cost-efficient option overall. The higher gold-grade sets look tempting, but since every device is single-use, the extra cost rarely pays for itself.
Auction Gameplay & Round Rules
Each match starts by matching you with other players and rolling a random lot of items, shown in the top-right corner. Items you have not identified yet appear as gray silhouettes, which either means the rarity is still unknown or the item is common enough that its rarity does not matter much. Intel from the auctioneer’s public announcements, your assistant’s skill, and any devices you use will narrow this down over the course of the match.
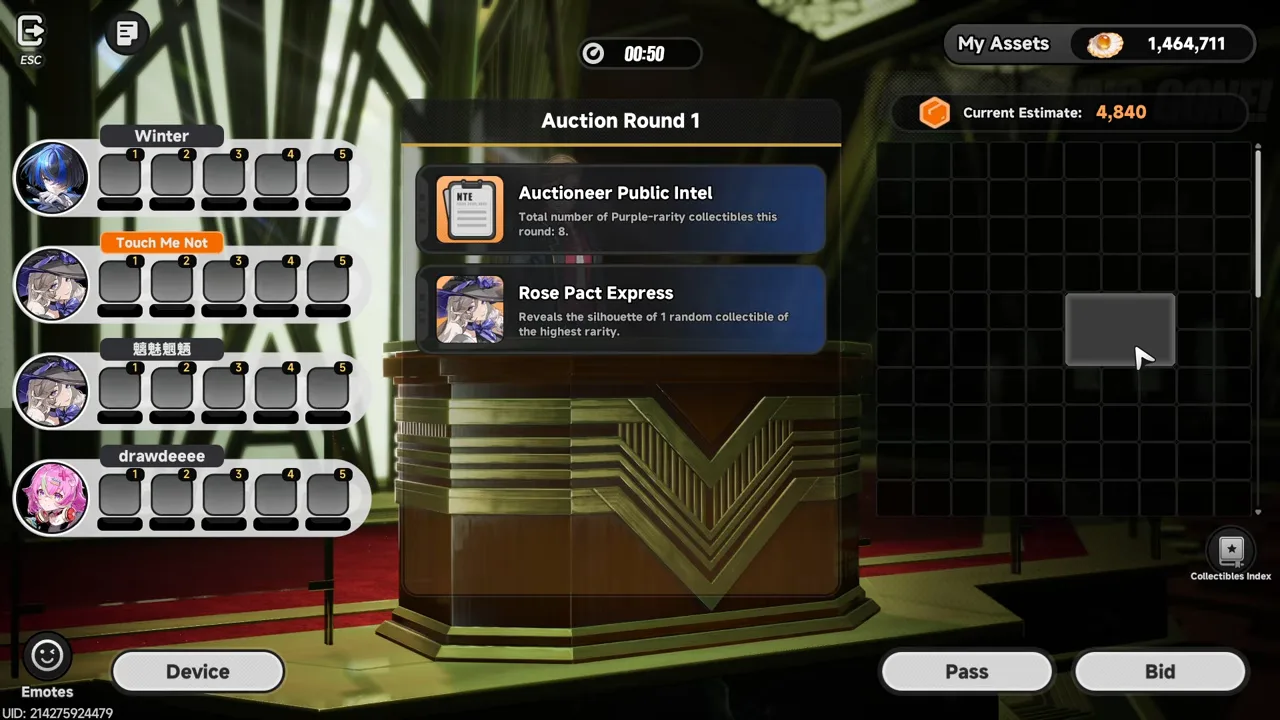
The auction runs five rounds, each giving you roughly 40 to 50 seconds to gather intel and place a bid. Winning a round outright works differently depending on where you are in the match:
- Round 1 — bid more than double the second-highest bid to win the lot immediately.
- Rounds 2 to 4 — bid more than the second-highest bid by the round’s listed margin to win immediately.
- Round 5 — the highest bidder simply wins, no multiplier required.
From Round 2 onward, you can see whether opponents used a device and check its description, which helps you guess what they know and what they are planning. Keep a calculator handy once bidding wars get tight. The math matters more than gut feel.
Bidding Strategy Examples
In one run, public intel revealed eight purple-rarity items in the lot, and the assistant’s skill flagged a single item taking up six inventory slots as the highest rarity in play, worth an estimated 240,000-plus Gold Shells on its own. A device confirmed the full gold-rarity value of the lot at 270,000. Based on that, the opening bid was set at 500,000. An opponent matched it closely, so both sides raised cautiously through the middle rounds. By Round 4, one opponent was sitting on a 600,000 bid, so the winning play was to multiply that by 1.1 and add another 15,000 on top, clearing the round’s required margin by about 1,800 Gold Shells and taking the lot for more value than expected.
In an earlier run, a gold-rarity valuation device showed 650,000 in total gold-rarity value, so the opening bid matched that number to stay safe. An opponent noticed the device use and countered with 700,000. Knowing the exact gold-rarity total still gave the edge, since holding steady near the original bid range through Rounds 3 and 4 signaled that pushing further was a losing move. The opponent backed off in Round 5, securing the win, though the margin was thin since the winning bid was already close to the lot’s real ceiling.
Final Tips
Learning the round-by-round win conditions and building a habit of checking public intel and device readouts before every bid will improve your odds by a wide margin. Even with good information, outcomes still come down to what your opponents decide to do in the moment, so treat every match as its own case and have fun with it.
Video Guide
Related Neverness to Everness Resources

Guide
Blackbird: Rotation, Teams & Awakening Guide
How Blackbird's Malice, Forsaken Feather and Witch of Deliverance fit a rotation, the Nova team that suits her best, her build, and which Awakenings and signature Arc are worth pulling for.

Guide
Last Bus Out and Perfectly Common Dreams: Duskmoor Anomaly Commission Walkthrough
How to trigger and solve the two new Duskmoor Anomaly Commissions from Version 1.4: the Wayward Line bus and the Dreamaway Pillow dream.

Guide
Lilliput in the Looking Glass: All 3 Escape Routes
Walkthrough for the Pukaland Anomaly Commission Lilliput in the Looking Glass: the bedroom, bathroom and kitchen escape routes and every step of each.

News
NTE 1.4: Blackbird, Pukaland, Porsche and a Free Code
Version 1.4 lands September 30 with limited S-class Blackbird, a Lacrimosa rerun, the Pukaland theme park, a Porsche collab and 600 Annulith of compensation.

News
NTE Version 1.4 Preview Special Program Recap
NTE's Version 1.4 "For Whom the Verses Mourn" preview show aired, with a follow-and-quote giveaway for Fabricated Dice running through September 18.