Summary
Biography
Basic info
Stats
Stats are calculated at lvl , rank

Rank Up Costs
Upgrade materials and kane cost.
Total Costs
Total Kane: 0
Featured Events
No featured events available for Hinagiku Akiba.
Pros
Cons
Review
Overview
Hinagiku Akiba is a high damage breaker with tanking and debuffing rolled into her kit. There is no situation where she’s not good, and many situations where she’s extremely good. Her break damage is massive, with break speeds averaging around Yo levels in the SHARK test (Yo can break a bit faster with good RNG though). Her damage output is high even when not built for it; when built for it, she can easily hit 100k+ PER TICK on her charge punch (yes, 300k hits every 1.5 seconds). Her utility is also amazing; a full screen 30 second 30% defense shred at only 1 bar, on top of applying Attention (yes, this actually matters now). She has good performance as an AI teammate, being the only character currently available that can DEFLECT enemies thanks to her charge punch. However, her optimization when manually operated is genuinely absurd thanks to a mix of perfect timing her charge punch to get more out, counterattacking for more stun, and dash cancelling to recover stamina faster. There’s genuinely too much to cover for one character so we’ll continue throughout the guide.
TLDR: She’s VERY good and arguably the best character in the game overall.
Primary Attack
Hina has a 3 stage attack, with each stage being chargeable (holding down the primary attack button) to deal more damage and generate 60 Ki Fist stacks at max charge. Her first two punches are jabs, while the third attack is an uppercut. Regardless of if previous stages were charged for any amount of time you can charge the next attack. For example, doing 2 uncharged primaries (the jabs) then holding down the button will charge the uppercut punch. While charging you’ll see and hear cues that indicate the charge level; once you hear a “ding” and see the gauntlet flash gold you’re at max charge and should release the primary attack button to do a massive punch (AKA a max charge punch) that does 3 instances of damage. From here on out, we’ll be calling uncharged primary attacks (AKA how everyone else’s primary attack works) “Uncharged Punch” and charged primary attacks “Charged Punch”. While charging, getting hit by any deflectable attack (AKA anything physical, including projectiles) will cause a deflect to occur (this does NOT deal any damage or break damage); pressing the primary attack button after this will give you an immediate max charge punch. This is a huge part of Hina’s damage output and executing max charge punches as soon as possible is going to be a big part of optimizing her DPS. More relevantly to most people, this can also be used to get very easy deflects against enemies. However, because the deflect doesn’t do any break, it’s strictly worse than a counterattack itself. But hey, you didn’t pull this cheat code of a character to let that stop you, right?
Secondary Attack
Hina leaps towards her target and slams down with her fists doing 3 damage instances, generating 60 Ki Fist stacks on activation. This move is technically her best tool for breaking enemies quickly when spammed but is obviously worse than similar characters (Kazuki, Senju, Koishi). It has a few benefits to being used though. Most obviously is its ability to track enemies; for some reason Hina can outright curve in mid air to hit her target even if that target changes. It moves her farther than her charge punch does allowing you to get back into position if your target runs off. It can be freely cancelled into her counterattack for even more optimal breaking (and particularly useful with her T3 dupe if you have it, allowing for extremely high bursts of break damage). Finally, if you have her T5 it becomes an actually respectable damage option (although not by THAT much). With that being said, for the stamina used it’s generally not worth using damage wise and should be reserved exclusively for either breaking or getting that last bit of charge needed to perform her strategy skill.
Counterattack
Deflect counterattack (can only deflect physical attacks). Standard counterattack. With her T3 she gets to do a max charge punch after a successful counterattack which is insanely useful.
Strategy Skill
Requires 300 stacks of Ki Fist. Hina rushes forward a short distance before doing a golf swing with her gauntlets. With a currently unmatched 1200 break value, this is the strongest break move in the game. However, you have to fully charge her unique meter to use it. This does make her break speeds a bit slower than a dedicated breaker character, but it does allow you to force a break very quickly. More interestingly, you can use this when the enemy’s break bar recovers to do a huge chunk to it allowing for rapid back to back breaks with the right team. It also just does a lot of damage; 3000% is just under Enoki’s total 4000%. Becomes VERY spammable through her T1 and T5, letting her even the playing field vs dedicated breakers if you invest into her dupes.
Ultimate Skill
Requires Tension Phase 1, costs 100 Tension. Hina does a cute heart animation before applying a 30% defense reduction and Attention to all enemies for 30 seconds. This alone would’ve been enough to warrant her a top tier position and makes her the premiere defense shredder (sorry Jio, but at least you have a new job now as a gardener). There’s not a lot to say about this here, it’s pretty much exactly what it says it does.
Chain Skill
ROCKET PUNCH! Yeah other than that it’s just an average chain skill.
Combos (If Operating)
Hina has a ton of options for her rotation on top of different options when reacting to how the enemy is attacking. Because I’m biased as hell I will be listing ALL of them.
- To maximize DPS, you’ll want to do 2 uncharged primaries (like a normal character's primary attack string) then max charge her 3rd primary (AKA the uppercut). This is because charging her jabs reduces our total DPS compared to squeezing out more uppercuts. We skip using secondary here since its damage is very unimpressive for its casting time and stamina cost. Strategy skill should be used when it's available (ideally immediately following a max charge uppercut). However, this combo is very vulnerable to being interrupted; any attack that forces you to counterattack or charge deflect will reset you back to the start. And unlike Enoki, we have no way to skip to the good part of this attack string. As such, this string is mainly used in either telegraphed attack phases where we have the time to execute it OR if the boss is stunned via breaking.
- A more realistic scenario is spamming max charge punches (whether manual or not) into secondary attack. This does less DPS but significantly more break damage, with an additional benefit of safety. If you have the stamina/the time, opting for manual max charge punch -> secondary then counterattacking during the secondary allows for even more break damage. This will also charge her strategy skill faster, unlike the optimal DPS rotation which loses out on multiple charge punches and secondaries.
- Another option is eschewing manual charge punches in favor of secondary attack spam and counterattack. This lets you get her strategy skill charged the fastest irrespective of the enemies aggression, but isn’t great for immediate damage output or breaking. Main use case for this is setting up a quick back to back break (which she is very good at facilitating) by breaking with her strategy skill ready to go before the boss recovers, then opening with a strategy skill after the boss recovers to cause a huge chunk of damage to their break bar and quickly causing a second break. This idea is best used with T3/T5 as you can easily get max charge punches through counterattacks.
Tips
- You can technically do a mini charge for each of her primaries to do a smidge more damage, but keep in mind that some situations have very strict time limits in which you can squeeze out her attacks. Every boss has a general set/series of “attacks” that they will do where you can figure out an optimal rotation per fight.
- Track your stamina usage when doing her break heavy combos! If you run out of stamina her lengthy recovery animations can leave you open to being hit.
- Learning when to release manual max charged punches is very important for doing her maximum DPS. Listen for the ding and watch her gauntlet for the gold flash.
Potential
- Fighting Instinct: Levels up her skill’s ranks. As usual, this is the normal dump option for improving her damage.
- Survival Instinct: Increases Max HP, Defense, and Max Stamina. Another dump option. Better for the AI than for you.
- Coordination: Increases Support. Useless for Hina.
- Passive 1: Increases action DMG of a fully charged Primary Attack. A massive boost to her damage. At max rank it’s 720% for max charge punches and 1080% for her max charge uppercut. Only works on max charge though, so make sure to fully charge!
- Passive 2: After ulting, fully charged Primary Attacks cause an AoE attack around Hina. Don’t sleep on this, this is actually pretty good. Every max charge punch will generate an AOE pulse around her for a decent amount. Obviously very good when fighting multiple enemies or even against a single enemy if you’re getting lots of max charge punches off. Best if you’re ignoring her counterattack in lieu of just charge deflect spamming. Her passive 1 will deal more overall damage though, especially with Fighting Instinct points. Will likely be at its best when clearing out mobs in Fractal Vice or farming Rifts, so put some points into it for that and remove them when facing bosses.
Dupes
Hina’s signatures are COMPLETELY optional for her supportive capabilities. They only serve to either improve her break damage or her DPS. If you just want Hina to be a tank/support, do not consider dupes. WIth that in mind, let’s continue.
- Akiba Secret Kenjutsu: Dedication: Increases the amount of Fist Ki from Primary/Secondary by 15. Successfully deflecting while charging her Primary Attack grants 25 Fist Ki.
Lets you get more strategy skills out for more breaking. Very useful for double break setups. - Akiba Secret Kenjutsu: Gentle but Firm/Akiba Secret Kenjutsu: Through Thick and Thin: Gain 2/3 Potential Gems.
Potential Gems are very useful for her as she gets a lot of damage off them. Read her Potentials section if you want to learn more. - Akiba Secret Kenjutsu: Forewarned is Forearmed: After a successful Counterattack her next Primary Attack is fully charged.
I consider this her best dupe, despite how unimpressive it sounds. Being able to mix in counterattacks is very important for her breaking, and more max charge punches is very good for her DPS AND breaking. With correct rotations you only stand to gain from this, and gain a lot you do. - Headfirst: After a fully charged primary attack, immediately performing a secondary attack causes it to do 2x Action DMG and increase its Fist Ki generation by 50.
This READS crazy but Hina’s secondary does not do a lot of damage and this isn’t going to save that. Its main benefit is making it generate (alongside T1) a whopping 125 Ki Fist charge (nearly half the required amount) letting you really spam out her strategy skill. Very useful for her breaking speed, making her competitive with Kazuki and Senju.
Operating Character
If you want to DPS, you should probably pilot her yourself. The AI isn’t bad, and it’ll hold the fort down tanking wise, but Hina’s optimal DPS rotations are far too specific and intricate for the AI to perform well. As a support, Hina is acceptable whether piloted or not; moreso a matter of if you want the absolute fastest breaks or not.
Conclusion
Hina is THE best character in the game right now, full stop. She simply does EVERYTHING other than healing at an S tier level when properly built. She has no realistic flaws that can’t be easily played around, she is extremely forgiving for any skill level, she has a ton of skill expression for players willing to master her, and she actually has good dupes for future investment. What more needs to be said?
Synergy
Characters that work well with Hinagiku AkibaHina has a LOT of team options and what you run depends on who you want to run her with.
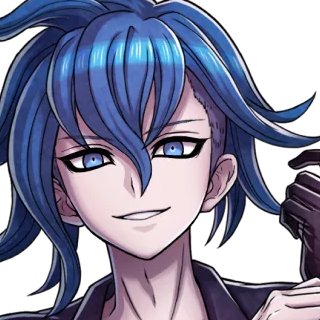 Kazuki AoyamaKazuki will always be a good option. His break speed, AI friendliness, and decent damage output is always helpful. His synergy with his signature card is also very useful for hitting 100% crit rate easily.
 Jio TakinogawaDefense reduction stacks just fine and Jio enables one of the best cards in the game now (Full Bloomed Cherry Blossoms). His supplementary break is also very useful.
 Hyakuichitaro SenjuWith the recent changes AI Senju is significantly more usable, providing decent break speeds from that position on top of a very strong shield to reactivate Things to Hold On To. I say reactivate because Senju’s biggest buff is actually the existence of the new substat Shield Expansion, which removes his biggest problem compared to Kazuki for speedrun strategies by activating Things to Hold On To immediately, and is one of the few characters who can refresh shields.
 Eiji TodorokiDon’t let Todoroki’s Attention debuff fool you, this is a very usable combo. Todoroki’s ultimate finally has a character who can truly utilize its buff to its full extent, especially if you have T5. Throw some ult efficiency lines on Todoroki to keep in phase 2 to keep her signature card active and you have a very solid option.
 Miu JujoMiu’s new best friend. Bombard enabler, highest defense shredder in the game, can easily line up Backstab+ for her crystal build, and good break speeds. What more could Miu want (other than a Jio for Cherry Blossoms)?
 Tsuruko SembaOur lifebar melting bookworm loves having a tank on the team, but it was rarely worth sacrificing the slot for one. Now she has an amazing teammate in Hina, who IS actually worth the slot. Recommended to run Ult Effiency on Hina to ensure Tsuruko can retain EX phase IF you’re running Tsuruko’s signature card.
 Yutaka GotandaThe farming king has only gotten better thanks to having 2 new bosses he destroys (Tentacles and Big Tentacles), and Hina lets him maximize his damage output very well. Still situationally useful, but man does he work.
 Tsuki IrohaWhile it remains to be seen if this is the case in the new Fractal Vice (check our tier list post Fractal Vice release) Iroha is still a phenomenal nuker that can drop bosses the instant you get 2 bars. And just like Miu, Hina enables Bombard very well.
Best Team Composition
Party building guide for Hinagiku AkibaShredding Defense Like Paper
Hina substitutes over Miu for an alternate take on nuking. Kazuki exists to help break and enable his signature, Jio shreds defense and fuels Cherry Blossoms, and Hina acts as the carry. Better for longer fights where farming Cherry Blossoms isn’t a damage loss/time killer.
Miu National
A new take on the best team, and possibly the best team in the game if you can stack Cherry Blossoms. Jio and Miu set petals up FAST once you get to phase 2, and Hina can either function as a carry alongside Miu OR act as a tank for Miu to safely run around and grab them. As above, best for longer fights.
One Punch Hina
Subs out Jio for Todoroki to maximize our primary attack damage. Kazuki also appreciates getting to spend tension on his own ult, and also likes Todoroki’s ult buff for his secondary attack.
Are you tired of this team yet?
As per usual, the F2P team everyone can run. And as usual, a great team in every situation. Passive 2 Iroha is still used here regardless of if you want Hina to be a DPS or not.
AI Senju REAL
Senju is a F2P Kazuki here. While the team lacks a powerful ult nuke, that's not a big problem when you have Hina punching for 200k+ per uppercut. Between Hina’s ult and Todoroki’s ult you’ll generally maintain enough uptime to not overcap on tension, but Senju’s ult is perfectly fine to drop for a bit of extra damage and invulnerability.
Best Compatible Monsters
Best Compatible Monsters for Hinagiku AkibaDPS Build (Manual Only)
Sub Stats: Her best sub stat by FAR is the new Of Sword and Spear+, providing 60% increased damage (and yes, it DOES stack) for 30 seconds after a deflect. After that it’s everyone’s favorite, ol’ reliable Crit Damage IV+. Finally, thanks to the all new THIRD GOLD LINE, ATK IV+ is our best option for additional damage. Crit Rate IV+ is also acceptable if you aren’t hitting 100% off Tension Cards. Iron Fist of Doom III is also good since her damage primarily comes from her primary. The AI’s DPS is not worth consideration for a build. Just don’t. It doesn’t even know how to punch after deflecting.
Patimon sets
- 2-piece: Increases Attack by 15%.
 Attacker
Patimon stats
 Of Sword and Spear
 Critical DMG Multiplier
 Critical Rate
 AttackIron Fist of Doom
Breaker/Support Build (Manual)
Sub Stats: Of Sword and Spear+ is still her best choice overall when manually controlled. Since damage isn’t of concern here we’ll want Max Stamina to get out more of our break rotation without having as much downtime. Final stat is up to you; Counterattack Stamina Reduction, defensive options like Max HP, Defense, Regenerate, or Shield Expansion, or even damage via Crit Damage, Crit Rate, or ATK.
Patimon sets
- 2-piece: Increases Attack by 15%.
 Attacker
Patimon stats
 Of Sword and Spear
 Maximum Stamina
 Counterattack Stamina Cost Reduction
 Maximum HP
 Defense
 Regenerate
 Shield Expansion
 Critical DMG Multiplier
 Critical Rate
 Attack
Breaker/Support Build (AI)
Sub Stats: When in the AI’s hands, Hina will do significantly less max charge punches than the player making damage less valuable. Instead we want to focus on what the AI is GOOD at, which is deflecting attacks and breaking. As such, our main stats will be Max Stamina and any of Max HP, Defense, Regenerate, or Shield Expansion.
Patimon sets
- 2-piece: Increases Attack by 15%.
 Attacker
Patimon stats
 Maximum Stamina
 Maximum HP
 Defense
 Regenerate
 Shield Expansion
Best Tension Cards
Best Tension Cards for Hinagiku AkibaWith the addition of the third gold substat line, the tension card lineup recommendations have greatly changed. With that said, the classic Full Party + Strike Zone is always usable, and Things to Hold On To is still the best crit rate card in the game. As a DPS, her best card is unsurprisingly her signature card Professional Maid, providing 120%-200% (yes, her card dupes are HUGE) primary attack damage. All Out works surprisingly well for her optimal DPS rotation thanks to her very generous stamina recovery from her charge mechanic. Her chibi card, Punishing Attack, is a decent self Attack boost provided you have a Hegemony enabler. Iron Moe Punch is her 1* card and works as a budget version of her signature if you don’t want to pull for it, but also requires Hegemony to remain competitive (and you need to get a Strategy Skill out). Tiger!, another new 1* card, provides a very good primary attack boost if you’re on an Attack Role set (Attacker, Berserker, or Gladiator) for a very easy requirement. If paired with Jio, Full-Bloomed Cherry Blossoms (the drop from Neo Chiyoda’s boss) is the best source of crit rate and crit damage provided you can spend time gathering the petals. Cross Counterattack completely removes her stamina issues since her charge punches ARE considered counterattacks for the sake of its stamina recovery.
For more supportive options, her most obvious synergy is with Bombard, being one of the few characters with a 1 bar ult. She’s also the best abuser of the all new Rejection Impulse card, which lets her function as a tension battery when combined with any Hegemony activator (most notably the battle pass card Cornerstone of Supremacy). Hegemony is at its best it has ever been, so cards like Fist of Atonement, Light Tempo, and previously mentioned cards like Iron Moe Punch and Tiger! are good options to consider.
 All Party Members
 All Party Members
 All Party Members
Night Time Ponder
Maximum 3 stacks.
Increase Critical Rate by 10% for each stack.
When under [Night Time Ponder], each time an Additional Attack hits, stacks will increase.
 Characters: Conditions Met
Perfectionism
Maximum 2 stacks.
Increase Primary Attack DMG Multiplier by 100% for each stack.
 All Party Members
 Characters: Conditions Met
![]() [Hegemony]
[Hegemony]
Target a specific character infinitely. This effect cannot be overwritten, and has higher priority over [Attention]. When an enemy under [Hegemony] attacks the targeted character, damage is reduced by 5%. If the character targeted with [Hegemony] is knocked out, the effect will be removed.
 Special Condition
[Attention]
Enemies granted Attention will prioritize attacking the character who granted them the effect.
![]() [Hegemony]
[Hegemony]
Target a specific character infinitely. This effect cannot be overwritten, and has higher priority over [Attention]. When an enemy under [Hegemony] attacks the targeted character, damage is reduced by 5%. If the character targeted with [Hegemony] is knocked out, the effect will be removed.
 Characters: Conditions Met
Based on the number of enemies granted [Hegemony], further increase Primary Attack DMG Multiplier by 12%.
![]() [Hegemony]
[Hegemony]
Target a specific character infinitely. This effect cannot be overwritten, and has higher priority over [Attention]. When an enemy under [Hegemony] attacks the targeted character, damage is reduced by 5%. If the character targeted with [Hegemony] is knocked out, the effect will be removed.
 Special Condition
Faded Blossom
Maximum 100 stacks.
Increase Critical Rate by 0.5% and Critical DMG Multiplier by 1.5% for each stack.
 Characters: Conditions Met
 Characters: Conditions Met
 All Party Members
![]() [Hegemony]
[Hegemony]
Target a specific character infinitely. This effect cannot be overwritten, and has higher priority over [Attention]. When an enemy under [Hegemony] attacks the targeted character, damage is reduced by 5%. If the character targeted with [Hegemony] is knocked out, the effect will be removed.
 Special Condition
[Attention]
Enemies granted Attention will prioritize attacking the character who granted them the effect.
![]() [Hegemony]
[Hegemony]
Target a specific character infinitely. This effect cannot be overwritten, and has higher priority over [Attention]. When an enemy under [Hegemony] attacks the targeted character, damage is reduced by 5%. If the character targeted with [Hegemony] is knocked out, the effect will be removed.
 All Party Members
![]() [Hegemony]
[Hegemony]
Target a specific character infinitely. This effect cannot be overwritten, and has higher priority over [Attention]. When an enemy under [Hegemony] attacks the targeted character, damage is reduced by 5%. If the character targeted with [Hegemony] is knocked out, the effect will be removed.
 Special Condition
[Attention]
Enemies granted Attention will prioritize attacking the character who granted them the effect.
![]() [Hegemony]
[Hegemony]
Target a specific character infinitely. This effect cannot be overwritten, and has higher priority over [Attention]. When an enemy under [Hegemony] attacks the targeted character, damage is reduced by 5%. If the character targeted with [Hegemony] is knocked out, the effect will be removed.
