


































Introduction: The Incantation DPS With Two Bodies
 Zankou
is the most mechanically dense main damage dealer in the roster, and she is also one of the easiest to actually execute once the pieces click into place. She is an Incantation unit built around a Gas Arc, and her damage arrives through three separate channels at once: direct Incantation hits, damage over time, and Follow-up Attack damage. That third channel is what makes her team building so open, because Follow-up Attack scaling opens Anima line-ups on top of the Chaos partners a pure DoT carry relies on.
Zankou
is the most mechanically dense main damage dealer in the roster, and she is also one of the easiest to actually execute once the pieces click into place. She is an Incantation unit built around a Gas Arc, and her damage arrives through three separate channels at once: direct Incantation hits, damage over time, and Follow-up Attack damage. That third channel is what makes her team building so open, because Follow-up Attack scaling opens Anima line-ups on top of the Chaos partners a pure DoT carry relies on.
Core Identity
- Element: Incantation
- Recommended Arc: Gas
- Roles: Main DPS, DoT, Follow-up Attack
- Primary reactions: Scorch and Hexed
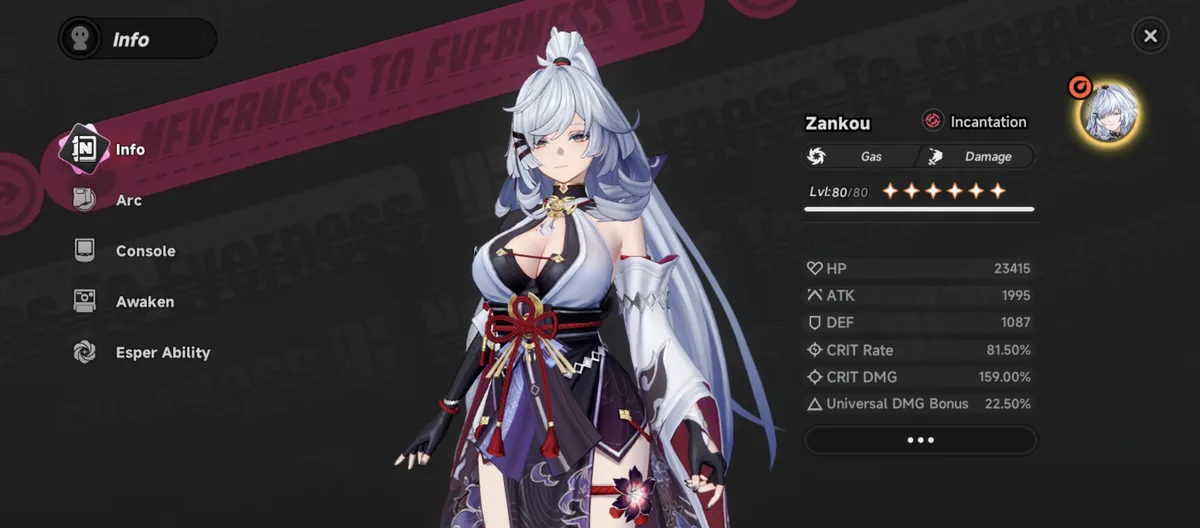
Everything in her kit revolves around a form switch. Zankou starts every fight in Reality Form and moves into Illusion Form through her Redirect Skill, and each form gives her a completely different attack string, a different buff, and a different way of feeding her damage over time.
Reality Form and Illusion Form
Her Basic Attack is six abilities wearing one button, and which one comes out depends entirely on the form she is in and whether you tap or hold.
| Attack | Form | Input | What it does |
|---|---|---|---|
| Wildfire | Reality | Tap, up to 5 hits | Incantation DMG, pulls targets in on the 5th hit, grants Hunt |
| Flickering Shadow | Reality | Hold during the 1st or 2nd stage of Wildfire | Fast Incantation burst that skips the rest of the string |
| Nightmare Waltz | Illusion | Tap, up to 4 hits | Incantation DMG, 1 stack of Heartwrench per hit, pulls in on the 3rd hit, grants Delusion |
| Moonfall | Illusion | Hold during the 1st or 2nd stage of Waltz | Incantation DMG plus 1 stack of Heartwrench |
| Broken Twigs | Both | Basic Attack while airborne | Area plunge that gains up to 100% bonus damage from fall height |
| Voidstep | Both | Basic Attack after a Critical Dodge | Critical Riposte that deals Incantation DMG and reduces Break |
Two details in that table carry most of her ceiling. Nightmare Waltz counts as Follow-up Attack DMG, and every Waltz hit spreads up to four DoT effects from the target to every enemy in the area, including the original target. Moonfall counts as Follow-up Attack DMG as well, which means her entire Illusion Form attack chain benefits from Follow-up Attack buffs.
The Three Buffs
| Buff | Source | Effect |
|---|---|---|
| Hunt | Wildfire, Reality Form | Personal damage bonus while she fights in Reality Form |
| Heartwrench | Nightmare Waltz, Moonfall, Redirect Skills | DoT dealing Incantation DMG every second |
| Delusion | Nightmare Waltz, Illusion Form | Raises the Crit DMG of DoT damage across the team |
Delusion is the buff that extends her Illusion Form window into a party-wide gain, and it is also the buff her first Awakening turns permanent.
Redirect Skills: Sanguine Dash and Soulcross
Her Redirect Skill is the form switch, so it changes name depending on where she currently stands.
Sanguine Dash fires from Reality Form and moves her into Illusion Form. After the 4th or 5th stage of Wildfire, or after Flickering Shadow or Voidstep, it upgrades into an enhanced version that hits far harder, applies Heartwrench, and triggers Disarray, which strips a large amount of Break from every enemy in a wide area. Casting it from Reality Form also delays the removal of Hunt, so the buff survives the transition.
Soulcross fires from Illusion Form and sends her back to Reality Form. Shortly before Illusion Form runs out, it upgrades into an enhanced version that deals heavy area damage, applies Heartwrench, and triggers Oblivion — the effect that activates her second Ultimate. All Soulcross damage, enhanced or otherwise, counts as Follow-up Attack DMG, and casting it delays the removal of Delusion.
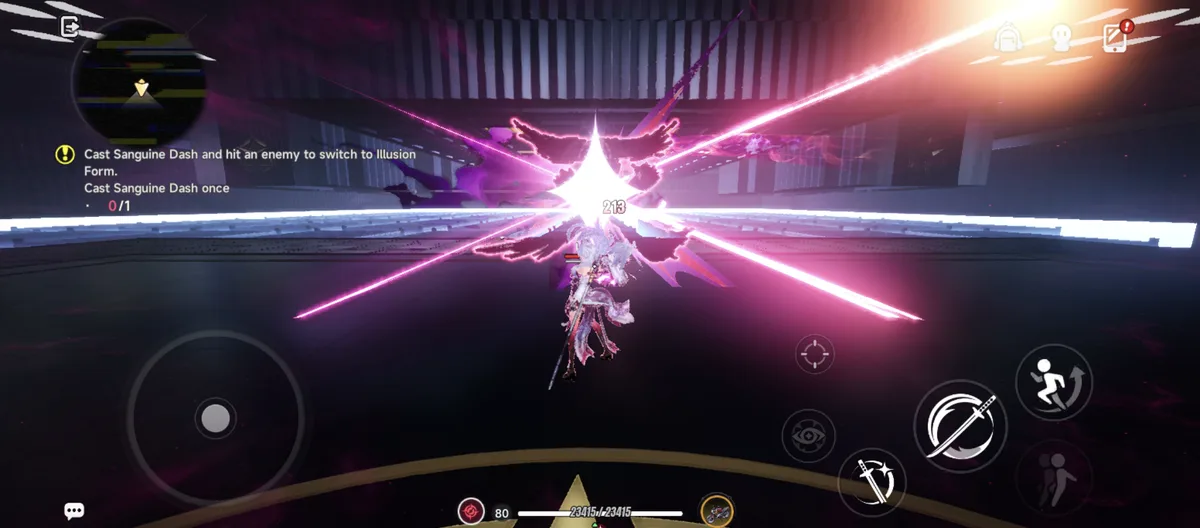
Illusion Form ends when Soulcross or Bloodfeast Reverie is cast, when its duration expires, or when Zankou leaves the field. One warning applies to both skills: if the cast is interrupted before it completes, the form switch is cancelled entirely and you lose the window.
Timing rule: always land the enhanced Soulcross before Illusion Form expires. Letting the timer run out costs you Oblivion, and Oblivion is the only way into her second Ultimate.
Two Ultimates: Inferno Flamenco and Bloodfeast Reverie
Zankou carries two Ultimates on the same button, and the game decides which one comes out.
Inferno Flamenco is the standard cast and becomes available once Ultimate Energy is full. Bloodfeast Reverie becomes available when Oblivion fires from the enhanced Soulcross, and it takes priority whenever it is active. Its damage counts as Follow-up Attack DMG and it applies Vile Ash to enemies in a large area, a DoT dealing one instance of Incantation DMG per second for 30 seconds and stacking up to 10 times.
The payoff sits in the window right after. Once Bloodfeast Reverie lands, you get a short period in which one enhanced Inferno Flamenco can be cast without spending any Ultimate Energy at all. Let that window close and the free cast disappears, so the two Ultimates should always be chained back to back at the end of a rotation.
Passives: Silent Sunset and Crimson Reverie
Her two passives are what pull her into Scorch teams and what let her fill her Esper Cycle on demand.
Silent Sunset raises the Scorch cap to 3 stacks and turns every ally DoT into her own. For each DoT an ally inflicts on a target already afflicted with Scorch, Zankou applies another stack of Scorch, and the new stack overwrites the damage, type, and duration of the existing one. Scorch applied this way cannot trigger the passive again, so the loop stays bounded, and the practical result is that the more DoT applicators sit beside her, the faster her Scorch ramps.
Crimson Reverie sets her Cycle Energy to 100 on entering battle, with a 30-second cooldown and a hard limit of one trigger per battle. It also raises her Cycle Intensity by 100 for as long as she is on the team. That second half is easy to skim past and it is the more important line: Cycle Intensity decides whose stats the Scorch reaction damage is calculated from, so the bonus keeps that damage calculated from Zankou’s own investment. She joins
 Zero
as the second unit in the game who can fill the Esper Cycle instantly, with the difference that Zero can do it repeatedly.
Zero
as the second unit in the game who can fill the Esper Cycle instantly, with the difference that Zero can do it repeatedly.
The Rotation
The kit reads as a wall of conditions, and the actual button sequence is short.
- Open with one Wildfire hit, then hold Basic Attack for Flickering Shadow. Holding reaches the enhanced Sanguine Dash faster than walking through all five Wildfire stages, so it is the default in every timed fight.
- Cast enhanced Sanguine Dash to enter Illusion Form.
- Spam Nightmare Waltz until the enhanced Soulcross lights up near the end of the Illusion Form window.
- Cast enhanced Soulcross to trigger Oblivion and arm Bloodfeast Reverie.
- Cast Bloodfeast Reverie, then immediately cast the free enhanced Inferno Flamenco.
- Keep attacking to refill the Esper Cycle for the next swap.
Compressed to one line: attack until the skill upgrades, use it, attack until it upgrades again, use it, then fire both Ultimates.
Best Build
Arcs
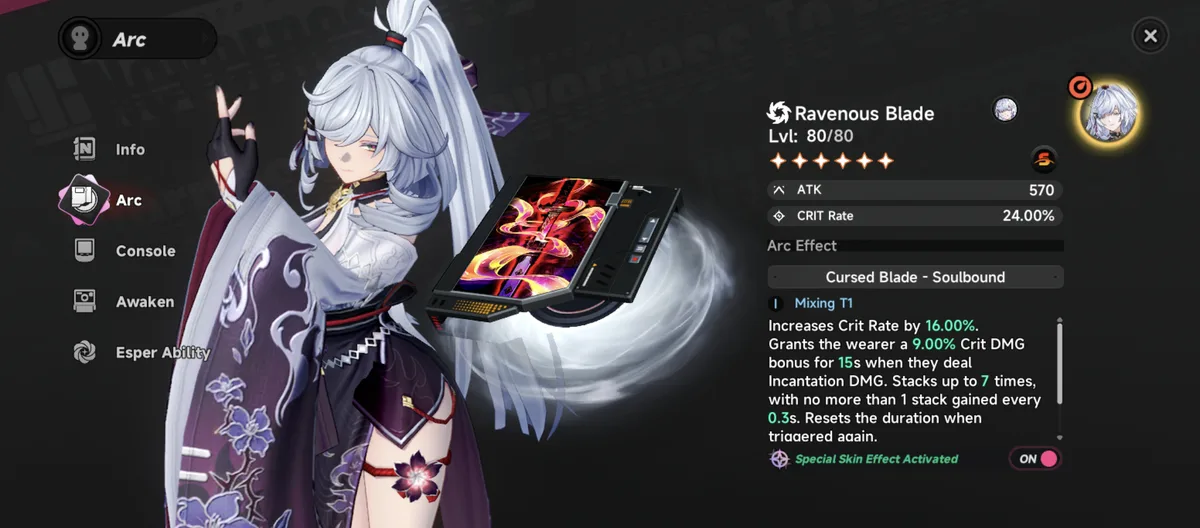
Her signature Ravenous Blade is her best in slot by a wide margin. It carries 570 ATK with Crit Rate as its secondary stat, and its Cursed Blade – Soulbound effect adds 16% Crit Rate outright plus a 9% Crit DMG stack for 15 seconds every time the wearer deals Incantation DMG, up to 7 stacks with a 0.3-second gate between them. Fully stacked, that is 63% Crit DMG on top of the Crit Rate, and those figures double to 32% Crit Rate and 18% per stack once the effect is fully ranked up. The condition is generic enough that any Incantation DPS can hold the Arc at full value.
| Priority | Arc | Rarity | Statline (max) | Why |
|---|---|---|---|---|
| 1 |
 Ravenous Blade
|
5★ | 570 ATK / 24% Crit Rate | 16% Crit Rate outright plus up to 63% Crit DMG, on a condition she meets constantly |
| 2 |
 Fluff of Finesse
|
5★ | 512 ATK / 27.5% ATK | Thief’s Candy adds up to 43.2% damage after a Critical Dodge, and the bonus is element-agnostic |
| 3 |
 Good Boy's Grand Adventure
|
5★ | 474 ATK / 45% ATK | The largest ATK substat available, plus 30% Charge Efficiency toward Inferno Flamenco and a team ATK buff |
| 4 |
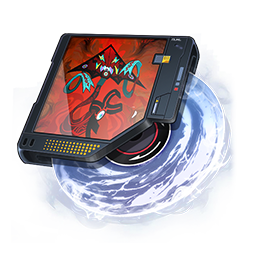 Watch Your Heads!
|
4★ | 475 ATK / 40% Crit DMG | Ghostly Kite adds 18% ATK for 15s after a Redirect Skill, and she casts two per rotation |
| 5 |
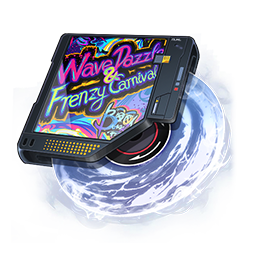 Cosmos Daze, Wild Reverie
|
4★ | 475 ATK / 25% ATK | 30% damage for 10s after a Support Skill, gated behind a 20-second cooldown |
Console Set
 Crimson: Twin Butterflies
is the set to build. The 2-piece gives 10% Incantation DMG, and the 4-piece grants 6% ATK whenever a nearby enemy takes Incantation DMG from the team, stacking to 6 times with each stack lasting 10 seconds and staying active while she is off-field.
Crimson: Twin Butterflies
is the set to build. The 2-piece gives 10% Incantation DMG, and the 4-piece grants 6% ATK whenever a nearby enemy takes Incantation DMG from the team, stacking to 6 times with each stack lasting 10 seconds and staying active while she is off-field.
Her Console specialization is Type III, worth 16% Crit DMG for every Type III Module equipped across 20 total slots, so the module layout should lean into that shape.
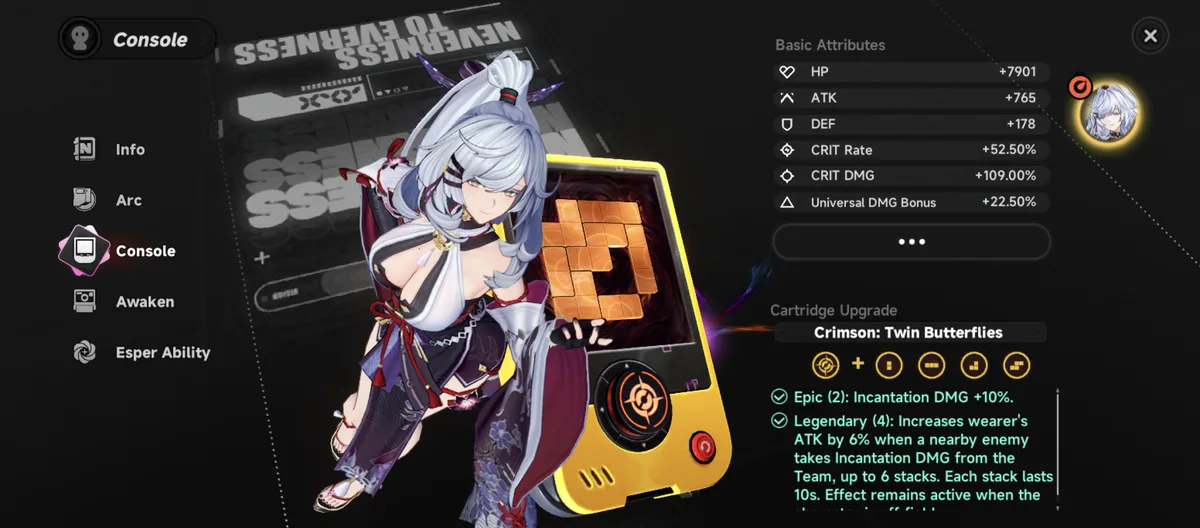
- Main attribute: Crit Rate
- Sub attributes: Crit stats first, then ATK, then Cycle Intensity
Talent Priority
- Sanguine Dash / Soulcross — the Redirect Skill carries the largest share of her rotation damage
- Inferno Flamenco / Bloodfeast Reverie
- Wildfire / Nightmare Waltz
- Stoked Flame — her Chain Skill, last in line
Best Teams
Zankou lives in two reactions. Scorch pairs her Incantation with a Chaos unit and is where she plays today, while Hexed pairs her Incantation with an Anima unit and is where she is heading.







 Incantation
 Chaos
Chaos
Upon triggering Esper Cycle, inflicts Scorch on the target for 15s, dealing DoT.
Resonance

Moderate Mischief
Scorch Enhancement: Inflicts another instance of Scorch with the same effect as the existing one when a Power Word is generated on a target affected by Scorch.
Can I Eat This?
Scorch Enhancement: Increases DoT taken by the target by 25% for each type of DoT effect while in Scorch state, up to 100%.

Temperance
Scorch Enhancement: Applies one of three random debuffs whenever Scorch is inflicted on a target: -20% ATK, -10% Esper Resistance, or +10% Break Efficiency, lasting for 15s. The same effect cannot stack.
Silent Sunset
Scorch Enhancement: Scorch can be stacked up to 3 times. For each DoT effect allies inflict on a target afflicted with Scorch, Zankou inflicts 1 stack of Scorch on them, replacing the DMG, type, and duration of existing Scorch on the target with those of the newly inflicted effect. Scorch inflicted by this effect cannot trigger it again.


 Anima
Incantation
Anima
Incantation
Deals an additional instance of follow-up attack DMG to the target equal to 20% of Anima or Incantation DMG taken within 12s after triggering Esper Cycle.
Resonance
Weakness Radar
Hexed Enhancement: Increases the base DMG of additional Follow-up Attacks from Hexed to 30% while Linko is on the team. Targets affected by Hexed take 10% more Follow-up Attack DMG.
Scorch: The Team You Can Build Now
Only two Chaos units can currently trigger Scorch, so one of them is mandatory.
 Sakiri
forms the other half of the core, since her Scorch enhancement amplifies exactly the DoT damage Zankou is stacking. The fourth slot is genuinely flexible.
Sakiri
forms the other half of the core, since her Scorch enhancement amplifies exactly the DoT damage Zankou is stacking. The fourth slot is genuinely flexible.


Rotation:
-
 Iroi
Skill — opens with her healing and ATK buffs
Iroi
Skill — opens with her healing and ATK buffs - Swap to
Sakiri
— the Anima to Incantation swap triggers Hexed
- Sakiri Ultimate → Skill — lands her buffs and grouping
- Swap to
 Lacrimosa
— the Incantation to Chaos swap triggers Scorch
Lacrimosa
— the Incantation to Chaos swap triggers Scorch - Lacrimosa Skill → Ultimate — adds her own damage over time stack
- Swap to Zankou — the Chaos to Incantation swap triggers Scorch again
- Run Zankou’s full combo from the rotation above, then keep attacking until her Esper Cycle refills
- Swap back to Iroi to trigger Hexed and start the loop again
Support Ultimates are worth holding to every second rotation, which applies to both Sakiri and Lacrimosa. Swapping Iroi for
 Haniel
opens up the Discord reaction, and swapping Lacrimosa for
Haniel
opens up the Discord reaction, and swapping Lacrimosa for
 Daffodill
makes the whole team free-to-play friendly while keeping most of its output. That version runs no limited 5★ damage dealer apart from Zankou and still lands among her strongest options.
Daffodill
makes the whole team free-to-play friendly while keeping most of its output. That version runs no limited 5★ damage dealer apart from Zankou and still lands among her strongest options.
The core is Sakiri plus one Chaos unit. Everything after that is a buffer slot, and even
 Hotori
holds it perfectly well.
Hotori
holds it perfectly well.
Hexed: The Team To Watch
Hexed is likely to become her best in slot once
 Linko
arrives. Linko buffs Follow-up Attack damage and raises the Follow-up Attack damage that Hexed targets take, and Zankou routes an unusual amount of her kit through that damage type — Nightmare Waltz, Moonfall, every Soulcross cast, and Bloodfeast Reverie all count as Follow-up Attack DMG. The overlap is close to total, which points to Linko taking that fourth slot the moment she is available.
Linko
arrives. Linko buffs Follow-up Attack damage and raises the Follow-up Attack damage that Hexed targets take, and Zankou routes an unusual amount of her kit through that damage type — Nightmare Waltz, Moonfall, every Soulcross cast, and Bloodfeast Reverie all count as Follow-up Attack DMG. The overlap is close to total, which points to Linko taking that fourth slot the moment she is available.
Pull Value and Awakenings
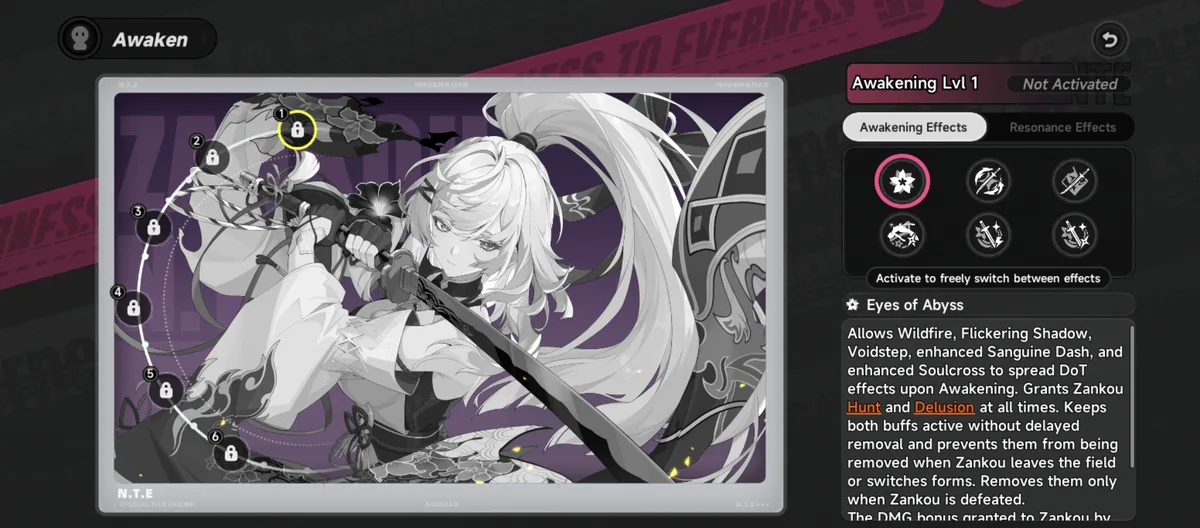
At base, Zankou is already a complete unit and needs nothing from her Awakenings to function. If you have resources to spare, the stopping points that matter are early.
| Awakening | Name | Value |
|---|---|---|
| A1 | Eyes of Abyss | The stopping point. Hunt and Delusion become permanent, Hunt’s damage bonus rises to 40%, Delusion’s team-wide DoT Crit DMG rises to 50%, and her main attacks spread DoT effects on Awakening |
| A2 | Abyssal Kiss | Kindling builds from Scorch and Hexed cycles for a 150% Final DMG boost on the next Inferno Flamenco |
| A3 | Kiss in a Nightmare | Worth targeting for teams with no healer — Delusion restores 4% of her Max HP per second |
| A4 | Nightmare Bloom | Bloodfeast Reverie activates as soon as Inferno Flamenco is available and shares its Kindling stacks |
| A5+ | — | Progressively larger damage increases with no new mechanics |
She is shaping up to be the strongest main damage dealer released so far, and with Linko beside her she has the ceiling to compete with any premium team in the game. If a strong DPS is what you are saving for, she is an easy recommendation, and A1 is where the extra investment stops paying for itself.
Related Neverness to Everness Resources
Guide
Blackbird: Rotation, Teams & Awakening Guide
How Blackbird's Malice, Forsaken Feather and Witch of Deliverance fit a rotation, the Nova team that suits her best, her build, and which Awakenings and signature Arc are worth pulling for.

Guide
Last Bus Out and Perfectly Common Dreams: Duskmoor Anomaly Commission Walkthrough
How to trigger and solve the two new Duskmoor Anomaly Commissions from Version 1.4: the Wayward Line bus and the Dreamaway Pillow dream.

Guide
Lilliput in the Looking Glass: All 3 Escape Routes
Walkthrough for the Pukaland Anomaly Commission Lilliput in the Looking Glass: the bedroom, bathroom and kitchen escape routes and every step of each.
News
NTE 1.4: Blackbird, Pukaland, Porsche and a Free Code
Version 1.4 lands September 30 with limited S-class Blackbird, a Lacrimosa rerun, the Pukaland theme park, a Porsche collab and 600 Annulith of compensation.

News
NTE Version 1.4 Preview Special Program Recap
NTE's Version 1.4 "For Whom the Verses Mourn" preview show aired, with a follow-and-quote giveaway for Fabricated Dice running through September 18.