

































Overview
Building your team in Tribe Nine is straightforward at its most basic level, but optimizing it for different encounters can become surprisingly complex. This guide aims to help both newcomers—who may not fully understand how team-building works—as well as veteran players interested in exploring diverse approaches.
Roles
In Tribe Nine, each character takes on one of three major role categories: DPS, Breaker, and Support. Within these broader categories are smaller subcategories that further define a character’s function and team contributions.
DPS
DPS stands for “Damage Per Second.” These characters focus on dealing direct damage, usually with the goal of eliminating enemies as efficiently as possible. While some content in Tribe Nine doesn’t strictly require fast clears—no time limit is imposed—most players will find that running at least one DPS shortens battles and improves overall consistency.
Attacker DPS
These characters dish out consistently high damage, though they often can’t blow up enemies instantly without meeting certain conditions. Attackers don’t strictly need a Breaker to function well.
-
 Enoki Yukigaya
: Once she ramps up her heat gauge, she can maintain high damage via her strategy skill. Passive 2 significantly boosts her damage by draining her own HP.
Enoki Yukigaya
: Once she ramps up her heat gauge, she can maintain high damage via her strategy skill. Passive 2 significantly boosts her damage by draining her own HP. -
 Tsuruko Semba
(Passive 2): Once her field is active, enemies caught inside take multiple hits from her secondary attack or strategy skill.
Tsuruko Semba
(Passive 2): Once her field is active, enemies caught inside take multiple hits from her secondary attack or strategy skill. -
 Yutaka Gotanda
: His secondary attack deals a steady stream of damage. His ultimate can finish off those who survive his sustained firepower.
Yutaka Gotanda
: His secondary attack deals a steady stream of damage. His ultimate can finish off those who survive his sustained firepower.
Nuker DPS
Nukers excel at massive burst damage, often capable of deleting enemies instantly—usually through a powerful ultimate. They generally need a dedicated Breaker to keep targets locked down so they can unleash their big hits.
-
Enoki Yukigaya
(Passive 1): Her ultimate deals absurd damage, especially paired with her naturally high base stats.
-
 Miu Jujo
: Once fully charged, her ultimate can devastate enemy lines over its duration.
Miu Jujo
: Once fully charged, her ultimate can devastate enemy lines over its duration. -
 Tsuki Iroha
: Despite being a free 2-star character, her passive 2 plus high innate ultimate ratio gives her arguably the fastest nuke in the game.
Tsuki Iroha
: Despite being a free 2-star character, her passive 2 plus high innate ultimate ratio gives her arguably the fastest nuke in the game.
Breaker
“Break” in Tribe Nine works like a stun mechanic in other games—once you fill an enemy’s break gauge, that enemy becomes defenseless, and your team enters a chain-attack state that grants tension gauge (crucial for ultimates and tension card phases). Characters with high break damage are thus indispensable for consistent tension generation.
-
 Kazuki Aoyama
: The premier Breaker. Can rapidly deplete an enemy’s break gauge and synergies well with tension cards thanks to frequent breaks.
Kazuki Aoyama
: The premier Breaker. Can rapidly deplete an enemy’s break gauge and synergies well with tension cards thanks to frequent breaks. -
 Hyakuichitaro Senju
: Extremely high break damage per use of his secondary attack, but struggles with high stamina costs, short range, and low personal DPS.
Hyakuichitaro Senju
: Extremely high break damage per use of his secondary attack, but struggles with high stamina costs, short range, and low personal DPS. -
 Yo Kuronaka
: The game’s protagonist and a versatile option who can break, heal, or dish out DPS, though his break speed lags behind Kazuki/Senju.
Yo Kuronaka
: The game’s protagonist and a versatile option who can break, heal, or dish out DPS, though his break speed lags behind Kazuki/Senju. -
Tsuki Iroha
: Not a dedicated Breaker, but her ranged toolkit can fill the role in a pinch—particularly when investing into her passive 1.
Support
Support characters bring indirect benefits to the team—buffs, debuffs, healing, shielding, or tanking. Because these non-damage roles overlap, most Support units offer multiple utilities, though they often specialize in one.
Buffer
Buffers enhance allies’ damage output via attack buffs, crit rate buffs, or other beneficial effects.
-
 Eiji Todoroki
: The definitive buffer. His strategy skill grants +10% crit rate, and his ultimate (further boosted by passive 1) massively increases primary/secondary attack damage. He can also tank thanks to his taunt.
Eiji Todoroki
: The definitive buffer. His strategy skill grants +10% crit rate, and his ultimate (further boosted by passive 1) massively increases primary/secondary attack damage. He can also tank thanks to his taunt. -
 Mita Santaro
: Technically a tank as well, but his secondary and passive 2 buff both attack and support for allies.
Mita Santaro
: Technically a tank as well, but his secondary and passive 2 buff both attack and support for allies.
Others:
-
Yutaka Gotanda
passive 2 gives the entire team a sizable attack boost after ulting.
-
Tsuki Iroha
can provide a crit rate buff via chain skill and extra tension if you level passive 1.
Debuffer
Debuffers weaken enemies to help the team deal additional damage.
-
 Jio Takinogawa
: Applies a venom-based armor shred debuff through passive 1, up to 25% at max level. Invaluable for any multi-hit DPS.
Jio Takinogawa
: Applies a venom-based armor shred debuff through passive 1, up to 25% at max level. Invaluable for any multi-hit DPS.
Technically, tanks also “debuff” enemies by forcing aggro via the “Attention” debuff, though some bosses ignore it.
Healer
Healers provide direct HP restoration or shields. Some “healing” abilities in Tribe Nine function as damage mitigation or partial health replenishment.
-
Tsuruko Semba
(Passive 1): Heals allies within her field when she deals damage. Can also fully heal an ally who drops below 50% HP via her ultimate.
-
 Minami Oi
: Her drone and shield on break protect allies from damage.
Minami Oi
: Her drone and shield on break protect allies from damage. -
 Koishi Kohinata
: High burst healing from his strategy skill, though he’s often run as a DPS with passive 2.
Koishi Kohinata
: High burst healing from his strategy skill, though he’s often run as a DPS with passive 2.
Others:
-
Yo Kuronaka
’s passive 2 adds healing while in Burst
-
Hyakuichitaro Senju
can shield
-
Kazuki Aoyama
provides a reliable shield on break or strategy skill activation.
Tank
Tanks force enemies to focus on them—great for protecting squishier allies. Often combined with buffing, healing, or other supportive effects.
-
 Q
: Has a full-field taunt and decent break/damage, but lacks strong synergy.
Q
: Has a full-field taunt and decent break/damage, but lacks strong synergy. -
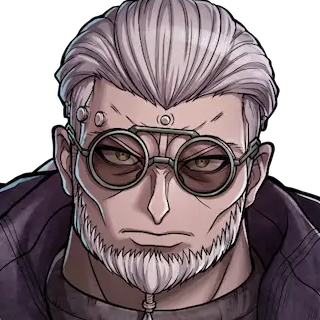 Roku Saigo
: The “pure” tank. Can stack defense indefinitely via Rage and self-heal with passive 1, but suffers from very slow animations.
Roku Saigo
: The “pure” tank. Can stack defense indefinitely via Rage and self-heal with passive 1, but suffers from very slow animations. -
Eiji Todoroki
: Have taunt utilities.
-
Mita Santaro
: Also have taunt utilities.
Suggestions
Most team compositions include at least one DPS, one Breaker, and one Support. If you’re just starting, choose your favorite character and then add units who enhance that character’s strengths or compensate for their weaknesses.
Example: Tsuruko as Main DPS
- Scales with Crit and Support
- Low Break values
- Doesn’t Need tension or ult for main damage
- Wants enemies to stay in her field
- Multi-Hit attacks
- Prefers to be piloted, ideally by you
Potential teammates and their synergies:
-
Tsuki Iroha
: Scales well with Crit/Support, offers a crit buff and solid break, great AI performance, has a strong ultimate for tension overflow.
-
Mita Santaro
: Provides attack/support buffs. If he’s at T3, his secondary can target allies consistently for buffing.
-
Kazuki Aoyama
: Top-tier AI breaker, enables strong crit rate synergy with his signature tension card.
-
Yo Kuronaka
: Slower break than Kazuki but offers more personal damage.
-
Jio Takinogawa
: 25% armor shred from venom synergy for Tsuruko’s many hits.
Team Ideas
- F2P:
- Pulse Nuking:
- Premium Damage:
Tension Cards
Tension cards are as vital as unit synergy. Often, you’ll slot at least two near-mandatory cards for crit rate (e.g., Full Party + Strike Zone) and then select others based on your primary DPS needs.
For Tsuruko as a main DPS, you might run:
- Full Party + Strike Zone (2 slots) for ~30% crit rate at Phase 1.
- Battle Tactics + Diligent Perusal (2 slots) for boosting her extra hits with passive 2.
- 1 flex slot, e.g. All Out for universal damage, Excuse/Maximization for crit rate on break, or Add Insult to Injury if paired with a levelled passive 1 Iroha.
 3-Star
Tension 1
3-Star
Tension 1
Full Party
 All Party Members
Full Party
All Party Members
When granted [Unity], there will be 2x effectiveness.
 1-Star
Tension 0
1-Star
Tension 0
Strike Zone
All Party Members
Strike Zone
All Party Members
At the start of battle, grant party members _[Unity]_.
 1-Star
Tension 0
1-Star
Tension 0
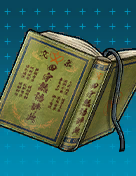
Battle Tactics
 Characters: Conditions Met
Battle Tactics
Characters: Conditions Met
Synergy
 Curse
Curse
 2-Star
Tension 2
2-Star
Tension 2
Diligent Perusal
Characters: Conditions Met
Diligent Perusal
Characters: Conditions Met
When granted [Curse], further increase the Action DMG of Additional Attacks by
Synergy
Curse
 2-Star
Tension 0
hard
2-Star
Tension 0
hard
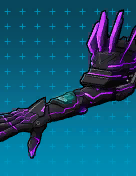
All Out
All Party Members
All Out
All Party Members
 1-Star
Tension 1
1-Star
Tension 1
Excuse
 Special Condition
Excuse
Special Condition
Synergy
 Control
 1-Star
Tension 1
1-Star
Tension 1
Maximization
Characters: Conditions Met
Maximization
Characters: Conditions Met
Synergy
Control
 3-Star
Tension EX
Requirement
3-Star
Tension EX
Requirement
Add Insult to Injury
Characters: Conditions Met
Add Insult to Injury
Characters: Conditions Met
Based on the number of times continuous damage is dealt or Recovery Effect is granted to a same target by the operating character, grant them a same number of stacks of [Whispering Spirits] for 5s.
When reaching the maximum stack of [Whispering Spirits], further increase Support point by 75.
Whispering Spirits
Maximum 5 stacks.
Based on the number of stacks, increase Support point by 15.
After the effect is granted, cannot grant the same effect within 5s.
Conclusion
You don’t strictly need elaborate team synergy for current endgame, since it’s balanced around level 40 while the cap is 50. Nonetheless, refining your roster and experimenting with skillful compositions is a core part of the fun in Tribe Nine. By understanding each role’s purpose—and aligning characters, tension cards, and playstyles—you’ll create an efficient, dynamic team prepared for existing challenges and anything future updates bring. Enjoy experimenting and remember that the best team is the one that keeps you engaged and enjoying the game!
Related Tribe Nine Resources

Guide
Tribe Nine Patimon Guide
Guide on how to use Patimon in Tribe Nine

Guide
Tribe Nine Reroll Guide
Guide on how to reroll in Tribe Nine

Guide
Should You Buy Cornerstone of Supremacy on Tribe Nine?
A guide on whether you should buy the Battle Pass containing tension card Cornerstone of Supremacy in Tribe Nine.

Guide
Should You Buy The Game Starts Now on Tribe Nine?
A guide on whether you should buy the Battle Pass containing tension card The Game Starts Now in Tribe Nine.