
































The Perfect Team Does Not Exist
The single most useful thing to understand about Suikoden STAR LEAP is that no fixed party carries you through everything. Every serious fight is a matchup: you look at what the enemies resist, what they are weak to, and what they will hit you with, and then you bring the characters who answer that. This means you will be levelling a broad bench, and the training facility exists precisely so you can afford to.
Everything below is the reasoning behind that matchup. Once it clicks, the difficulty curve flattens out considerably.
The Two Damage Triangles
Damage in this game runs on two separate wheels that both matter at once.
Weapon types form a three-way loop, and this side of the damage is governed by physical attack against physical defence:
| Weapon type | Beats | Loses to |
|---|---|---|
| Sword | Wisdom | Combat |
| Wisdom | Combat | Sword |
| Combat | Sword | Wisdom |
Elements form a five-way loop, and this side is governed by magical attack against magical defence:
| Element | Beats | Loses to |
|---|---|---|
| Fire | Wind | Water |
| Wind | Earth | Fire |
| Earth | Lightning | Wind |
| Lightning | Water | Earth |
| Water | Fire | Lightning |
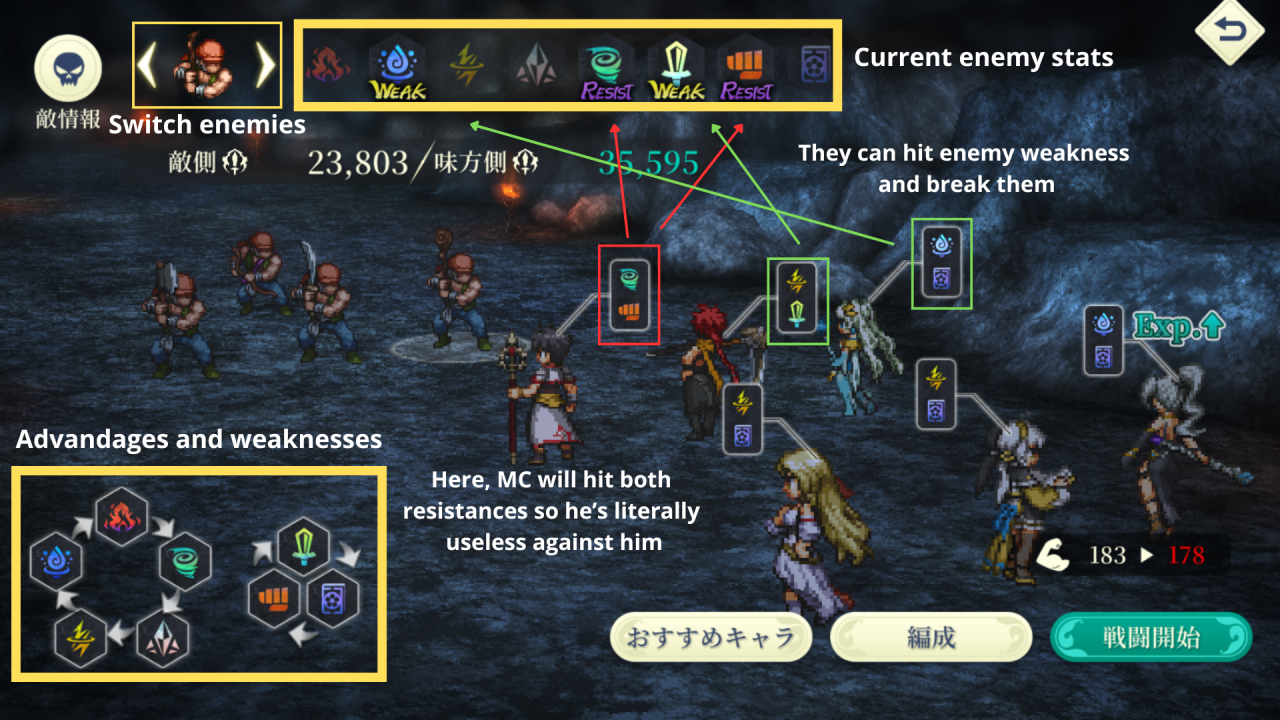
Every character carries one of each, and the two combine in a way you can predict without looking anything up. A Sword and Fire character resists Wisdom and Wind, because Wisdom loses to Sword and Wind loses to Fire. That same character takes weakness damage from Combat and Water, the two things that beat their pair. The numbers behind those two words are consistent across the whole roster: a resisted hit lands at 25% reduced damage, and a weakness hit lands for 50% more. The character page spells out each individual’s resistances and weaknesses, and once you trust the wheel you can read an unfamiliar unit at a glance.
Hitting Weakness, Breaking, and Knockdown
The wheels are not a small damage modifier. They decide the shape of the whole fight.
When your attack is resisted, damage drops hard and you will be grinding the fight out on raw stats alone, which rarely ends well against anything tuned for your level. When you hit a weakness, damage climbs sharply and you push the target’s balance down on that weakness. Break one of their weaknesses all the way and the enemy is unbalanced, which shoves them backwards in the turn order and buys you turns.
Break both of their weaknesses and the enemy is knocked down. This is the moment the fight is decided: a knocked-down enemy has both physical and magical defence reduced, so every point of damage you have been saving should land in this window. A knockdown does not push them further back in the turn order the way an unbalance does — their next turn can even come around sooner — so the window is shorter than it looks and the order on screen is the only thing worth planning around.
Order matters inside that window. Use skills first and watch the turn order as you go. As long as your characters still sit ahead of the enemy, keep spending skills, because chain attacks appear to consume the free turns you would otherwise get. The moment the order shows you slipping behind the enemy, cash out with your chain link.
The damage side of the matchup runs in reverse on defence, which is why the enemy lineup matters as much as your own. Taking a weakness hit means eating that same 50% extra damage, while taking a resisted hit cuts damage substantially, which buys you the turns you need to break, burst, and heal.
Please note that some enemies have attacks that can force an unbalance on your character regardless of what they resist or are weak to. There is no matchup that avoids those, so the answer is bulk, healing, and killing the enemy before the attack comes back around.
A handful of characters can undo it after the fact.
 Jordi
,
Jordi
,
 Kika
and
Kika
and
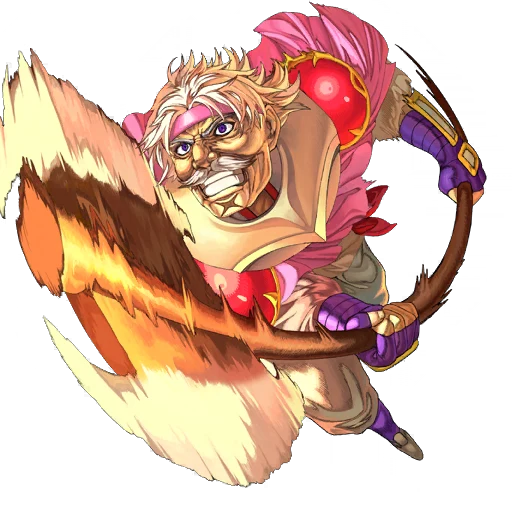 Kessler
carry a Talent Tree passive that dispels the unbalance on themselves the moment it lands, and
Kessler
carry a Talent Tree passive that dispels the unbalance on themselves the moment it lands, and
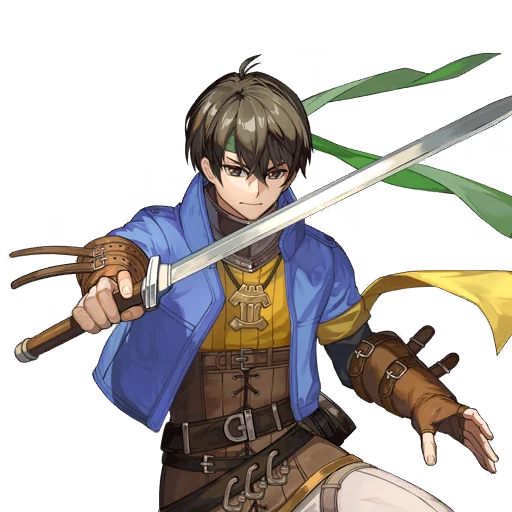 Hix
,
Hix
,
 Sanchez
,
Sanchez
,
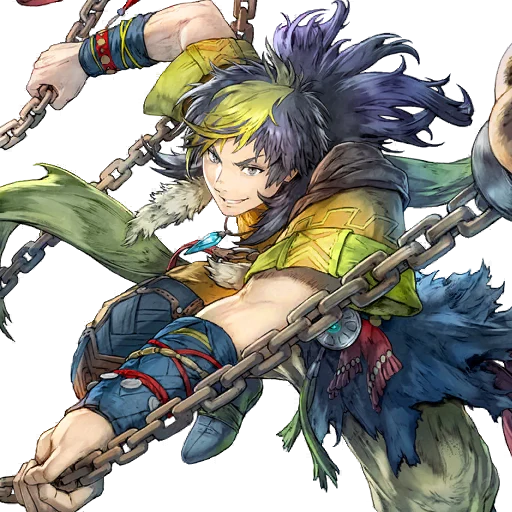 Sydonia
and
Sydonia
and
 Lei
do the same for an unbalanced ally. The passive fires once or twice a battle depending on how far the node is upgraded, so it buys a turn back rather than making the problem go away.
Lei
do the same for an unbalanced ally. The passive fires once or twice a battle depending on how far the node is upgraded, so it buys a turn back rather than making the problem go away.
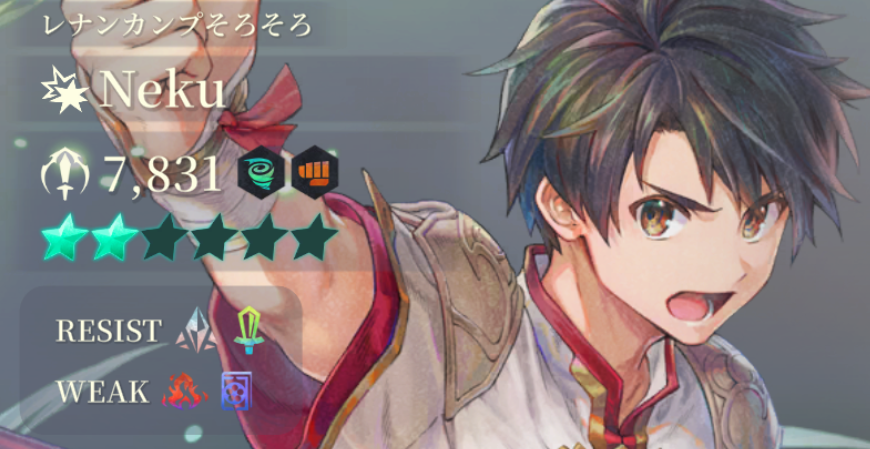
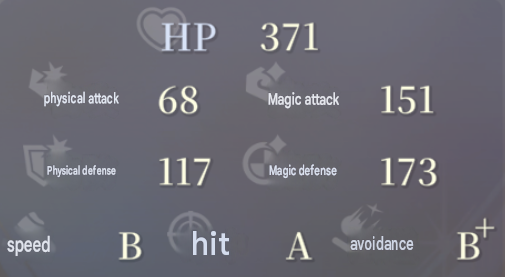
Checking enemy types against your party’s resistances is the first key to clearing high-level content. Bring characters who hit the enemy’s weaknesses and who resist what the enemy throws back, choosing physical or magical bulk depending on which side of the damage you are absorbing.
Leader Skills and Character Skills
Every character carries several distinct pieces of kit, and they trigger under different rules.
The leader skill only applies to the character you place first when forming a team, or the one you set through the first option after tapping a character. Most leader skills buff a shared trait — magical attack and magical defence for everyone of the same element, or a stat boost for everyone carrying a specific tag such as Liberation Army. Tags are listed on each character’s page, so you can see who a tag-based leader actually covers.
Picking the leader is a real decision, and the right answer changes with the content.
 Hisui
is a strong lead while you are exploring, since her leader passive heals the party after each battle, and she is a wasted slot in bounties, the tower, or Phantom Duels where that heal never fires.
Hisui
is a strong lead while you are exploring, since her leader passive heals the party after each battle, and she is a wasted slot in bounties, the tower, or Phantom Duels where that heal never fires.
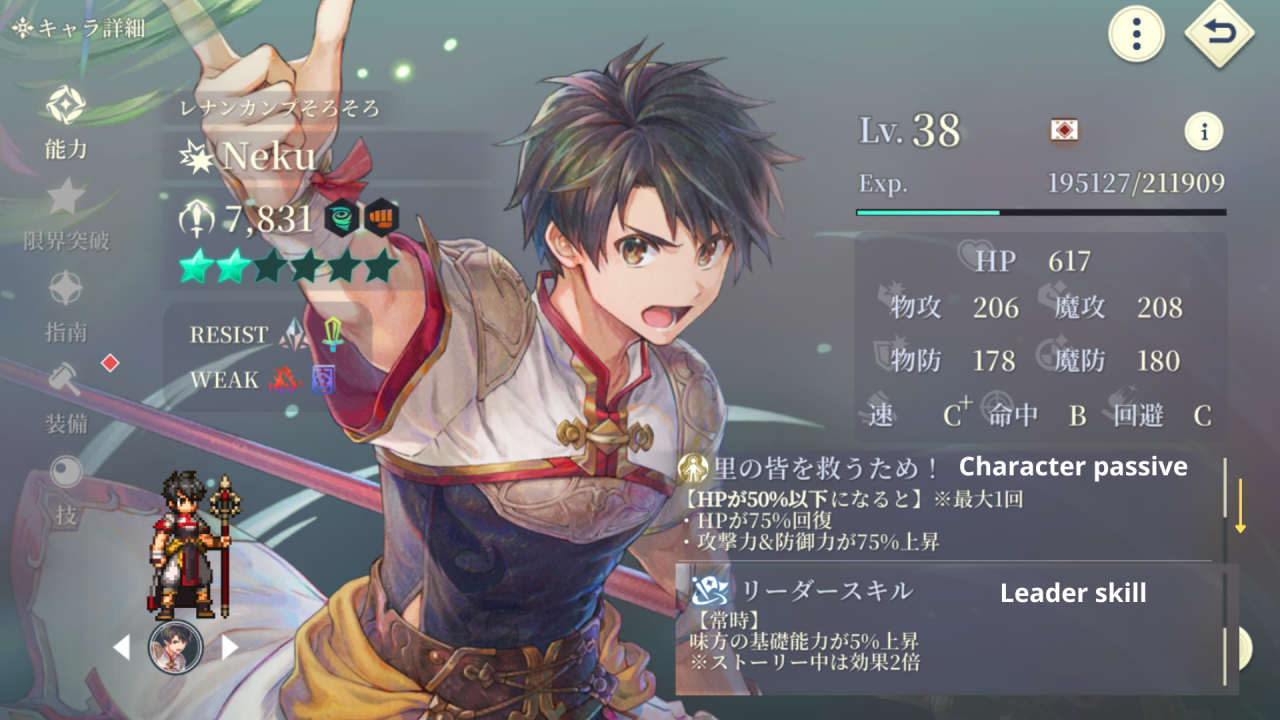
Unique Skills fire whether or not the character is leading, and they wait on a condition instead — dropping below a percentage of health, an ally dying, and so on. Read these before you build around someone, because a passive that triggers at 50% health changes how you want that character positioned and healed.
Every character also has a Support Ability that unlocks once you raise their bond to rank B. Reaching that rank is what allows you to slot them into your formation as a support in the first place, which is one of several reasons bond levels are worth farming early.
The Talent Tree
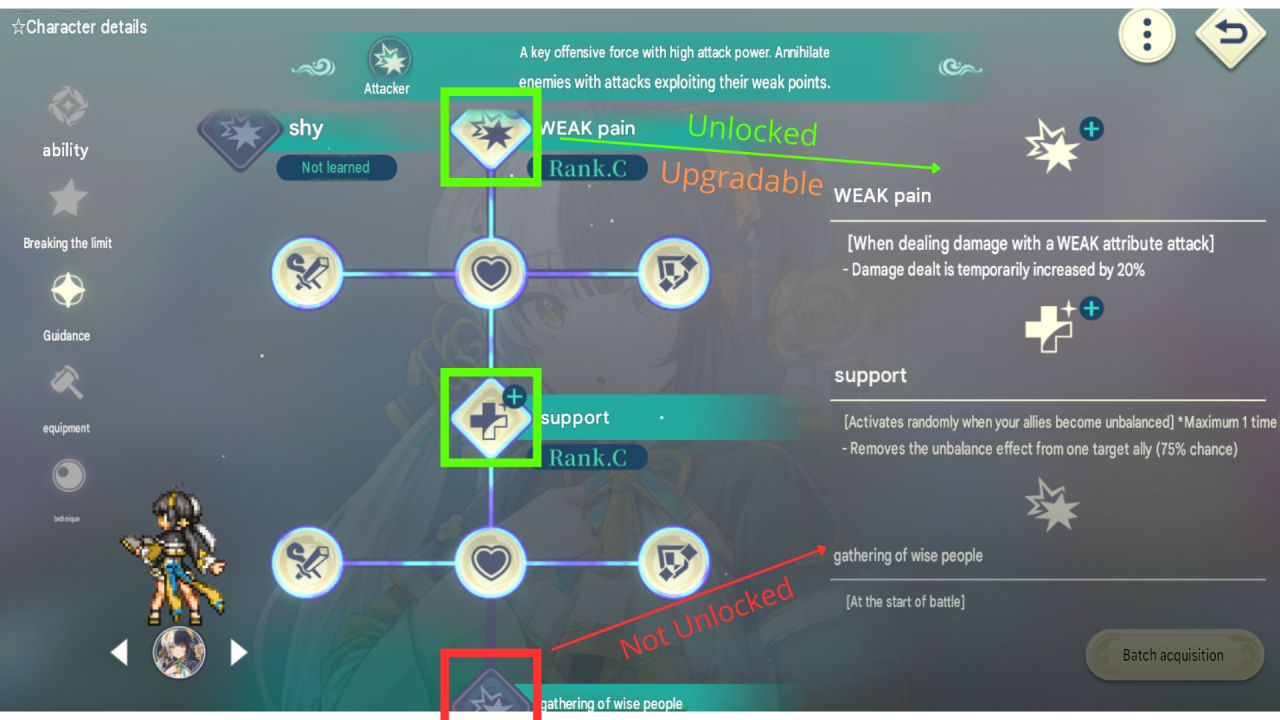
Every character has a Talent Tree of nodes you unlock with materials from Shirin’s bounty hunts, and it holds a large share of their power.
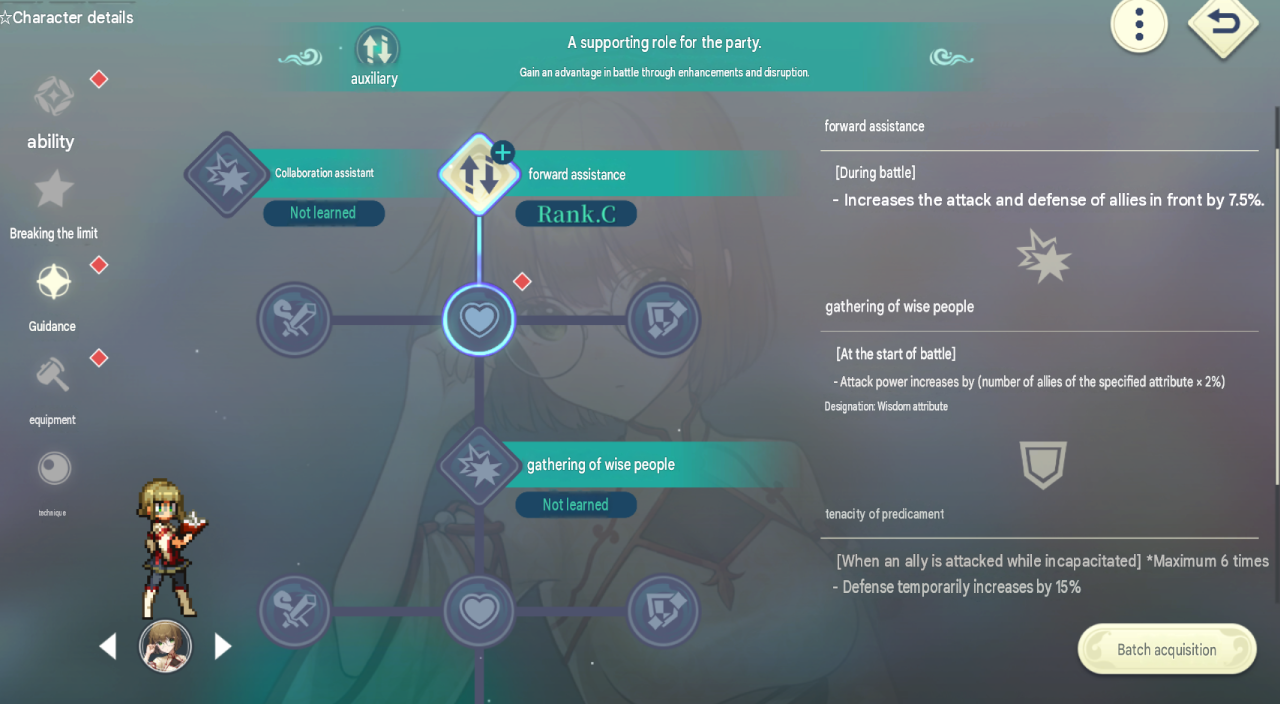
- There is a batch unlock button in the bottom right of the Talent Tree screen.
- Tapping a node shows the materials it needs and links you straight to the quest that drops them once you have unlocked it.
- Nodes are gated behind Ascension tiers at level 20, 30, 40, and 50, so you need to raise a character’s level cap before the later ones open.
- The top-left node only opens after two limit breaks — tablet quests for non-gacha characters, duplicates or shard training for gacha ones.
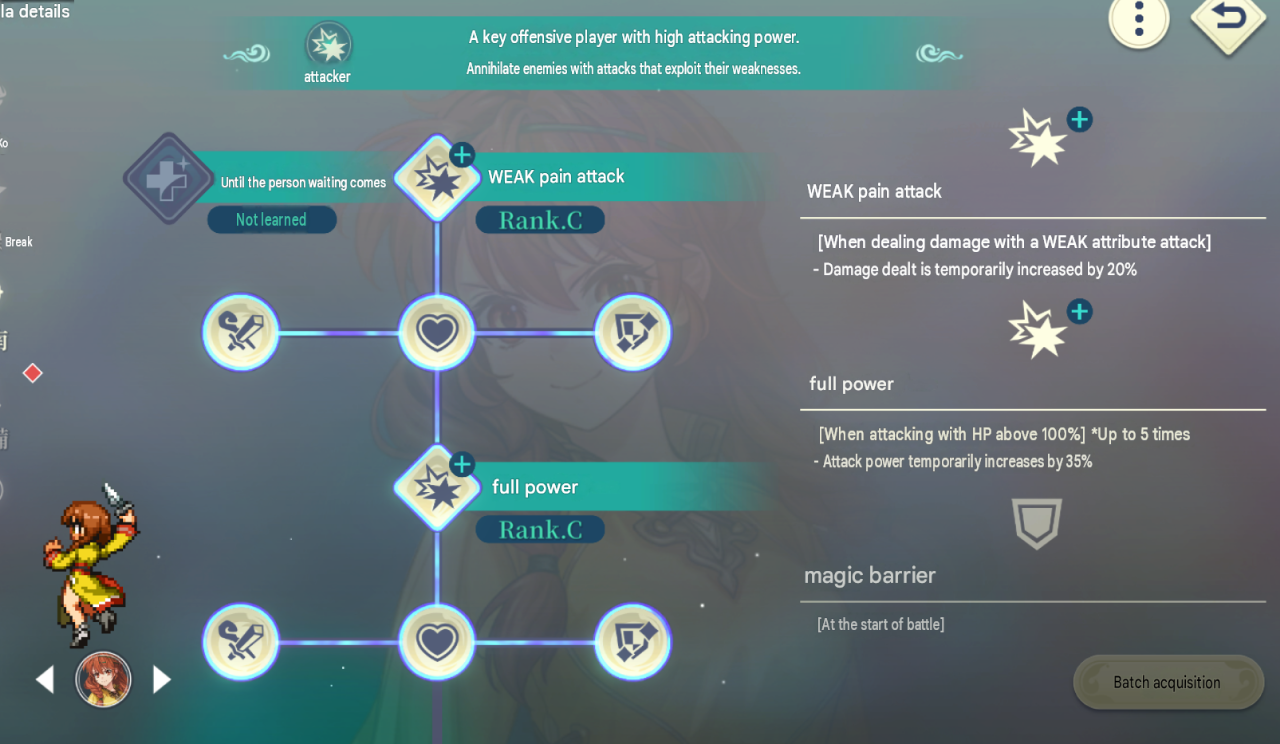
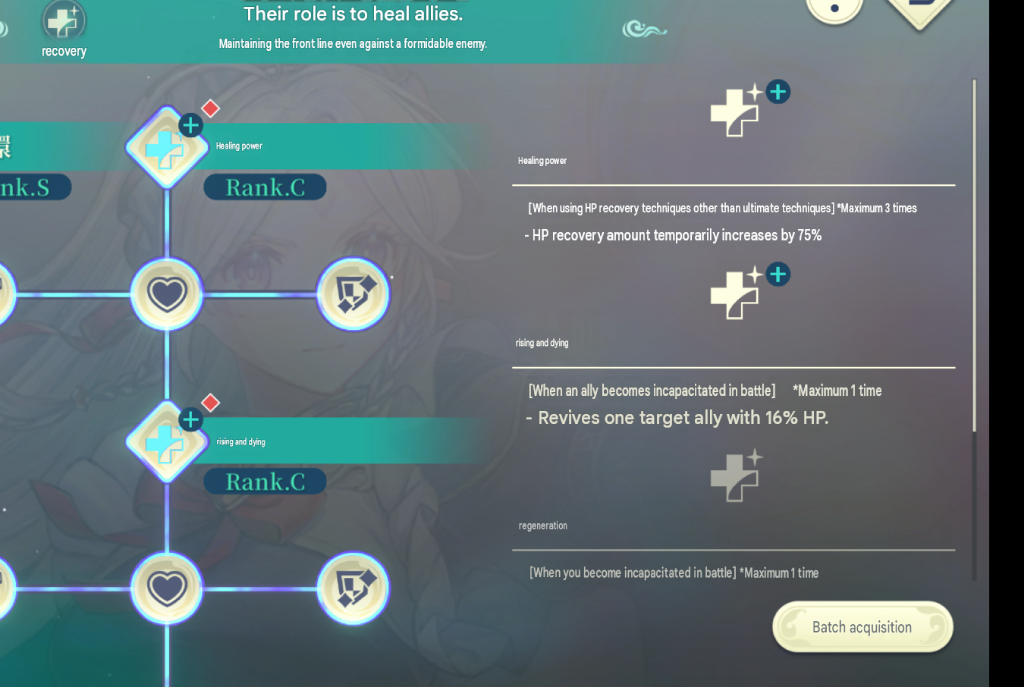
- Nodes marked Rank C or unlearned are the character’s passives. They start at C and climb to S as you feed them the required level and materials, and the effect scales with the rank.
The Four Roles
Roles are straightforward on the surface, and the useful detail is in what separates a good pick from a warm body.
Attackers are your break and damage engine. Their kits push their own damage output, and the ones worth investing in tend to land many hits per action, since hit count drives break progress as much as raw damage does. Multi-hit attackers are precious for exactly that reason.
Tanks hold high physical or magical resistance and soak hits for the rest of the party until their health runs low, and some open the fight with barriers already up. Match the tank’s bulk to the damage type the fight actually deals, and favour tanks who contribute something beyond survival, such as healing or multi-hit attacks that help break.
Healers keep the tank and the party standing. Heals have limited uses per battle, so hold them for the turns where real damage has landed. Some have passive area or single-target heals, some revive themselves, some revive an ally, and the differences decide who fits your party.
Hisui
is a strong early single-target healing option.
Supports cover everything else: attack and defence buffs, debuffs, small heals bundled into other actions. Their value depends entirely on what your attackers need, so read the kit before committing.
Building the Party
Early story
Lead with
Hisui
for the post-battle heal or with
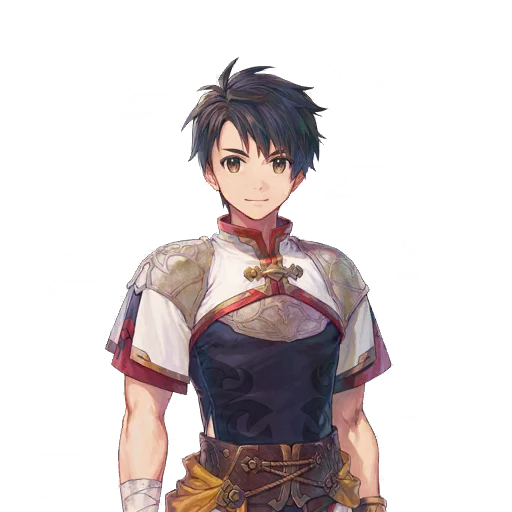 Hero
for the party-wide stat boost, and keep both in the team. Hold back on heavy investment in the free Hisui, since her SSR version arrives soon enough.
Hero
for the party-wide stat boost, and keep both in the team. Hold back on heavy investment in the free Hisui, since her SSR version arrives soon enough.
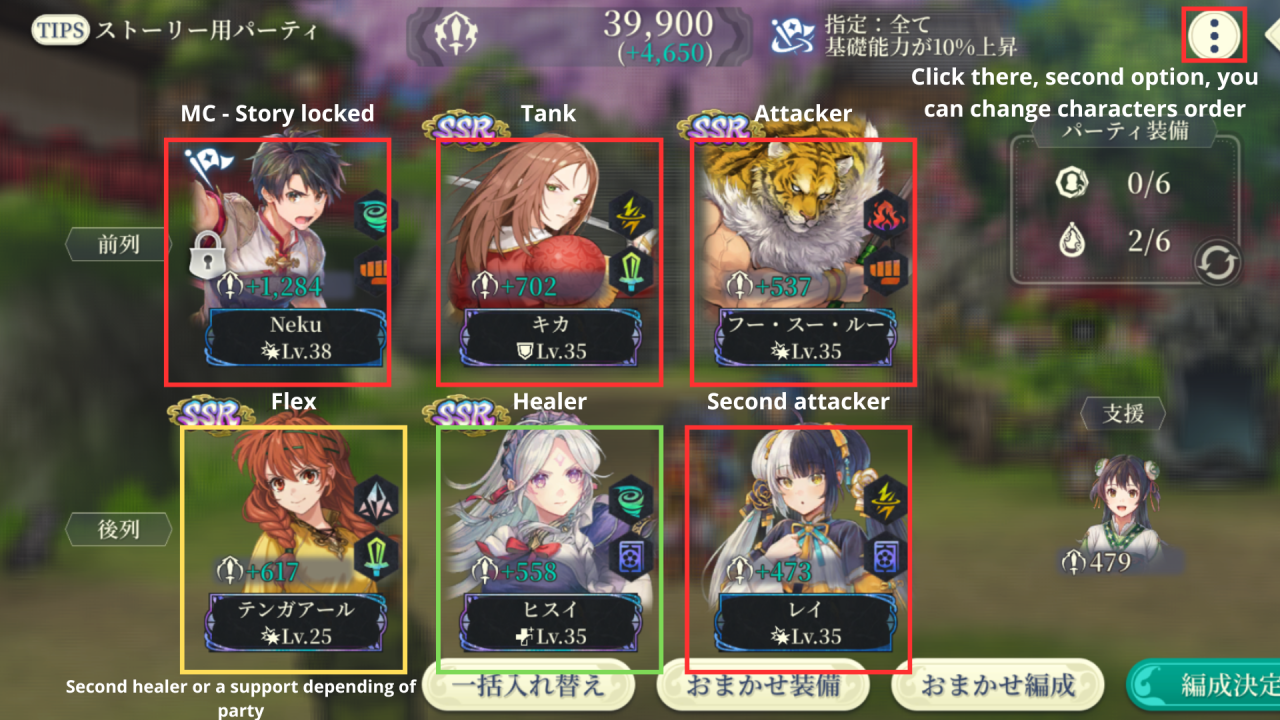
The early story is forgiving. Take a tank, fill the rest with whichever SSRs you have pulled, and make sure at least two of your damage dealers carry different elements so you cover more enemy weaknesses. That is enough to reach the end of chapter 2 without trouble.
Harder content
Start from resistances and weaknesses, as always. Many of the tougher fights put several enemies on the field at once, so one or two tanks plus healers who can also hit weaknesses earn their slots twice over. Identify the most dangerous enemy, break them as early as you can, and either nuke that target or spread horizontal, vertical, or full-field damage to push several enemies toward break at the same time and open up chain attacks.
Then work backwards from your main attacker. Their passives and gimmicks decide which supports belong beside them, and that choice matters more than the raw rarity of the units you slot in.
A concrete example of that thinking: a party built around
Hero
and
 Suikoden I Hero
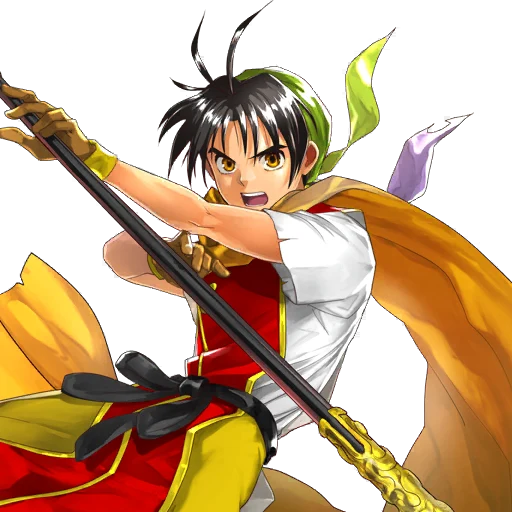
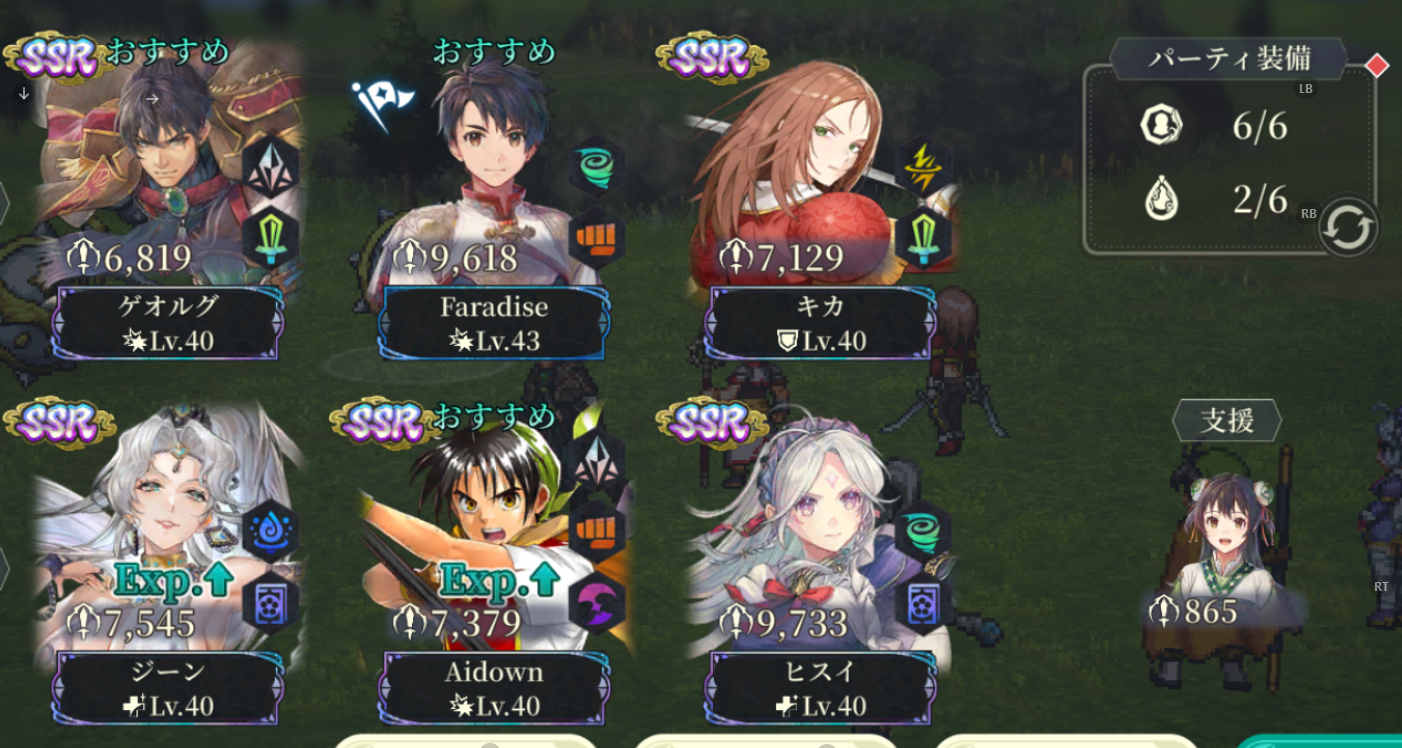
needs only three fixed members. Land three normal attacks with Suikoden I Hero to trigger his passive as early as possible for a 100% boost to his offensive stats, let the Hero fall so a healer with a revive passive brings him back, and his own passive heals him and pushes his stats up by 75%. That leaves two strong units online and three completely flexible slots.
Suikoden I Hero
needs only three fixed members. Land three normal attacks with Suikoden I Hero to trigger his passive as early as possible for a 100% boost to his offensive stats, let the Hero fall so a healer with a revive passive brings him back, and his own passive heals him and pushes his stats up by 75%. That leaves two strong units online and three completely flexible slots.
 Jeane
is the best healer for it at the moment,
Jeane
is the best healer for it at the moment,
 Georg
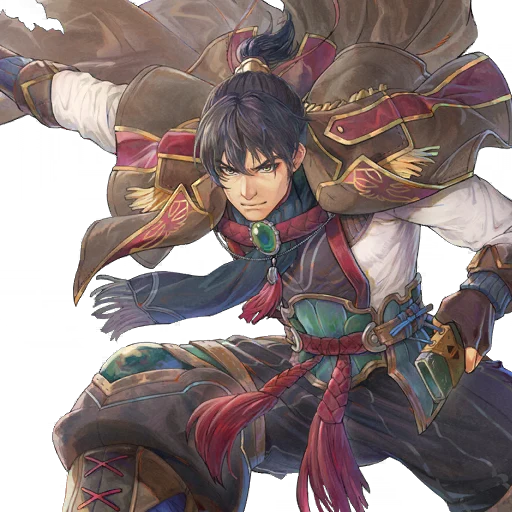
supplies enormous single-target damage, and
Kika
holds the tank slot until a fight calls for a physical one instead. The free SSR
Georg
supplies enormous single-target damage, and
Kika
holds the tank slot until a fight calls for a physical one instead. The free SSR
 Hisui
is mediocre here, and a fire mage or a buffer serves that slot better.
Hisui
is mediocre here, and a fire mage or a buffer serves that slot better.
Once this all feels natural, move on to buffs, debuffs, and positioning, where the remaining percentage points are hiding.
Related Suikoden STAR LEAP Resources
Guide
Gear, Accessories and Runes: What to Farm
Equipment ranks and slots, elemental gear sets from EX bounties, why disguises cost more than they give, which accessory each role wants, and the runes worth 99,999 Potch in Suikoden STAR LEAP.
Guide
Buffs, Debuffs, and Positioning: The Hidden Half of Combat
Stat stages and their speed multipliers, how percentage buffs differ from stacking ones, row-based support passives, and how to aim a unite attack in Suikoden STAR LEAP.
Guide
Character Growth: Cooking, Training and Stars
How bond levels, the Talent Tree, offline EXP, shard training, and the Tablet of Promise combine to raise characters in Suikoden STAR LEAP.
News
Suikoden STAR LEAP: New Event RPG and a Free SSR Nanami
A four-episode Event RPG opens September 30 with up to 24,000 Fantasy Stones and two new SSRs, alongside a login bonus for Suikoden: The Anime's Nanami.
News
Suikoden STAR LEAP: Chapter 3 Story and a QoL Overhaul
New Chapter 3 story, the Emotions & Secrets banner with Rachana, Gremio and Hou, badges, and a September 21 update with bulk trading and eight party slots.